Recon Clearance Cab lights?
#1
Recon Clearance Cab lights?
I have been thinking of getting the smoke clearance cab lights on the my truck. How do you guys like them that have put them on? Are they hard to instal? I would love to see some pictures if you guys have any. Thanks.
#2
I've got the recon clear lights and while I enjoy the look, I am not satisfied with the product. They've been on for less than a year and the chrome ring on the bottom is flaking off and exposing the ugly yellow plastic underneath. Not to mention that I've had to remove ALL of the lights and put silicone under all of them and on the top where the mounting screws go and they STILL get water inside the lights. I have no idea how but at least they stopped leaking into my cab. I'm about to find out how good their customer service and warranty is.
#5
Originally Posted by BigDan
Mine also leak. Do you think I should silicone just the screws?
Thanks
Thanks
I put some on the screw hole and a little on the screw. I also reused the little plastic washer on the screw.
Trending Topics
#8
silicone the screws and don't overtighten. The factory ones will leak too if not installed properly.
My recon's leaked only when the truck was parked in a light rain, (couldn't get them to do it in a carwash). Used some black RTV and haven't had a problem.
My recon's leaked only when the truck was parked in a light rain, (couldn't get them to do it in a carwash). Used some black RTV and haven't had a problem.
#9
How about the install on cab lights? What all was invovled. Im pretty sure I know the basics of how to do it, but just checking, you need to remove headliner and drill holes and run wiring correct?? How hard was the wiring?
MJ Sandt
MJ Sandt
#10
I had another truck to get the measurements off of, wasn't needed though you can just space them out and walk around the truck and look. Wiring wasn't too hard just tied them all together to 1 wire and ran it down to the relay in the fuse box under the hood. Remove the visors and clips, remove the lenses from the maplights to get to the screws. You will also have to remove both pillars, then pull down the front of the headliner. Mine took about 1 1/2 hours total, not too difficult.
Don't forget....measure twice drill once!! or is it the other way around?
Don't forget....measure twice drill once!! or is it the other way around?
#11
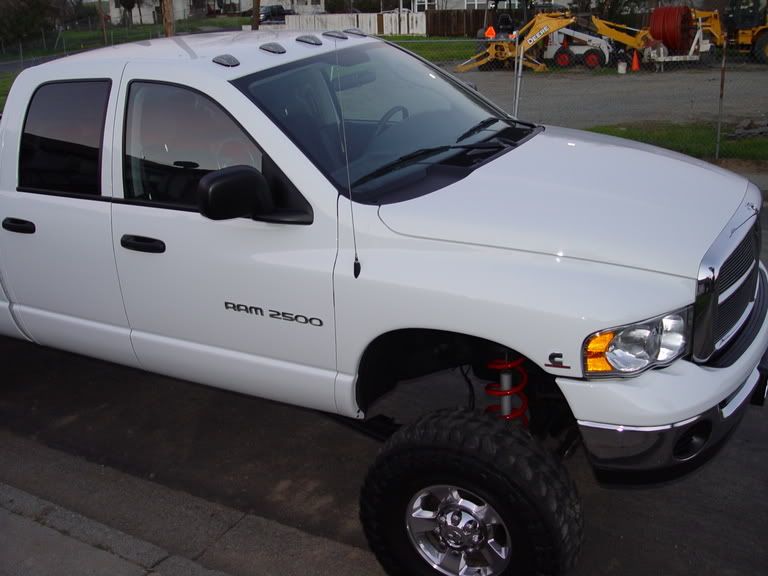
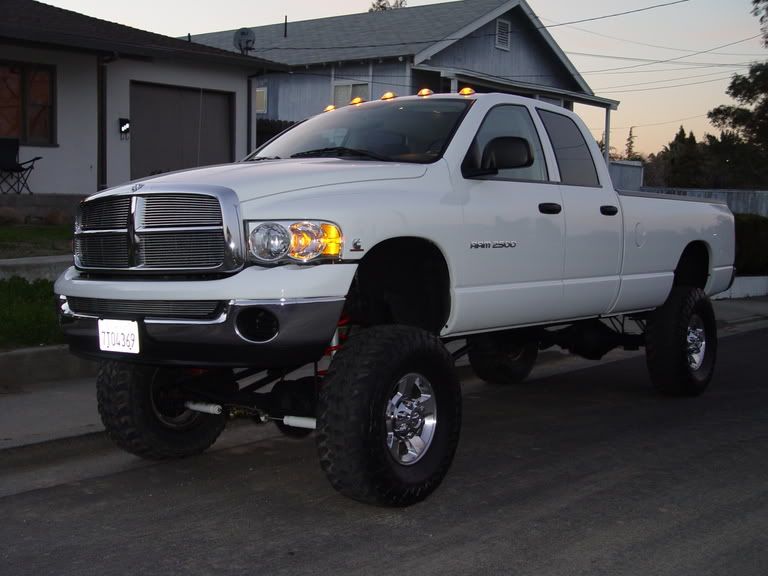
i just put them on, no leaks with all the rain weve been havin. install was not bad, take your time measuring...when you take the pass. side grab handle off, the power supply is already right there for the factory lights. HOWEVER...after i started the install, i noticed ONE of the lights was different...it had mounting holes on each SIDE instead of front and back, since i was already into the project i just put this one in the center...RECON said i was better off with that one cause those ones dont leak...i sent them an e-mail askin what on earth to do about the other four that they said WOULD leak...they offered me 30% off an led brake light...umm..no thanks...heres a few pics...and yes they are spaced evenly, didnt like the stock location look. i DID put marine silicone on both sides of the gasket, on the screws and over the screw heads after install.


#13
Mine were replacements, so they went in the same holes.
Is everyone using the white bulbs that are supplied?
I like the look of yellow lights at night, so I changed the bulbs to a yellow/gold tinted ones.
Is everyone using the white bulbs that are supplied?
I like the look of yellow lights at night, so I changed the bulbs to a yellow/gold tinted ones.
#14
i coulda sworn when i ordered them it said they came with white bulbs, but they arrived with amber ones...i kinda like em tho. best way to do this install is with 2 big ladders and some 2x12's and a friend...i also followed the curvature of the windshield.


