
Quest for Fleece styled gauge pod for 03-05 dash.
 10-21-2014, 11:47 PM
#1
Registered User
Thread Starter
Join Date: Jan 2006
Location: Denver CO
Posts: 318
Likes: 0
Received 0 Likes
on
0 Posts
Quest for Fleece styled gauge pod for 03-05 dash.
So anyone who is looking for a good quality aftermarket gauge pod knows Fleece Performance makes a killer dash top style pod for the 06-09 dash. I installed on in a buddy's mega cab and the fit and finish is beautiful, and the price point reflects that.
Anyone looking for this style gauge pod for their 03-05 is out of luck.
I have been looking for a similar pod for a long time with no luck. Of course you can buy a cheap autometer 3 hole pod that sits in a similar location, but fit and finish isn't all that great to me.
So I've decided to make a complete mess of my garage as well as stink it up a great deal in the efforts of making something similar.
Now keep on mind here that I have zero experience in fiberglass, and little more in plastic filler, so if your going to follow along, this should be interesting.
I like where the fleece gauge mount is placed, but I'm a short little fella and really don't care for any obstruction right in front of me, even though that's the best placement for consistent monitoring of the gauges.
I found that more towards the center of the dash more suited my needs, plus, it adds another touch of challenge for me to completely screw this thing up since this complicates the bottom edge with all the curves of the dash.
I don't want it sitting straight left to right and have to pivot the gauges to point towards the driver, so I opted to turn the entire pod towards the driver.
So, here we go. Feel free to point and laugh at my incompetence through the process. Heck, I don't even know if this is going to turn out as well as it looks in my head. But at the very least, maybe it'll give someone else an idea they can work on.
So here's the Fleece Performance gauge pod I'm modeling after:
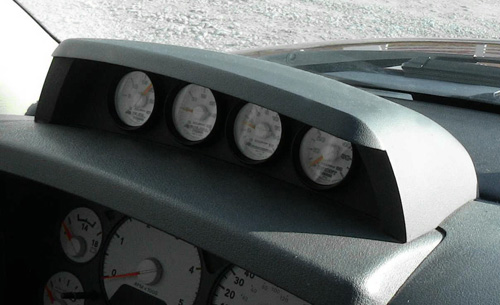
Fancy eh?
So in order to create the shape I wanted I needed to create a form. I spent about 36 seconds googling to come up with the poly extruded rigid foam sold at the big box stores. Bought a 24"x96"x1 1/2" piece for around $8 or so. I plan on building up multiple layers to create enough size to work with.
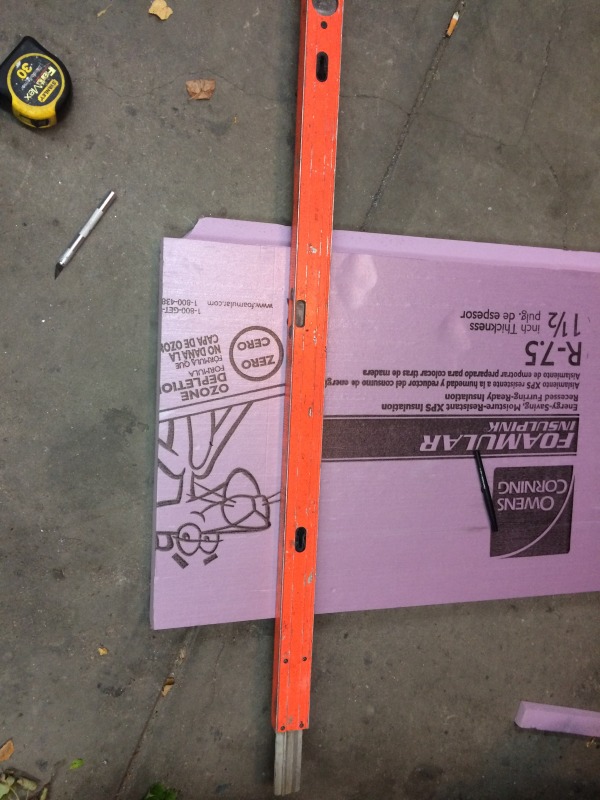
Apparently it's pink. Real men wear pink right?
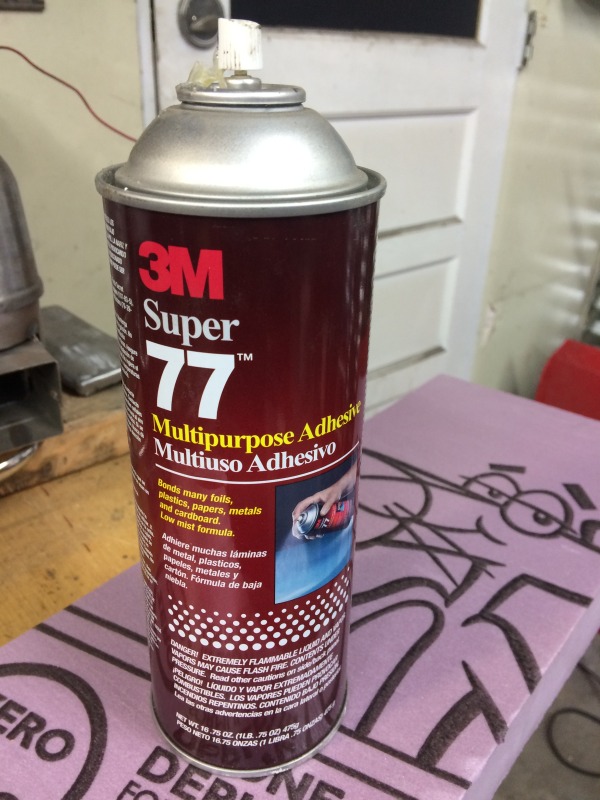
I used super 77 adhesive to adhere the pieces together.
I utilized a super high-tech method of pressing 3 layers of foam board together while they set up.
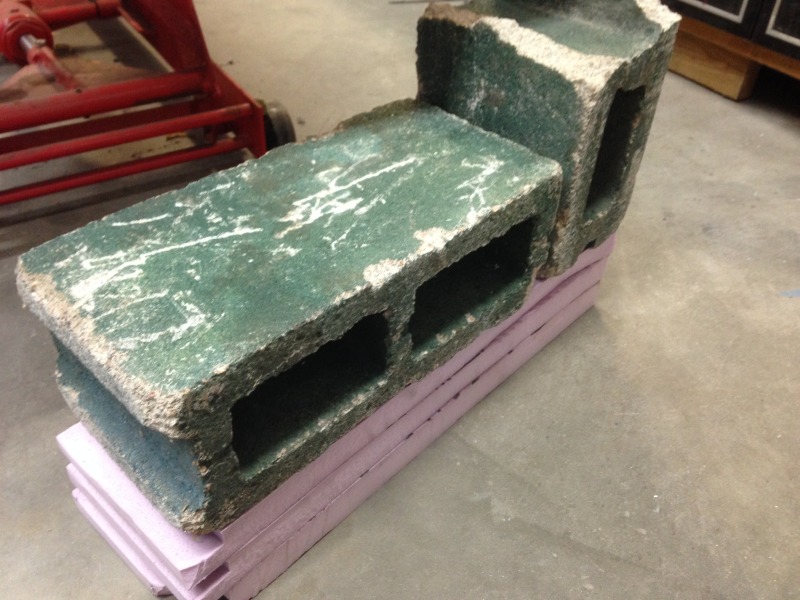
What I ended up with was a giant block of foam (not to be used as a flotation device) however, I'm sure this thing will float wonderfully.

Now to start the shaping process.
Like the fleece pod, I wanted to mimic the interior lines of the 03-05 dash so as to not look like some crappy plastic Velcro down off the shelve piece.
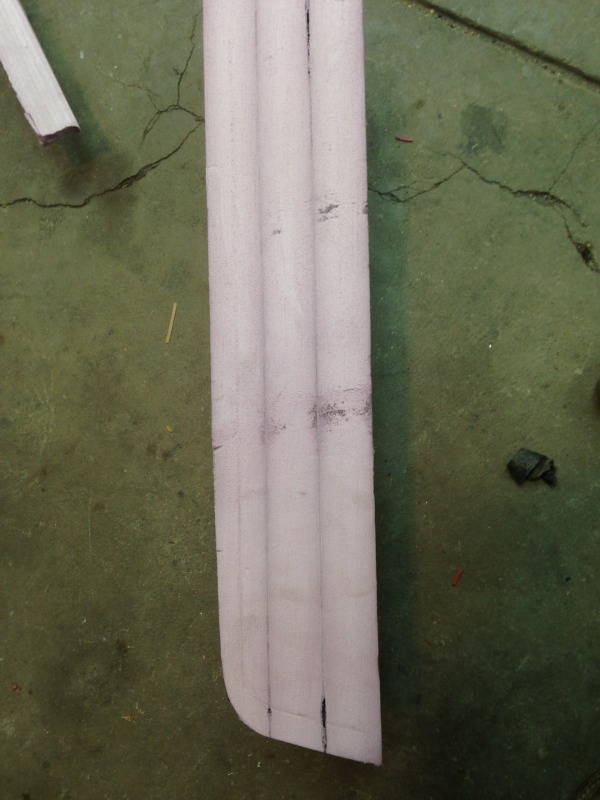
I started with one side to get a good profile of the angle I was after. I didn't want a giant box sitting on the dash, so square wasn't gonna cut it. I left the whole piece way long in case I needed to start over.
Once I got the sides where I wanted, I wanted to round off the top. Again, to add more complication. If I can't fiberglass a square box with ease, I sure as heck and fiberglass one with multiple curves.
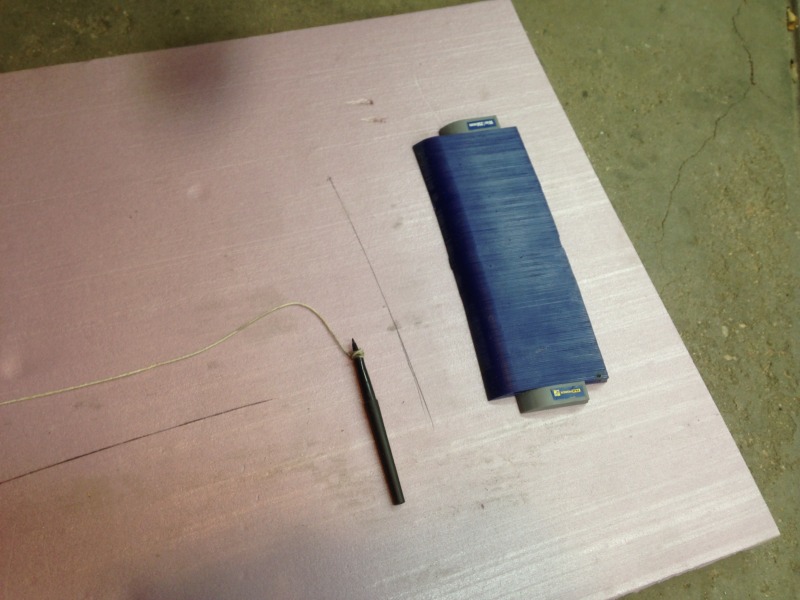
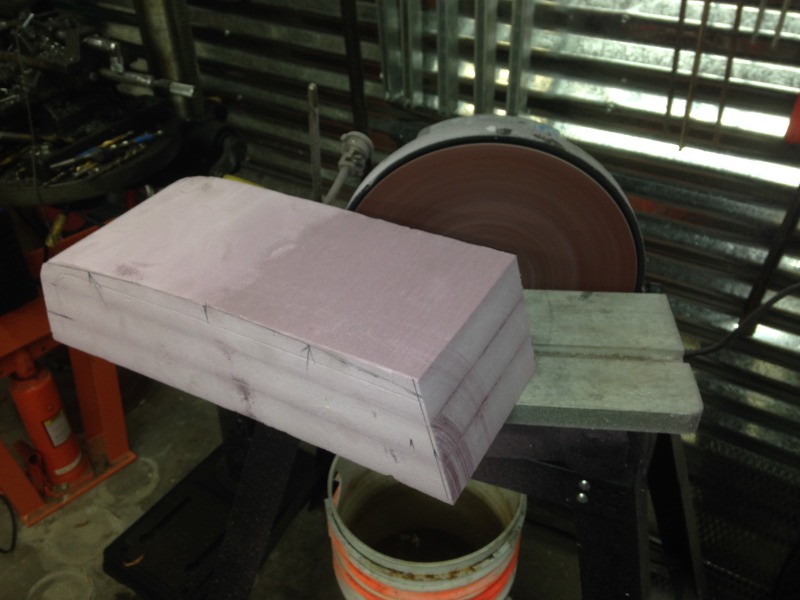
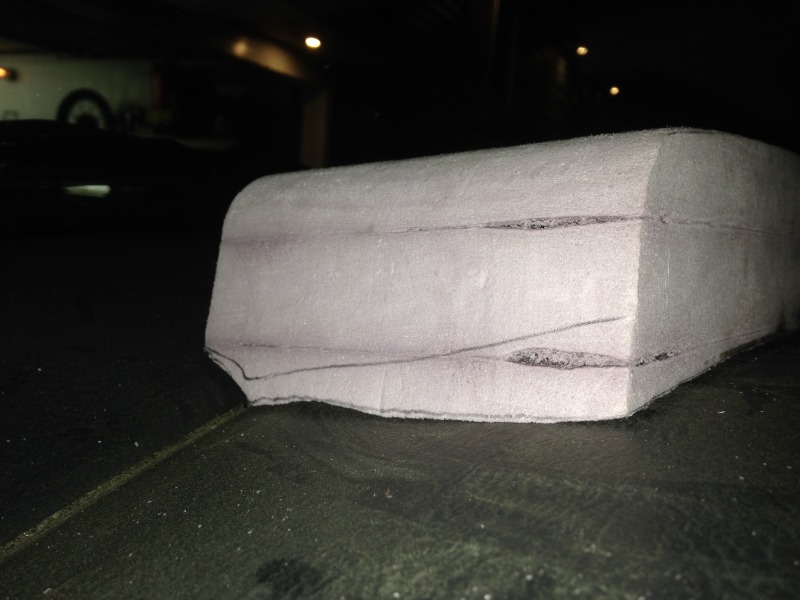
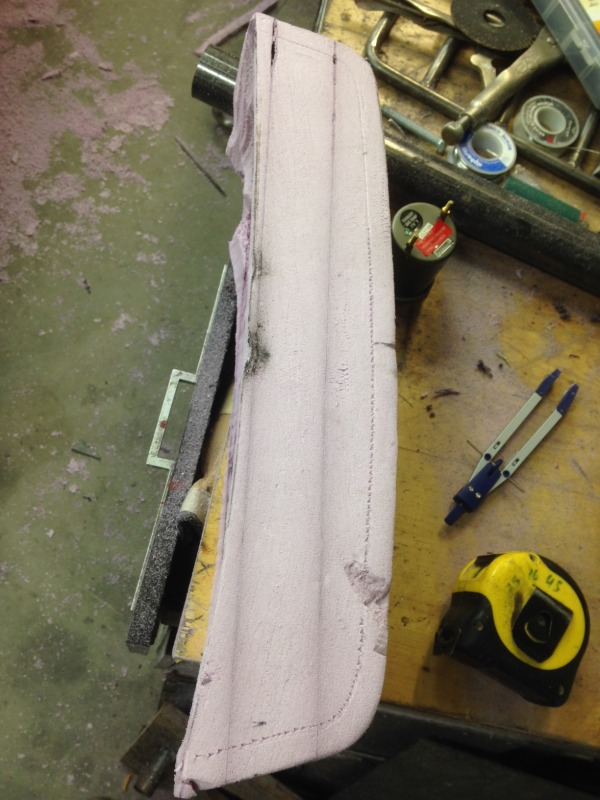
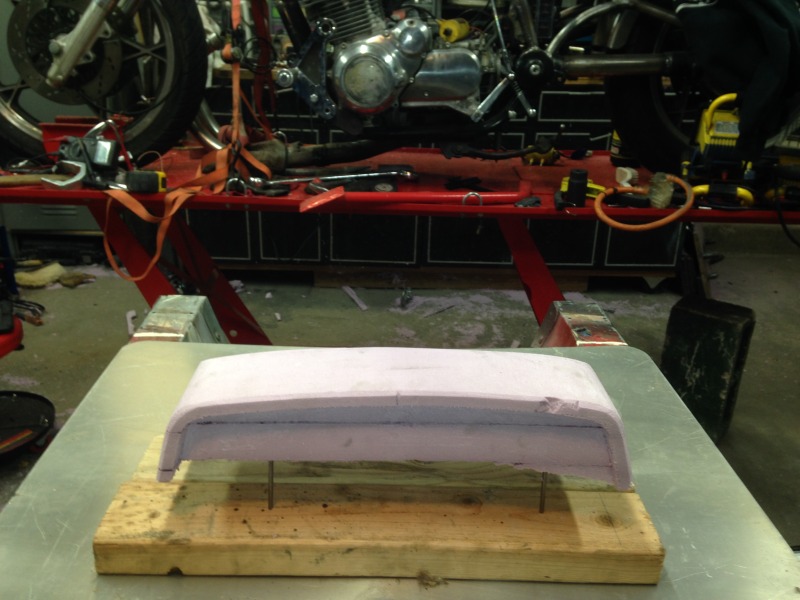
I took a contour gauge to the truck and came up with this ever so slight radius. Carried this to the foam board and set out with a string and marker to find the legnth of string needed to match the radius. Turns out, it's a lot. 6' or so. This was then transferred to the front face of the foam block.
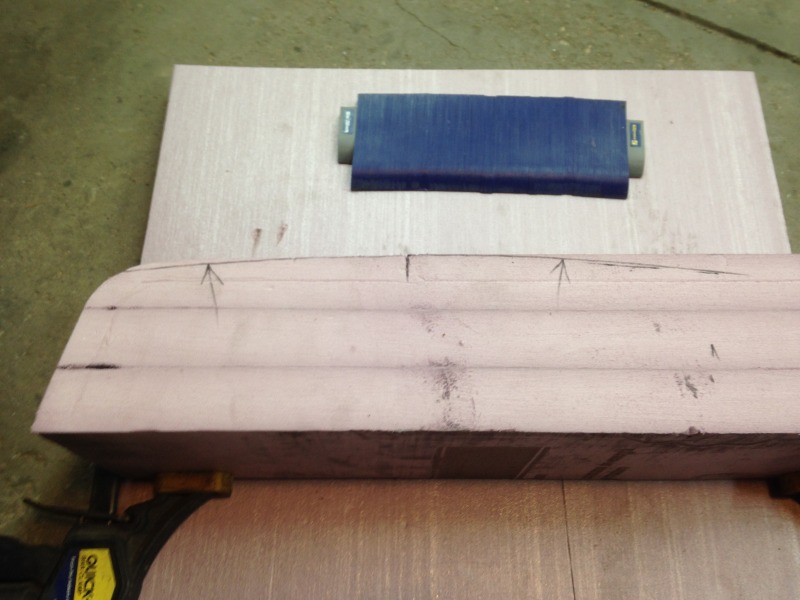
In the photo above, you can see the dark line identifying the radius I need to remove.
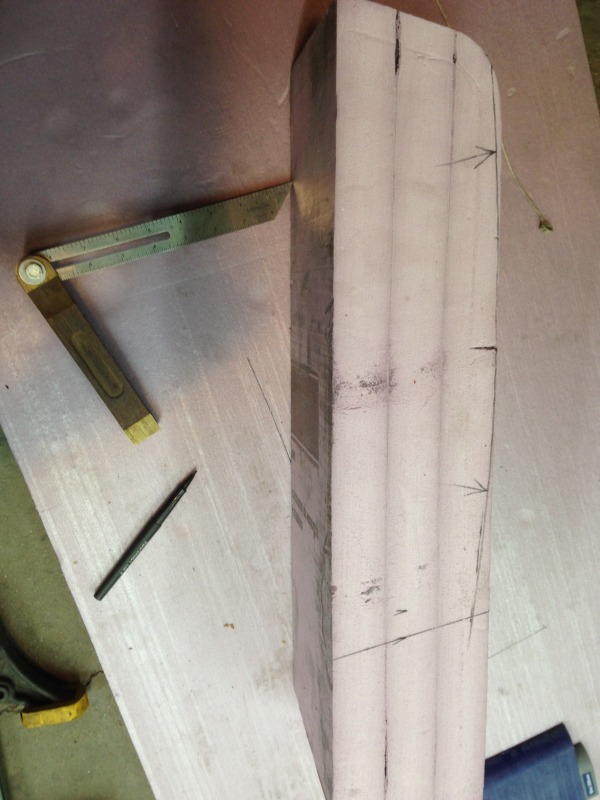
Next, I needed to figure out the total width of the pod. Utilizing an angle gauge, I matched the angle from the left side to the right side.
I want this pod to house six gauges, so with a little math, I carried the 1, divided that by the tangent of the fulcrum of the obtuse angles and tossed in a variable or two with a hypotenuse, added in some more letters and funny squiggly lines to come up with the overall width. I also added 3/4" on the top and sides for a lip to be added like the fleece pod has. I feel this is a key point in factory feeling styling and I wanted to incorporate this in my design. Plus the thing wasn't yet complicated enough.
Anyone looking for this style gauge pod for their 03-05 is out of luck.
I have been looking for a similar pod for a long time with no luck. Of course you can buy a cheap autometer 3 hole pod that sits in a similar location, but fit and finish isn't all that great to me.
So I've decided to make a complete mess of my garage as well as stink it up a great deal in the efforts of making something similar.
Now keep on mind here that I have zero experience in fiberglass, and little more in plastic filler, so if your going to follow along, this should be interesting.
I like where the fleece gauge mount is placed, but I'm a short little fella and really don't care for any obstruction right in front of me, even though that's the best placement for consistent monitoring of the gauges.
I found that more towards the center of the dash more suited my needs, plus, it adds another touch of challenge for me to completely screw this thing up since this complicates the bottom edge with all the curves of the dash.
I don't want it sitting straight left to right and have to pivot the gauges to point towards the driver, so I opted to turn the entire pod towards the driver.
So, here we go. Feel free to point and laugh at my incompetence through the process. Heck, I don't even know if this is going to turn out as well as it looks in my head. But at the very least, maybe it'll give someone else an idea they can work on.
So here's the Fleece Performance gauge pod I'm modeling after:
Fancy eh?
So in order to create the shape I wanted I needed to create a form. I spent about 36 seconds googling to come up with the poly extruded rigid foam sold at the big box stores. Bought a 24"x96"x1 1/2" piece for around $8 or so. I plan on building up multiple layers to create enough size to work with.
Apparently it's pink. Real men wear pink right?
I used super 77 adhesive to adhere the pieces together.
I utilized a super high-tech method of pressing 3 layers of foam board together while they set up.
What I ended up with was a giant block of foam (not to be used as a flotation device) however, I'm sure this thing will float wonderfully.
Now to start the shaping process.
Like the fleece pod, I wanted to mimic the interior lines of the 03-05 dash so as to not look like some crappy plastic Velcro down off the shelve piece.
I started with one side to get a good profile of the angle I was after. I didn't want a giant box sitting on the dash, so square wasn't gonna cut it. I left the whole piece way long in case I needed to start over.
Once I got the sides where I wanted, I wanted to round off the top. Again, to add more complication. If I can't fiberglass a square box with ease, I sure as heck and fiberglass one with multiple curves.
I took a contour gauge to the truck and came up with this ever so slight radius. Carried this to the foam board and set out with a string and marker to find the legnth of string needed to match the radius. Turns out, it's a lot. 6' or so. This was then transferred to the front face of the foam block.
In the photo above, you can see the dark line identifying the radius I need to remove.
Next, I needed to figure out the total width of the pod. Utilizing an angle gauge, I matched the angle from the left side to the right side.
I want this pod to house six gauges, so with a little math, I carried the 1, divided that by the tangent of the fulcrum of the obtuse angles and tossed in a variable or two with a hypotenuse, added in some more letters and funny squiggly lines to come up with the overall width. I also added 3/4" on the top and sides for a lip to be added like the fleece pod has. I feel this is a key point in factory feeling styling and I wanted to incorporate this in my design. Plus the thing wasn't yet complicated enough.
 10-21-2014, 11:49 PM
#2
Registered User
Thread Starter
Join Date: Jan 2006
Location: Denver CO
Posts: 318
Likes: 0
Received 0 Likes
on
0 Posts
Cutting of the side. Notice I left a little before the line in order to fine tune the mold to the absolutely perfect shape before I completely screw the whole thing up.
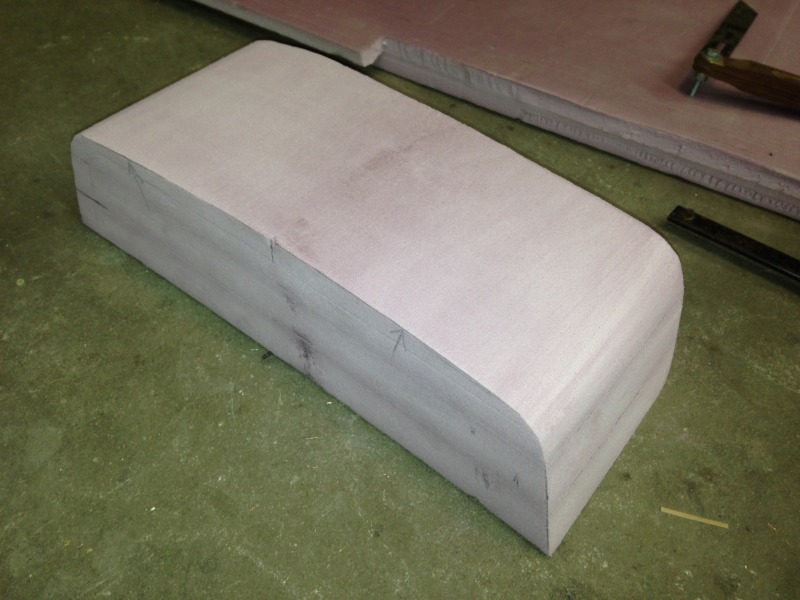
A little ole shaping and this thing isn't looking half bad!
Okay, got the sides and top curves where I like them, now I needed to start fitting it to the dash.
For this input on the tennis shoes and took 764 trips back and forth to the truck to get everything just right. This is weHere I fully expected to screw everything up.
Matched the dash radius on the front.

I used the math equation previously stated above to assure I had left enough room for the gauges between the under side of the lip and the top of the dash.
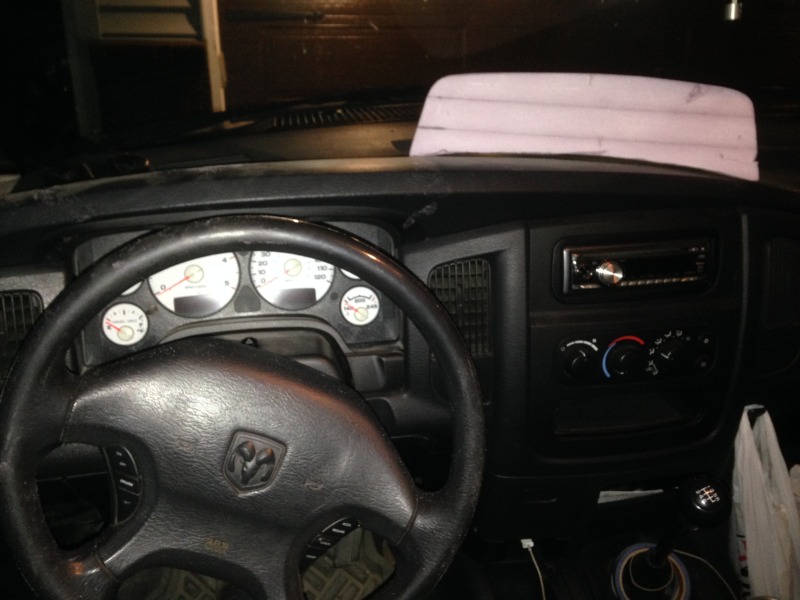
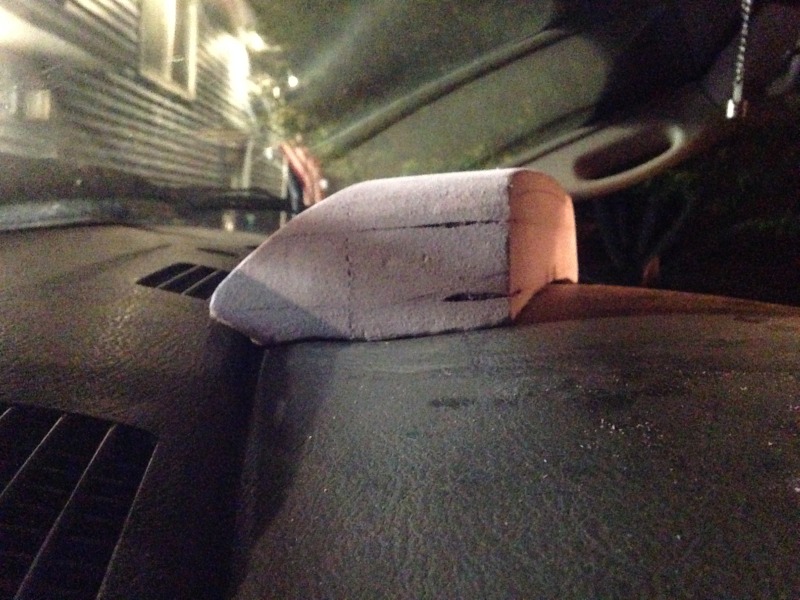
This is about the location I hope to have it.
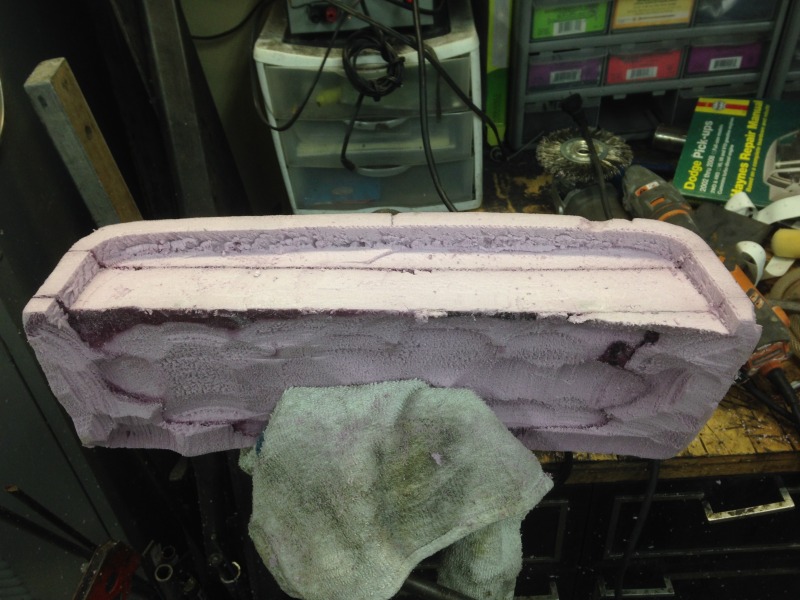
At this point I realized it was going to be a never ending battle trying to get the flatish bottom of the foam block to match all the curves of the dash so I decided to hollow out the center so I would only need to be working with the edges to get the shapes right.

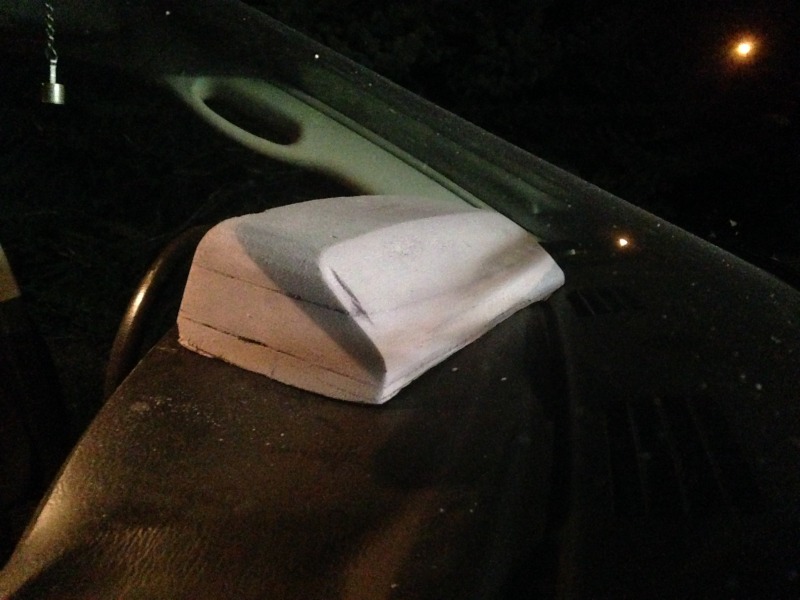
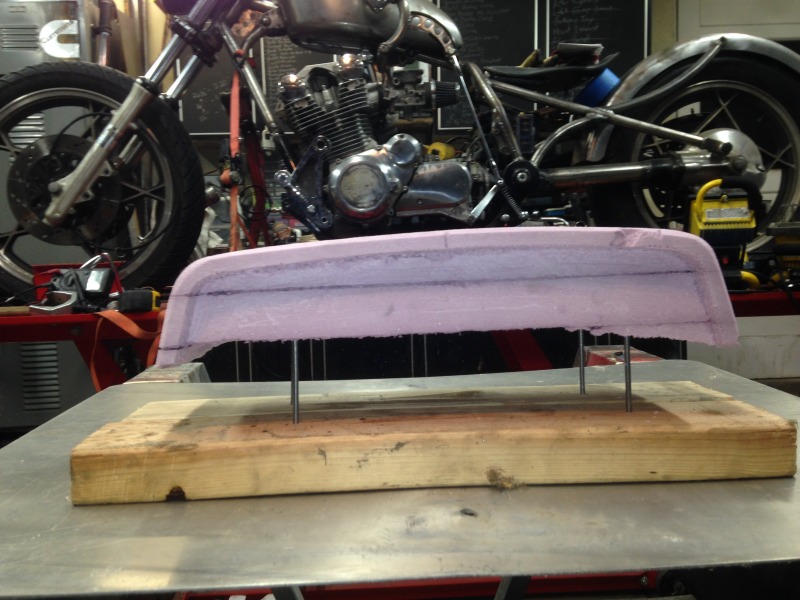
Here's a rear view of the fancy foam block. You can see on the right side that there are some odd shapes in order to get this to sit tight to the dash.
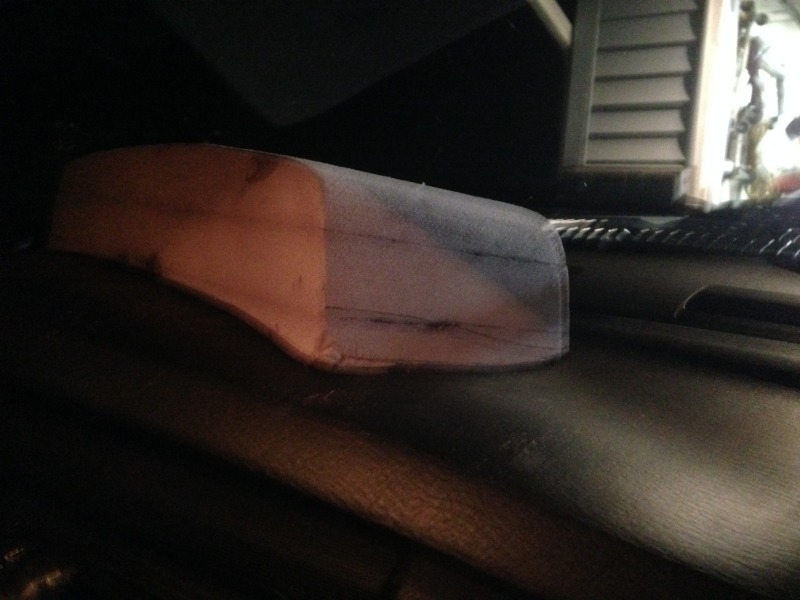
Still working it into place here. View from driver side.
And a view from the passengers side. Sorry for the poor photo.
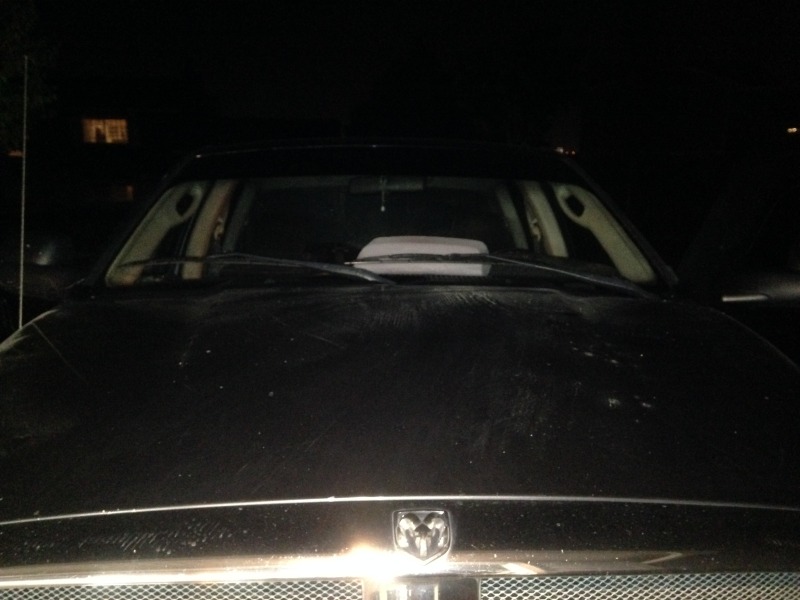
And a horrible shot from the front of the truck. .
A little ole shaping and this thing isn't looking half bad!
Okay, got the sides and top curves where I like them, now I needed to start fitting it to the dash.
For this input on the tennis shoes and took 764 trips back and forth to the truck to get everything just right. This is weHere I fully expected to screw everything up.
Matched the dash radius on the front.
I used the math equation previously stated above to assure I had left enough room for the gauges between the under side of the lip and the top of the dash.
This is about the location I hope to have it.
At this point I realized it was going to be a never ending battle trying to get the flatish bottom of the foam block to match all the curves of the dash so I decided to hollow out the center so I would only need to be working with the edges to get the shapes right.
Here's a rear view of the fancy foam block. You can see on the right side that there are some odd shapes in order to get this to sit tight to the dash.
Still working it into place here. View from driver side.
And a view from the passengers side. Sorry for the poor photo.
And a horrible shot from the front of the truck. .
10-21-2014, 11:50 PM
#3
Registered User
Thread Starter
Join Date: Jan 2006
Location: Denver CO
Posts: 318
Likes: 0
Received 0 Likes
on
0 Posts
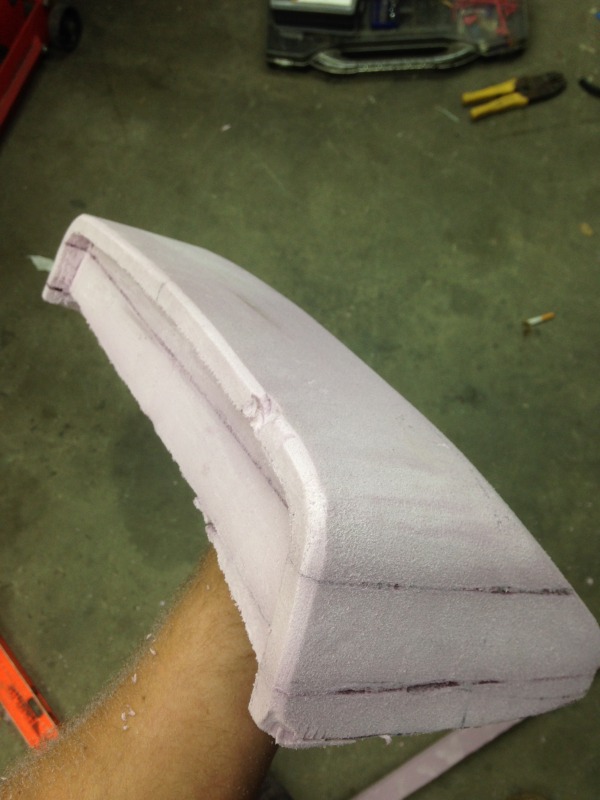
Since I wanted as many possible curves as I can get to make glossing the whole contraption as complicated as I could, I also shaved off the back of the pod. This will really clean up the look and make it look like it belongs more.
Next it was time to create the 3/4" lip around the front. I marked it out and used one of those fancy oscillating tools and a keen eye to cut this out. I really like how it ties it together.

Okay well so far so good. I love the shape, it'll hold what I need, fits well. Time to ruin all that hard work.
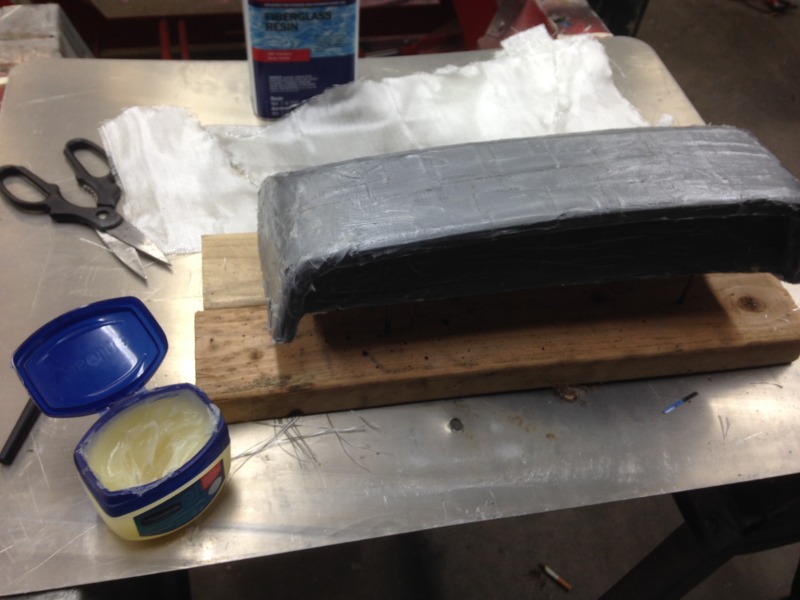
Again, having never done glass work before, I'm playing this all by ear. I can't glass right over the foam as the resin will eat the foam I assume. So I needed to coat it with something. And as they say, If Ya Can't Duck It��..
So duct tape was the answer. I also wanted to be able to easily release the form once done. Honestly I thought I would need to devolve the foam with acetone to get it out, but the mold proved to be easily removed later.
I coated the foam in duct tape, then in Vaseline. Stuff is always better lubed anyways.
I have nearly zero patients so ordering the right stuff online is out of the question, plus I'm on a budget, so this would have to work.
You might notice the front bottom edge is pretty nasty looong in this photo. Well when I hollowed out the center, I didn't take into account the 3/4" deep lip I'd be cutting into it, so when I cut the lip, I cut into the hollowed out center creating this first major screw up. I figure I can hang glass down the face and recreate the bottom edge.
Here it is all lubed up and ready for glass�..I think.
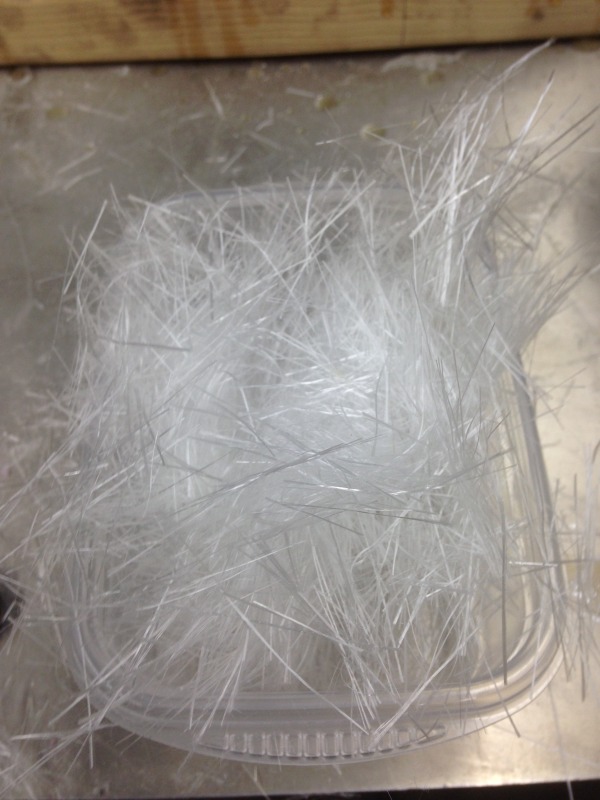
I bought two different types of glass. One is an interwoven mat that is very loose and flexible, the second was random oriented stranded glass. I wasn't sure which would work better so I got both to try and see. You can see the woven mat in the background.
Next it was time to create the 3/4" lip around the front. I marked it out and used one of those fancy oscillating tools and a keen eye to cut this out. I really like how it ties it together.
Okay well so far so good. I love the shape, it'll hold what I need, fits well. Time to ruin all that hard work.
Again, having never done glass work before, I'm playing this all by ear. I can't glass right over the foam as the resin will eat the foam I assume. So I needed to coat it with something. And as they say, If Ya Can't Duck It��..
So duct tape was the answer. I also wanted to be able to easily release the form once done. Honestly I thought I would need to devolve the foam with acetone to get it out, but the mold proved to be easily removed later.
I coated the foam in duct tape, then in Vaseline. Stuff is always better lubed anyways.
I have nearly zero patients so ordering the right stuff online is out of the question, plus I'm on a budget, so this would have to work.
You might notice the front bottom edge is pretty nasty looong in this photo. Well when I hollowed out the center, I didn't take into account the 3/4" deep lip I'd be cutting into it, so when I cut the lip, I cut into the hollowed out center creating this first major screw up. I figure I can hang glass down the face and recreate the bottom edge.
Here it is all lubed up and ready for glass�..I think.
I bought two different types of glass. One is an interwoven mat that is very loose and flexible, the second was random oriented stranded glass. I wasn't sure which would work better so I got both to try and see. You can see the woven mat in the background.
10-21-2014, 11:52 PM
#4
Registered User
Thread Starter
Join Date: Jan 2006
Location: Denver CO
Posts: 318
Likes: 0
Received 0 Likes
on
0 Posts
And this is where you can start laughing at me.
First coat. As you can see I left the front edge long in order to rebuild it. The resin was stupid thick and really hard to work with. This is likely due to me buying inferior products.
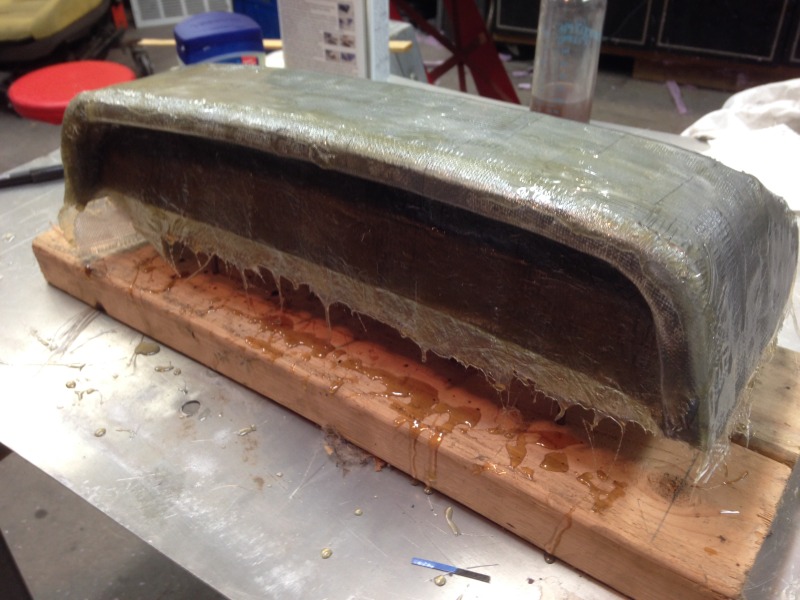
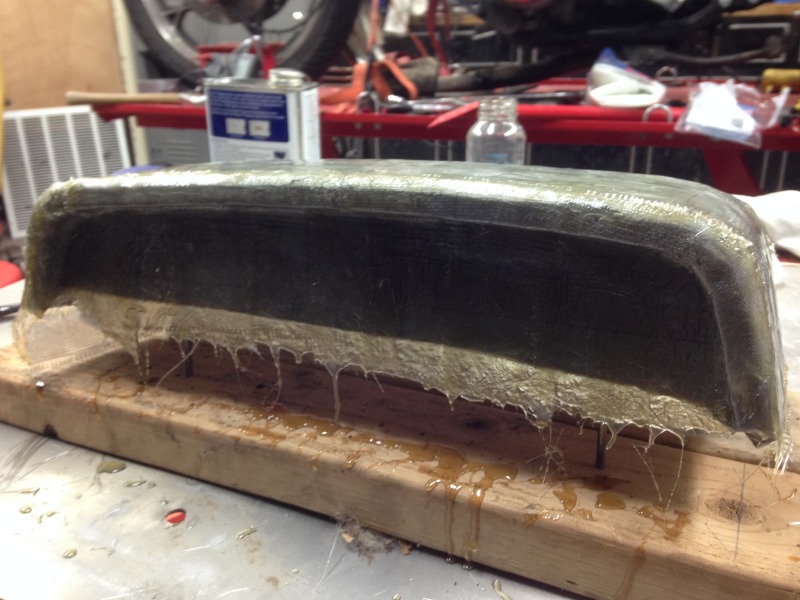
First I did the first coat. I REALLY didn't like how the inside corner was working out. I had used the mat on the top which layed down nicely, but I used the stranded mat in the inside corner and around the lip. This stuff was super rigid and really didn't want to bend tight around the lips corners. This created less of a nice formed lip and more of a rounded ball of crap edge. I really wasn't happy with it.
I let it sit overnight to review the next day anyways.
At this time I found my duct tape and Vaseline worked out very well as a release agent for the form. I did a little sanding before removing the form. Although this is only the first layer, I'm still not happy with it, and since the form came out in one piece, I decided to try another method to get the lip tighter.
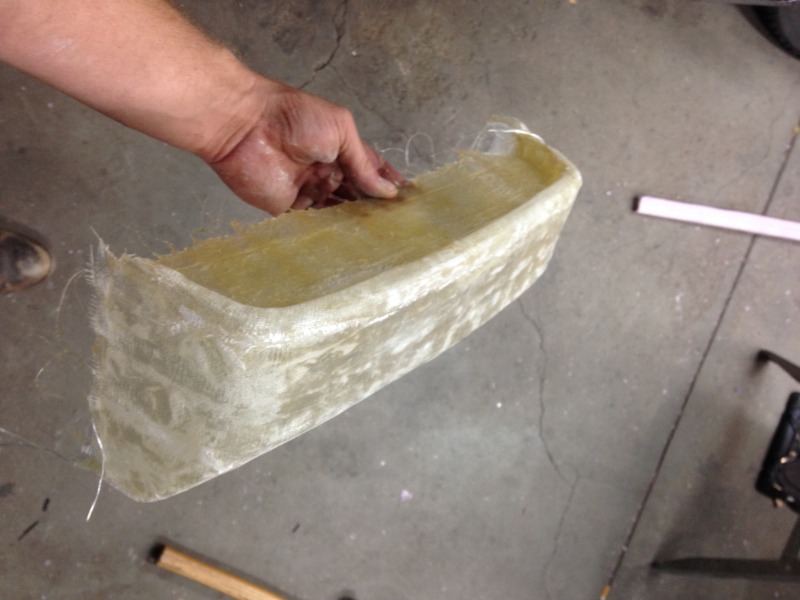
I guess we can call this proof-of-concept. I think it'll work out okay.
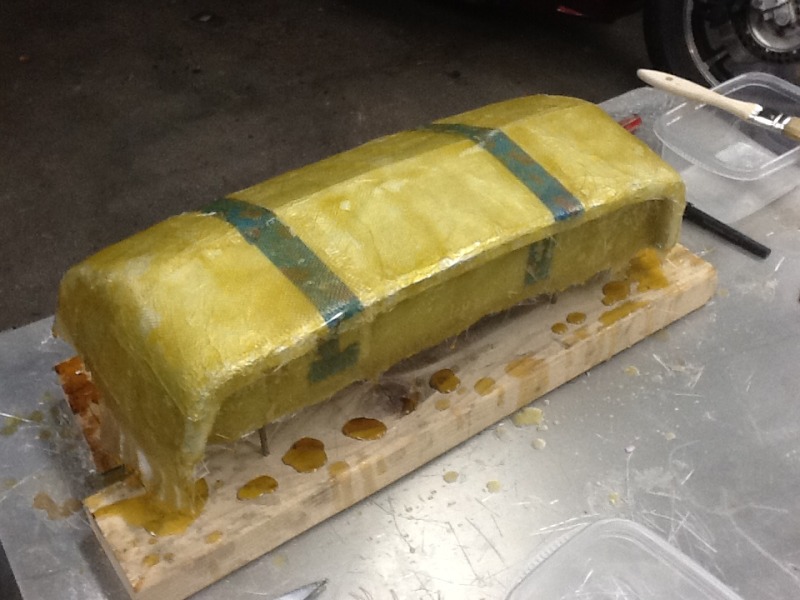
Next day (yesterday) I decided to try aluminum foil as the protective barrier between the foam and resin. I figured this would allow me to get this layer tighter to the interior corners of the lip, therefore allowing me to apply the glass tighter. I also lined up this layer as well to make removal easier.

This round rather than using the rigid stranded matting in squares, I decided to break it up into looser strands. Hopefully this will alow individual strands to bend around the corners tighter.
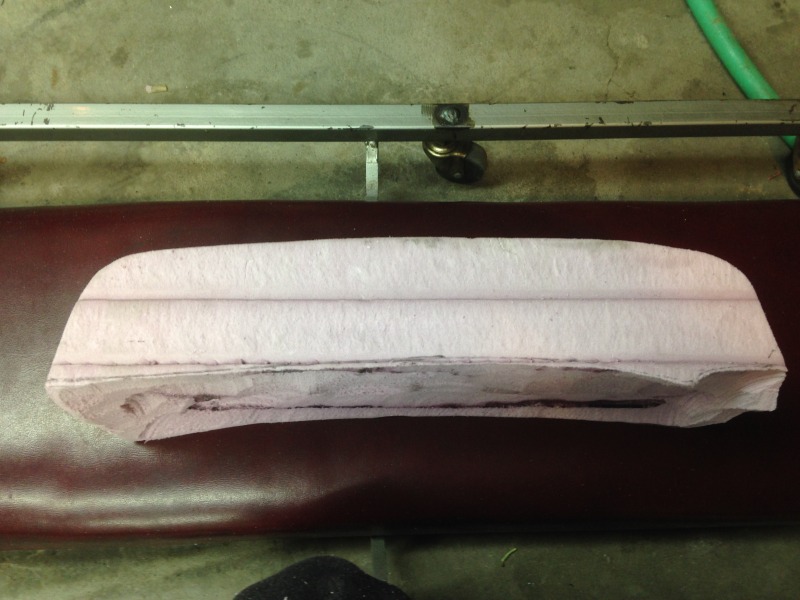
First layer on. I left the lip not installed quite yet and will focus in this once the main layer has cured so that I'm only fighting minimal wet glass rather than the whole darn thing.

You can see I still left the front edge long so I can trim back to where it needs to be.
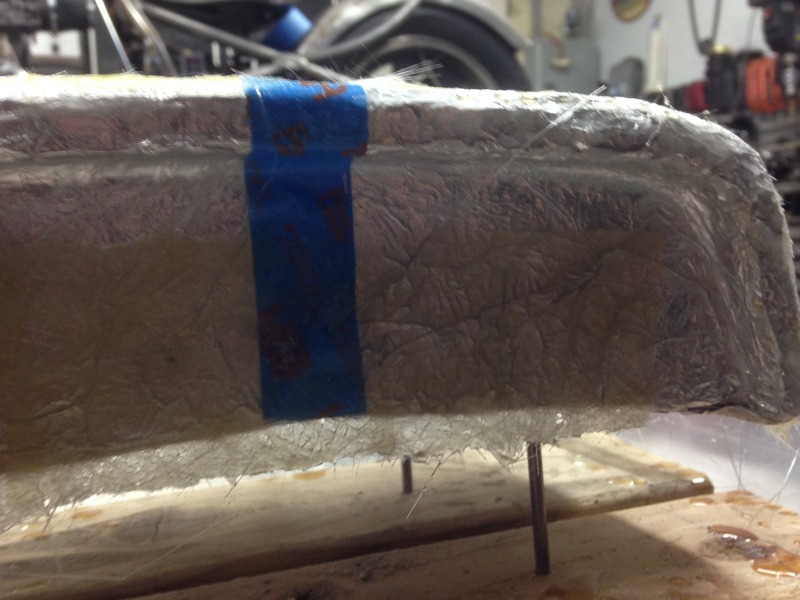
I did decide to use the thicker random strand matting throughout the entire body of the first layer as I felt this was stronger then the woven mat the first time around. Flexibility was just much less with that stuff.
Tonight I used the loose fill glass and filled in the inside corner of the lip. This worked much better this round and I was able to get it in tighter. Still not as tight as I would have hoped, but better.
I did use the woven mat as the second layer as I feel this provides a smoother layer which hopefully will be easier to sand down at the end of everything.
Here's where it stands tonight.
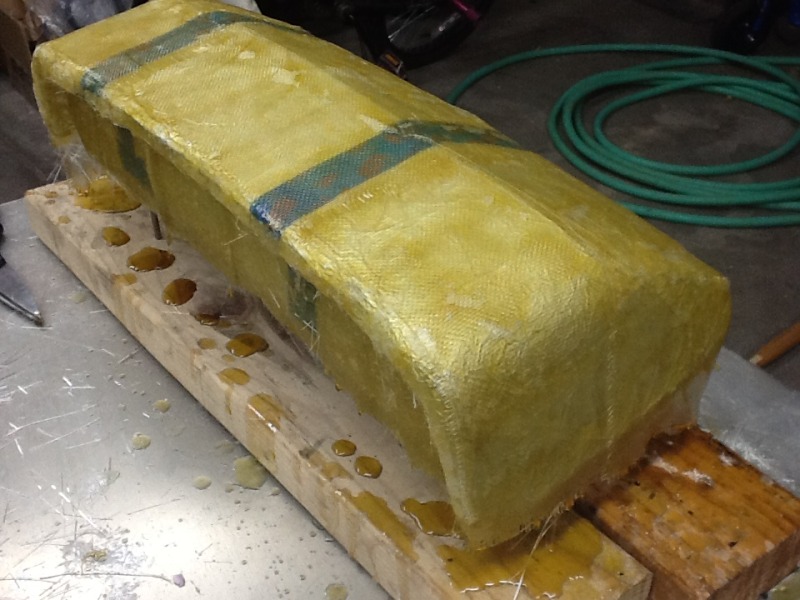
It looks pretty rough right now, but I'm confident I can sand this down and fill, and sand, and fill the thing into persuasion to a nice finished product.
I plan on removing the mold and completely filling in the inside of the lip with resin and glass in order to make this part solid and provide enough material to adequately sand and shale to where it needs to be to look good. I will also likely add a couple more layers inside the whole thing to add rigidity as well. The interior doesn't need to look pretty, but I want to make sure the whole thing is stiff and solid even after all the sanding is completed.
I'll post updates as I go along.
Edit: I forgot to mention that the second try I did thin the resin with acetone. I did a 50/50 mix of resin/acetone then added the hardener. This seemed to let it flow much more like water (easier to work the glass strands) and it still setup solid in 24 hours. I did the same thing for the second layer and will do it again for sure when I fill the interior of the lip. Hopefully this will alow more resin to occupy the space, and less air bubbles. We'll see.
First coat. As you can see I left the front edge long in order to rebuild it. The resin was stupid thick and really hard to work with. This is likely due to me buying inferior products.
First I did the first coat. I REALLY didn't like how the inside corner was working out. I had used the mat on the top which layed down nicely, but I used the stranded mat in the inside corner and around the lip. This stuff was super rigid and really didn't want to bend tight around the lips corners. This created less of a nice formed lip and more of a rounded ball of crap edge. I really wasn't happy with it.
I let it sit overnight to review the next day anyways.
At this time I found my duct tape and Vaseline worked out very well as a release agent for the form. I did a little sanding before removing the form. Although this is only the first layer, I'm still not happy with it, and since the form came out in one piece, I decided to try another method to get the lip tighter.
I guess we can call this proof-of-concept. I think it'll work out okay.
Next day (yesterday) I decided to try aluminum foil as the protective barrier between the foam and resin. I figured this would allow me to get this layer tighter to the interior corners of the lip, therefore allowing me to apply the glass tighter. I also lined up this layer as well to make removal easier.
This round rather than using the rigid stranded matting in squares, I decided to break it up into looser strands. Hopefully this will alow individual strands to bend around the corners tighter.
First layer on. I left the lip not installed quite yet and will focus in this once the main layer has cured so that I'm only fighting minimal wet glass rather than the whole darn thing.
You can see I still left the front edge long so I can trim back to where it needs to be.
I did decide to use the thicker random strand matting throughout the entire body of the first layer as I felt this was stronger then the woven mat the first time around. Flexibility was just much less with that stuff.
Tonight I used the loose fill glass and filled in the inside corner of the lip. This worked much better this round and I was able to get it in tighter. Still not as tight as I would have hoped, but better.
I did use the woven mat as the second layer as I feel this provides a smoother layer which hopefully will be easier to sand down at the end of everything.
Here's where it stands tonight.
It looks pretty rough right now, but I'm confident I can sand this down and fill, and sand, and fill the thing into persuasion to a nice finished product.
I plan on removing the mold and completely filling in the inside of the lip with resin and glass in order to make this part solid and provide enough material to adequately sand and shale to where it needs to be to look good. I will also likely add a couple more layers inside the whole thing to add rigidity as well. The interior doesn't need to look pretty, but I want to make sure the whole thing is stiff and solid even after all the sanding is completed.
I'll post updates as I go along.
Edit: I forgot to mention that the second try I did thin the resin with acetone. I did a 50/50 mix of resin/acetone then added the hardener. This seemed to let it flow much more like water (easier to work the glass strands) and it still setup solid in 24 hours. I did the same thing for the second layer and will do it again for sure when I fill the interior of the lip. Hopefully this will alow more resin to occupy the space, and less air bubbles. We'll see.


Thread
Thread Starter
Forum
Replies
Last Post
Farmboy_92
3rd Gen High Performance and Accessories (5.9L Only)
8
12-12-2012 10:06 PM