
ARP Head Stud Installation
 11-12-2007, 08:28 AM
#1
Registered User
Thread Starter

Join Date: Jun 2007
Posts: 89
Likes: 0
Received 0 Likes
on
0 Posts
ARP Head Stud Installation
Here is my installation and I hope it helps someone else:
I am in the process of putting new '03 Cummins crate engine in my Ford, so the engine I am working on is on an engine stand. I did not remove the head or replace the gasket, I installed the studs one at a time. The tap needs to be at least 6" long and the thread pattern is 12mm x 1.75mm pitch. I would set out 6-9 hrs for the installation. Take your time.
1. Remove the oil fill cap (you don't have to if you dont' want to).
2. Remove the breather cover (4) bolts.
3. Disconnect the breather tube and the lube oil drain tube from breather.
4. Remove the cylinder head cover (6) bolts and cover. The two shorter ones go on each end.
5. Disconnect the rocker housing injector harness connectors.
6. Remove the injector harness nuts. There are two 8mm bolts per injector, be sure you either take pictures, label or write down which go where.
7. Remove rocker housing and gasket (7) 10mm bolts.
8. Remove the rocker levers cross heads and push rods. There is (1) 10mm bolt per each one. Mark each one so they go back to there original location. I labeled my with a sharpie and laid them on my work table in order. Here is a picture of the rocker assembly and injector of the first cylinder.
http://www.truckblog.com/gallery/Aggie007/31704.jpg
With the rocker arms removed.
http://www.truckblog.com/gallery/Aggie007/31705.jpg
8. Now you are ready to start installing the head studs. Here is the sequence.
http://www.truckblog.com/gallery/Aggie007/31715.jpg.
9. Start with number 1, the center bolt.
10. I removed the head bolt, ran the tap down to clean out the hole and threads (mark the tap or remember the depth), screwed the stud in to the bottom, and put a washer and nut on. Point of this is to see how much further you will need to thread. I wanted (2) threads about 1/8" of stud showing above each nut when installed.
Tap depth.
http://www.truckblog.com/gallery/Aggie007/31707.jpg
First stud in to see how much further I need to tap.
http://www.truckblog.com/gallery/Aggie007/31706.jpg
How much further I took the tap down.
http://www.truckblog.com/gallery/Aggie007/31720.jpg
I cleaned the hole out with a magnet and a vacuum. You can use air but dont' recommend it because you don't know where the shavings are going to end up.
http://www.truckblog.com/gallery/Aggie007/31714.jpg
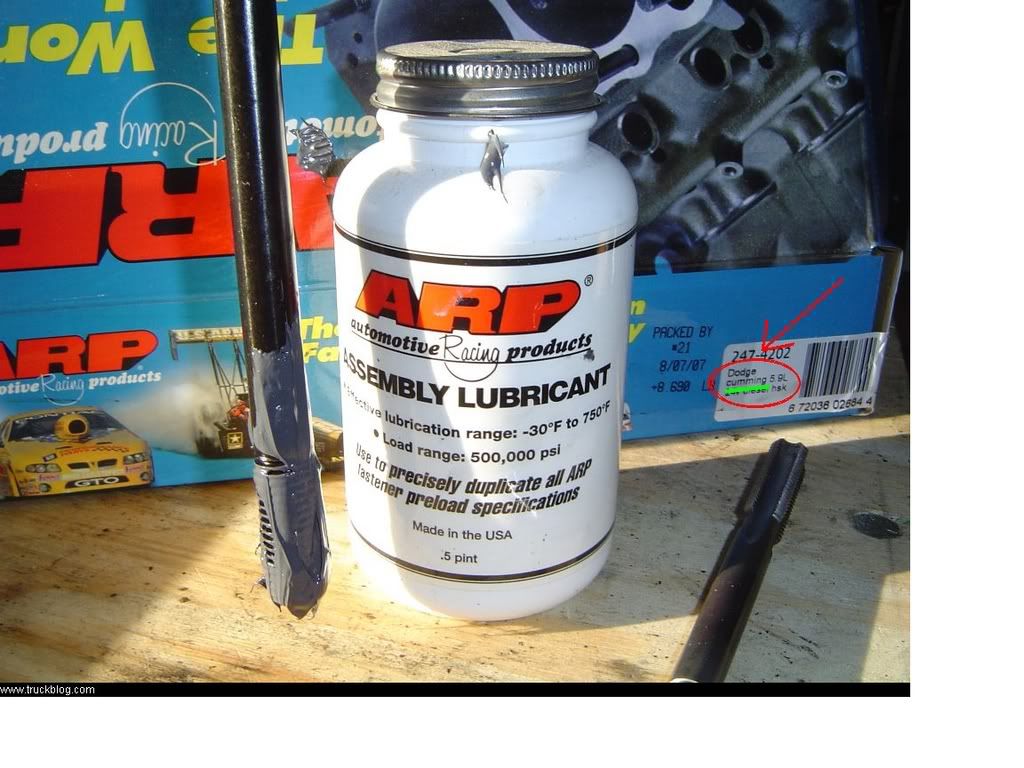
USE LOTS OF ARP LUBE!!!! This picture actually shows the wrong side coated but you get the idea. I actually used the ARP lube on both sides, to be sure I got proper torque specs. You want to be smooth and consistent when torque the nuts down.
http://www.truckblog.com/gallery/Aggie007/31713.JPG
You can use loc-tite on the threads going into the block (head) I didn't. It might give you that warm fuzzy feeling to use loc-tite. I torqued the studs down to 95 ft/lbs, then when I was finished with all (26) studs, I went back and torqued them down to 125 ft/lbs.
11. The exhaust side bolts are the long studs. There are six.
Here is a pic of my tap depth before tapping.
http://www.truckblog.com/gallery/Aggie007/31710.jpg
This is how far I could take the tap to, then it seemed like I bottomed out, and I wasn't going to force the tap any further.
http://www.truckblog.com/gallery/Aggie007/31711.jpg
First exhaust stud installed.
http://www.truckblog.com/gallery/Aggie007/31712.jpg
12. Do all (26) studs the same following the sequence above, taking each down to 95 ft/lbs.
13. Once all (26) studs in, re-torque to 125 ft/lbs. I went ahead and retorqued a third time to 130 ft/lbs.
Here are some torque specs for reinstallation.
http://www.truckblog.com/gallery/Aggie007/31717.jpg
http://www.truckblog.com/gallery/Aggie007/31718.jpg
14. Once you are finished with the studs you are ready to put everything back together. Reinstall the rocker lever assemblies and torque the bolts down to 18 ft/lbs.
15. I had to clearance the back of the rocker housing injector harness. Here are some pics, but they didn't turn out very good. First one is how much I need to file or grind down in order to get the injector harness housing to fit flush with the top of the head.
http://www.truckblog.com/gallery/Aggie007/31730.JPG
http://www.truckblog.com/gallery/Aggie007/31731.JPG
16. Reinstall the rocker housing injector harness and torque the (7) 10mm bolts to 18 ft/lbs. Start with the center bolt and work your way out.
17. Reinstall the injector harness nuts. There are (2) 8mm nuts per injector. Be sure you are putting the wires back to correctly and you have gotten the two swapped. Be very careful to not overtighten. Finger tight and another 1/4-1/2 turn is more than enough, 13 in/lbs is the spec.
18. Reinstall the cylinder head cover (6) bolts and torque down to 89 in/lbs and reconnect the breather tubes and you are done. If you removed the breather cover (2) bolts, torque down to 18 ft/lbs.
I am in the process of putting new '03 Cummins crate engine in my Ford, so the engine I am working on is on an engine stand. I did not remove the head or replace the gasket, I installed the studs one at a time. The tap needs to be at least 6" long and the thread pattern is 12mm x 1.75mm pitch. I would set out 6-9 hrs for the installation. Take your time.
1. Remove the oil fill cap (you don't have to if you dont' want to).
2. Remove the breather cover (4) bolts.
3. Disconnect the breather tube and the lube oil drain tube from breather.
4. Remove the cylinder head cover (6) bolts and cover. The two shorter ones go on each end.
5. Disconnect the rocker housing injector harness connectors.
6. Remove the injector harness nuts. There are two 8mm bolts per injector, be sure you either take pictures, label or write down which go where.
7. Remove rocker housing and gasket (7) 10mm bolts.
8. Remove the rocker levers cross heads and push rods. There is (1) 10mm bolt per each one. Mark each one so they go back to there original location. I labeled my with a sharpie and laid them on my work table in order. Here is a picture of the rocker assembly and injector of the first cylinder.
http://www.truckblog.com/gallery/Aggie007/31704.jpg
With the rocker arms removed.
http://www.truckblog.com/gallery/Aggie007/31705.jpg
8. Now you are ready to start installing the head studs. Here is the sequence.
http://www.truckblog.com/gallery/Aggie007/31715.jpg.
9. Start with number 1, the center bolt.
10. I removed the head bolt, ran the tap down to clean out the hole and threads (mark the tap or remember the depth), screwed the stud in to the bottom, and put a washer and nut on. Point of this is to see how much further you will need to thread. I wanted (2) threads about 1/8" of stud showing above each nut when installed.
Tap depth.
http://www.truckblog.com/gallery/Aggie007/31707.jpg
First stud in to see how much further I need to tap.
http://www.truckblog.com/gallery/Aggie007/31706.jpg
How much further I took the tap down.
http://www.truckblog.com/gallery/Aggie007/31720.jpg
I cleaned the hole out with a magnet and a vacuum. You can use air but dont' recommend it because you don't know where the shavings are going to end up.
http://www.truckblog.com/gallery/Aggie007/31714.jpg
USE LOTS OF ARP LUBE!!!! This picture actually shows the wrong side coated but you get the idea. I actually used the ARP lube on both sides, to be sure I got proper torque specs. You want to be smooth and consistent when torque the nuts down.
http://www.truckblog.com/gallery/Aggie007/31713.JPG
You can use loc-tite on the threads going into the block (head) I didn't. It might give you that warm fuzzy feeling to use loc-tite. I torqued the studs down to 95 ft/lbs, then when I was finished with all (26) studs, I went back and torqued them down to 125 ft/lbs.
11. The exhaust side bolts are the long studs. There are six.
Here is a pic of my tap depth before tapping.
http://www.truckblog.com/gallery/Aggie007/31710.jpg
This is how far I could take the tap to, then it seemed like I bottomed out, and I wasn't going to force the tap any further.
http://www.truckblog.com/gallery/Aggie007/31711.jpg
First exhaust stud installed.
http://www.truckblog.com/gallery/Aggie007/31712.jpg
12. Do all (26) studs the same following the sequence above, taking each down to 95 ft/lbs.
13. Once all (26) studs in, re-torque to 125 ft/lbs. I went ahead and retorqued a third time to 130 ft/lbs.
Here are some torque specs for reinstallation.
http://www.truckblog.com/gallery/Aggie007/31717.jpg
http://www.truckblog.com/gallery/Aggie007/31718.jpg
14. Once you are finished with the studs you are ready to put everything back together. Reinstall the rocker lever assemblies and torque the bolts down to 18 ft/lbs.
15. I had to clearance the back of the rocker housing injector harness. Here are some pics, but they didn't turn out very good. First one is how much I need to file or grind down in order to get the injector harness housing to fit flush with the top of the head.
http://www.truckblog.com/gallery/Aggie007/31730.JPG
http://www.truckblog.com/gallery/Aggie007/31731.JPG
16. Reinstall the rocker housing injector harness and torque the (7) 10mm bolts to 18 ft/lbs. Start with the center bolt and work your way out.
17. Reinstall the injector harness nuts. There are (2) 8mm nuts per injector. Be sure you are putting the wires back to correctly and you have gotten the two swapped. Be very careful to not overtighten. Finger tight and another 1/4-1/2 turn is more than enough, 13 in/lbs is the spec.
18. Reinstall the cylinder head cover (6) bolts and torque down to 89 in/lbs and reconnect the breather tubes and you are done. If you removed the breather cover (2) bolts, torque down to 18 ft/lbs.
 11-12-2007, 08:34 AM
#2
Registered User
Thread Starter
Join Date: Jun 2007
Posts: 89
Likes: 0
Received 0 Likes
on
0 Posts
I spoke to an ARP tech on the phone. I had read previously on another thread that it was bad to over tap (thread) the holes, that this was "very bad" but I never got a response to why. I was worried about two of my studs that I had over tapped the holes by a full turn or so. The ARP tech said that it is more important to have 50 to one-hundreths of thread out of each nut and that you cannot over tap so-to-speak. Actually you don't want the stud all the way bottomed out because you don't want to exert an outward force against the block
If you are really hardcore, you can buy the ARP stud cone (insert) washers to center each stud perfectly in the head and protect the holes from galling, instead of using the flat washers. They also give a larger surface area for shear.
If you are really hardcore, you can buy the ARP stud cone (insert) washers to center each stud perfectly in the head and protect the holes from galling, instead of using the flat washers. They also give a larger surface area for shear.
 11-12-2007, 07:13 PM
#7
Registered User
 do not rush the instal take your time and doing it right.I believe no set time limit Mine took two days I was waiting on injectors so no hurry
Trending Topics

 11-12-2007, 07:54 PM
#12
Muted User
Join Date: Jan 2006
Posts: 713
Likes: 0
Received 0 Likes
on
0 Posts
11-13-2007, 07:21 AM
#13
Registered User
Thread Starter
Join Date: Jun 2007
Posts: 89
Likes: 0
Received 0 Likes
on
0 Posts
jrussell,
Thats pretty funny.
Rpainter,
I do appreciate the tap very much. Thank you again. I sent you a PM on the other site to confirm your address before I send it back.
Thats pretty funny.
Rpainter,
I do appreciate the tap very much. Thank you again. I sent you a PM on the other site to confirm your address before I send it back.
11-13-2007, 04:58 PM
#14
Registered User
