
*REVISED* Homemade Air intake, The "whistler" V 2.0
 03-19-2007, 10:53 PM
#1
Registered User
Thread Starter
Join Date: Oct 2005
Location: Wisconsin
Posts: 684
Likes: 0
Received 0 Likes
on
0 Posts
*REVISED* Homemade Air intake, The "whistler" V 2.0
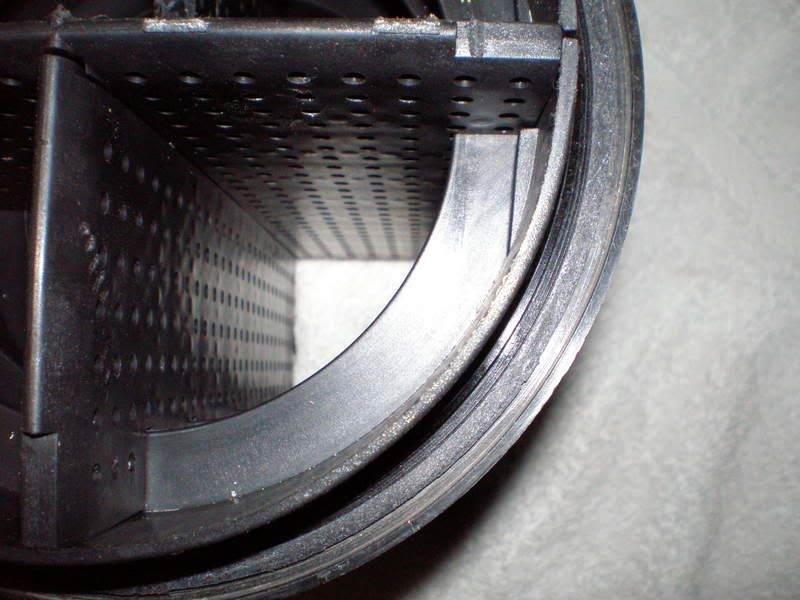
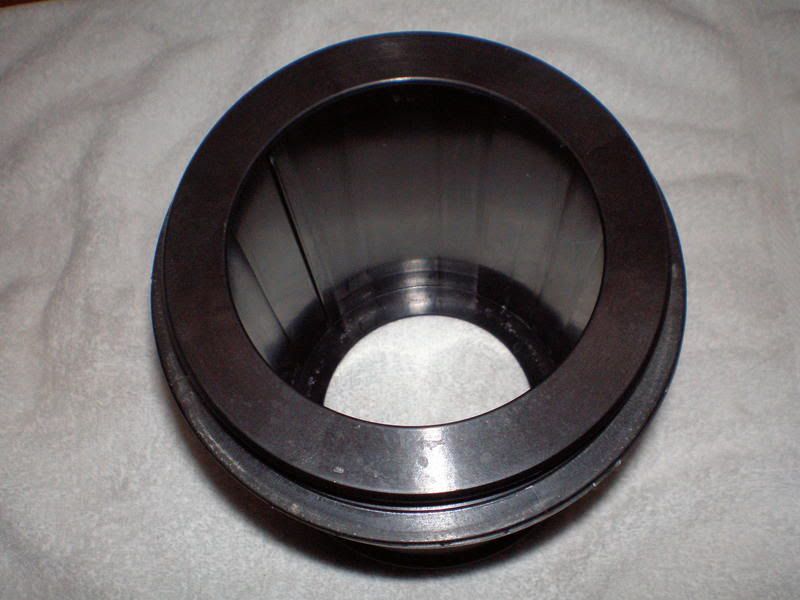
After reading, thinking, admiring, and re-reading the "Homemade 6" Air intake, AKA the "whistler", tech write-up" thread I decided to pull mine apart!!!!! That being said, I began by pulling the lower (pictured below on the left) "L" bow off and removed the air deflector inside (a whiteish/clearish plastic). I tried to pull it out with a pliers and that was not going to happen, so I twisted it until I was breaking it into pieces. This was really the only option for removal because it is held in by a "nub" on each end and the plastic grips very well onto the "L" bow.
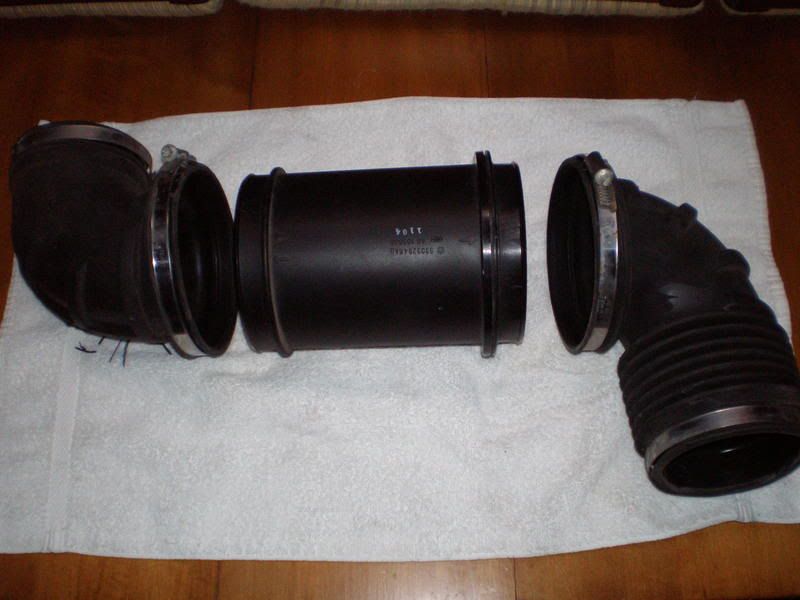
Next, you can see where I used a flat head screw driver as a "pry bar" to seperate the top end of the intermediate tube (this end only has 1 arrow to line up the upper "L").
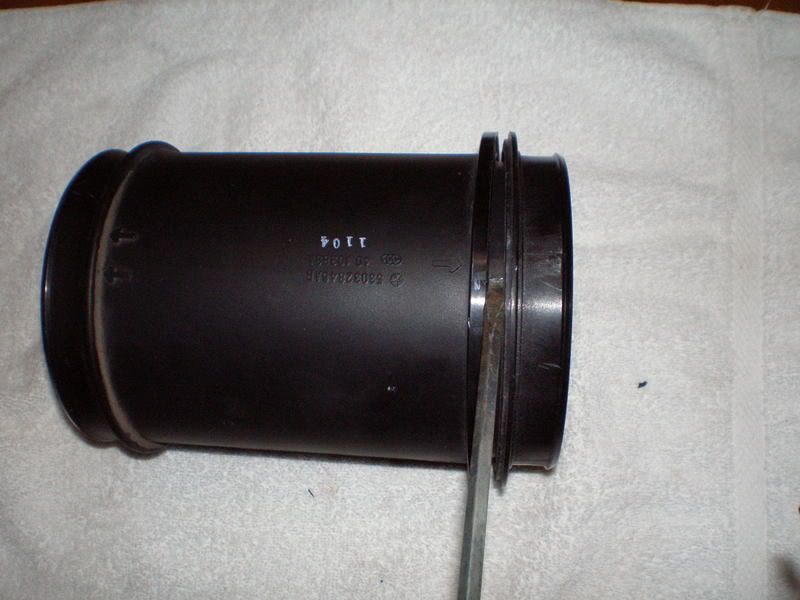
Carefully work your way all the way around the tube only moving the screw driver about 1/4 inch at a time. This way you will be sure not to crack or break either piece that you are seperating. It will sound like it is cracking but it is just the apoxy coming apart.
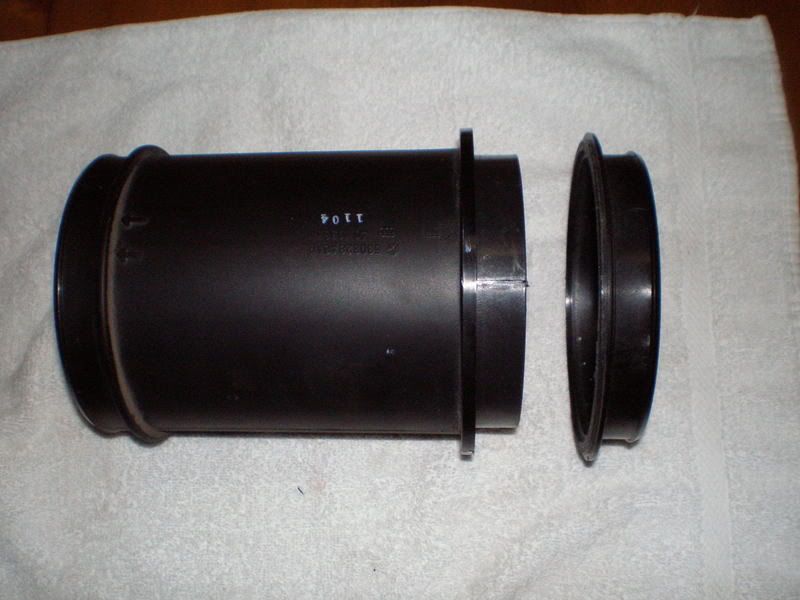
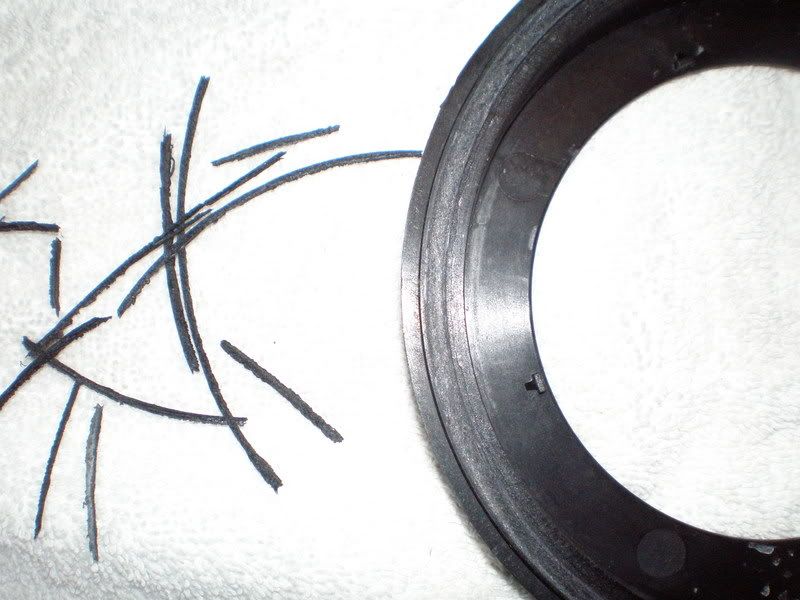
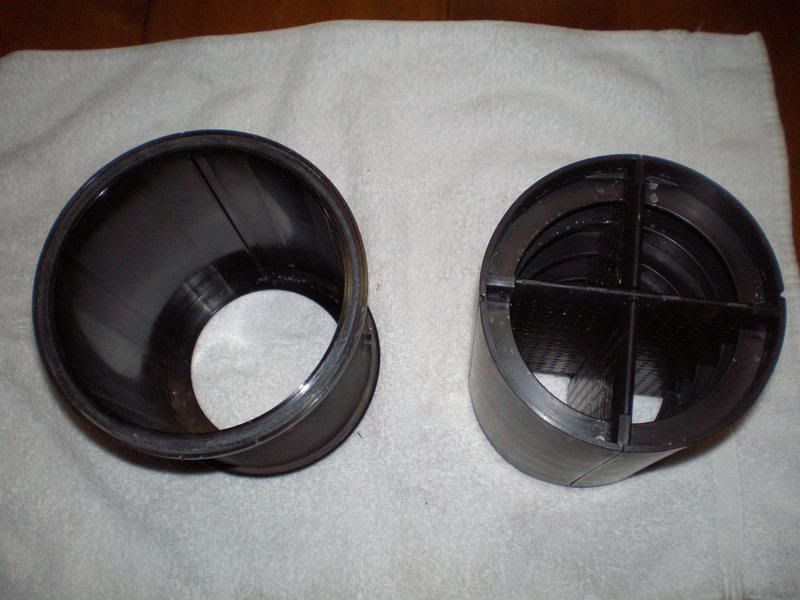
Once fully apart I used the screwdriver to remove ALL of the old epoxy on both halves, preparing it for re-epoxying and cleaning it up. You can see the chunks of old epoxy that I removed.
The next step was to slide the baffle out of the tube. Just pull, and it will slide right out.
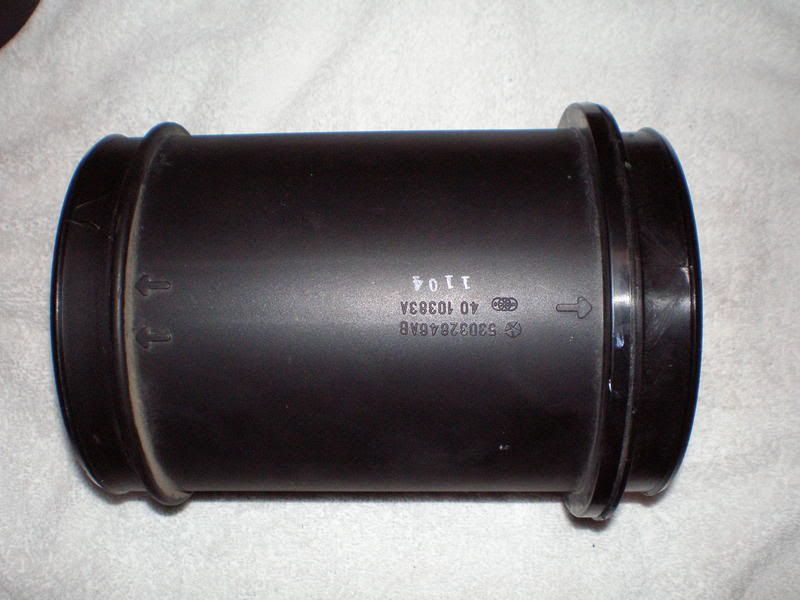
Once the baffle is removed you are ready to epoxy the end back on to the tube!!!!!!!!!!!!!!!!!!!!!!!!!!!! I used a high strength 5 minute epoxy from a local shop that was only $2. (this was my ONLY expense for this project) I also got some black silicone out of the tool box and coated the outside of the newly epoxied area just for peace of mind that it would not leak!!!
The last picture is showing the intermediate tube with the baffle removed!!!! PROJECT COMPLETE!!!!!!!!!!!!!!!!!!!!!!!!!!!!!!!!!! Under 2 hours and I was back on the road enjoying the LOUD whistle!!!!!!!!!!!!!!!!!!!!!!
TOTAL PROJECT TIME: 1.5 Hours
TOTAL PROJECT COST: $2
LOUD WHISTLE: PRICELESS
Next, you can see where I used a flat head screw driver as a "pry bar" to seperate the top end of the intermediate tube (this end only has 1 arrow to line up the upper "L").
Carefully work your way all the way around the tube only moving the screw driver about 1/4 inch at a time. This way you will be sure not to crack or break either piece that you are seperating. It will sound like it is cracking but it is just the apoxy coming apart.
Once fully apart I used the screwdriver to remove ALL of the old epoxy on both halves, preparing it for re-epoxying and cleaning it up. You can see the chunks of old epoxy that I removed.
The next step was to slide the baffle out of the tube. Just pull, and it will slide right out.
Once the baffle is removed you are ready to epoxy the end back on to the tube!!!!!!!!!!!!!!!!!!!!!!!!!!!! I used a high strength 5 minute epoxy from a local shop that was only $2. (this was my ONLY expense for this project) I also got some black silicone out of the tool box and coated the outside of the newly epoxied area just for peace of mind that it would not leak!!!
The last picture is showing the intermediate tube with the baffle removed!!!! PROJECT COMPLETE!!!!!!!!!!!!!!!!!!!!!!!!!!!!!!!!!! Under 2 hours and I was back on the road enjoying the LOUD whistle!!!!!!!!!!!!!!!!!!!!!!
TOTAL PROJECT TIME: 1.5 Hours
TOTAL PROJECT COST: $2
LOUD WHISTLE: PRICELESS
 03-19-2007, 11:03 PM
#2
Registered User
Join Date: Oct 2006
Location: Bridgeport Tx
Posts: 165
Likes: 0
Received 0 Likes
on
0 Posts
i did everything you did besides that big baffle piece in the middle because i couldnt figur out how to remove it. Now that you showed pics can you tell any difference with hp or anything since you done that?
03-19-2007, 11:09 PM
#3
Dude that's nothing like my intake and it's defiantly not V 2.0 of my whistler intake
this is just a intake tube gutting thread
but it is a cheap and effective mod
this should be called "***700's intake tube gutting V 1.0"
nice job on the pics
this is just a intake tube gutting thread
but it is a cheap and effective mod
this should be called "***700's intake tube gutting V 1.0"
nice job on the pics

 Cummins does not spend money with out a reason,
03-19-2007, 11:41 PM
Cummins does not spend money with out a reason,
03-19-2007, 11:41 PM
#5
Banned
Join Date: Dec 2005
Location: Twin Falls, Idaho
Posts: 5,194
Likes: 0
Received 0 Likes
on
0 Posts
Just my .02
Shane
03-20-2007, 01:54 AM
#6
don't get me wrong you did a great job on this write up.. but you made it sound like it is a new version of what I did...
I didn't even know the intake muffler came apart like that I thought you had to jack hammer that stuff out. I'm sure this will be very helpful to many people
I didn't even know the intake muffler came apart like that I thought you had to jack hammer that stuff out.
I'm sure this will be very helpful to many people
03-20-2007, 05:41 AM
#7
Chapter President

Join Date: Oct 2005
Location: A state of Missery (Missouri)
Posts: 1,763
Likes: 0
Received 0 Likes
on
0 Posts
Good write up. And pictures tooooo. I did the same thing to mine just a few days ago. Except the plastic fins in the elbo. Took about 30min. Yes it does whistle a little bit more because the baffles in the tube are there to quite the turbo sound.
Trending Topics
03-20-2007, 05:46 AM
#8
Registered User
Join Date: Aug 2006
Location: Raynham,MA
Posts: 865
Likes: 0
Received 0 Likes
on
0 Posts
Bob, Can you or anyone tell me ? Are you talking about the white vanes in the rubber elbow, just before the turbo? Should they stay in? I have the Brute Force and was thinking if I should put them back in.
03-20-2007, 08:15 AM
#9
Banned
Join Date: Dec 2005
Location: Twin Falls, Idaho
Posts: 5,194
Likes: 0
Received 0 Likes
on
0 Posts
Shane
03-20-2007, 09:05 AM
#10
Registered User
Thread Starter
Join Date: Oct 2005
Location: Wisconsin
Posts: 684
Likes: 0
Received 0 Likes
on
0 Posts
Maybe with a completely stock intake you are right on your CFM numbers!!!!!!!!!!!!!!!!!!! With either an air filter like 53 is suggesting, a "ported" air box or any other aftermarket filter or box all the vanes are doing is restricting air flow by up to 200 CFM!!!
don't get me wrong you did a great job on this write up.. but you made it sound like it is a new version of what I did...
I didn't even know the intake muffler came apart like that I thought you had to jack hammer that stuff out. I'm sure this will be very helpful to many people
I didn't even know the intake muffler came apart like that I thought you had to jack hammer that stuff out.
I'm sure this will be very helpful to many peopleI did not mean to infringe on your "custom" intake. I was actually going to order the parts that you suggest to make the whistler. After ripping mine apart I decide to be a cheapa@# and modify the stock one.
03-20-2007, 05:50 PM
#14
Registered User

Join Date: Sep 2006
Posts: 551
Likes: 0
Received 0 Likes
on
0 Posts
I did a similar thing, however I left the white and black vanes in place. I only removed the concentric rings. It seemed to me that the black and white vanes were promoting laminar flow into the turbo. I wonder if any Cummins Engineers ever chime in here? It would be interesting to hear their perspective.