
last ditch effort: dropping the transfer case
 11-15-2006, 05:11 PM
#1
Registered User
Thread Starter
Join Date: Nov 2004
Location: northwestern PA
Posts: 656
Likes: 0
Received 0 Likes
on
0 Posts
last ditch effort: dropping the transfer case
In case anyone has been following my saga for the last two and a half months, I had my transmission mildly built and it has done nothing but leak ever since. Replaced everything short of the actual transmission internals: overdrive housing, transfer case, all shafts, seals and bearings. Still has a small leak at the bottom of where the transfer case and transmission mate up.
If anyone with a shop manual would be so kind as to detail how the transfer case comes off, I would appreciate it. Plan is to smear orange RTV (same stuff used to join the transfer case halves) all over the mating surfaces. I requested the mechanic who has dropped the transfer case the last 10 times do this, but he didn't. Nothing else has worked. If this doesn't work then maybe I can make arrangements to cut my losses and trade my DTT parts so I can trade the truck for one with a 6 speed.
If anyone with a shop manual would be so kind as to detail how the transfer case comes off, I would appreciate it. Plan is to smear orange RTV (same stuff used to join the transfer case halves) all over the mating surfaces. I requested the mechanic who has dropped the transfer case the last 10 times do this, but he didn't. Nothing else has worked. If this doesn't work then maybe I can make arrangements to cut my losses and trade my DTT parts so I can trade the truck for one with a 6 speed.
 11-16-2006, 01:17 AM
#2
Registered User
Join Date: Jan 2002
Location: Southern, Indiana
Posts: 5,352
Likes: 0
Received 0 Likes
on
0 Posts
The transfer case is simple to remove.
Remove the selector arm (this is straightforward). Mark location of lever with paint marker on shaft.
Unplug 4x4 sensor from transfer case.
After removing driveshaft remove the 6 nuts that secure the transfer case to your transmission.
Make sure to have the transfer case supporter and it will simply slide off.
11-16-2006, 07:37 AM
#3
Registered User
I'll add that RTV is not the best sealer for this application. If there is any oil residue on the surfaces the RTV will fail.
Two machined surfaces should have anaerobic gasket maker.
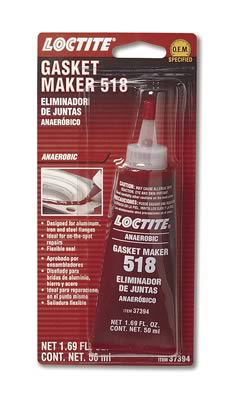
Two machined surfaces should have anaerobic gasket maker.
11-16-2006, 09:08 AM
#4
Registered User
Thread Starter
Join Date: Nov 2004
Location: northwestern PA
Posts: 656
Likes: 0
Received 0 Likes
on
0 Posts
The transfer case is simple to remove.
Remove the selector arm (this is straightforward). Mark location of lever with paint marker on shaft.
Unplug 4x4 sensor from transfer case.
After removing driveshaft remove the 6 nuts that secure the transfer case to your transmission.
Make sure to have the transfer case supporter and it will simply slide off.
Remove the selector arm (this is straightforward). Mark location of lever with paint marker on shaft.
Unplug 4x4 sensor from transfer case.
After removing driveshaft remove the 6 nuts that secure the transfer case to your transmission.
Make sure to have the transfer case supporter and it will simply slide off.
I call Chrysler, they're sending a factory tech, maybe 11 times will be a charm. One last chance.
 11-16-2006, 10:48 PM
#7
Registered User
Join Date: Jan 2002
Location: Southern, Indiana
Posts: 5,352
Likes: 0
Received 0 Likes
on
0 Posts
Unbolt rear driveshaft from rear yoke 4-15mm bolts.
Unbolt carrier bearing from above 2 bolts.
Driveshaft will slide out of the transfer case. Be prepared it isnt light.
Unbolt front driveshaft (forgot to mention in previous thread).
The front driveshaft uses torx bolts at the front coupling.
I had to use a small torx bit (MAKE SURE ITS THE EXACT SIZE! OR YOU WILL STRIP THEM OUT!)
Then I had to use a 1/4" extension so it would clear the u joint yokes.
Trending Topics
11-22-2006, 05:55 PM
#8
Registered User
Thread Starter
Join Date: Nov 2004
Location: northwestern PA
Posts: 656
Likes: 0
Received 0 Likes
on
0 Posts
Haven't gotten around to dropping it yet, I might have mentioned a factory tech is coming in on Monday. ATF+4 is pouring out and something is vibrating. Not good.
11-29-2006, 03:36 PM
#9
Registered User
Thread Starter
Join Date: Nov 2004
Location: northwestern PA
Posts: 656
Likes: 0
Received 0 Likes
on
0 Posts
11-29-2006, 05:19 PM
#10
Registered User

Join Date: Jan 2004
Location: Silverton, Or
Posts: 41
Likes: 0
Received 0 Likes
on
0 Posts
BTW, I believe the T-case is lubed by atf too. Maybe its not your trans at all... Are you noticing a serious drop in trans fluid? How about the T-case? But you said you had the T-case replaced. Hmmm. Let us know what happens.
11-29-2006, 09:46 PM
#11
Registered User

Join Date: Dec 2004
Location: northern indiana
Posts: 572
Likes: 0
Received 0 Likes
on
0 Posts
One trick I always do is to with RTV sealer is to only tighten bolts just above finger tight. And wait about 10 minutes or so. Then tighten them on down. This gives the RTV a chance to "set up" a little before being squashed out if you tighten them while the stuff is still wet. It has always worked for me anyhow, but with a transfer case you'll notice the bottom will be super tight due to the weight just hanging there, so you may want to support the case well until the stuff sets up so it will not be all squashed out before you even tighten the bolts as the bottom edge is the one giving you issues anyway. You may want to look very, very close at the surrounding casting on the case and the tranny cause there may be a small crack somewhere causing the leak. Who knows the guy installing it those other times could have "dropped" it and thought it was okay. Or there could be a burr on the mating surfaces if someone tried to pry the case/trans apart.
11-30-2006, 07:53 AM
#12
Registered User
Thread Starter
Join Date: Nov 2004
Location: northwestern PA
Posts: 656
Likes: 0
Received 0 Likes
on
0 Posts
I didn't have to remove the case the whole way, just separated it enough to get sealant between the surfaces.
Observations: rear driveshaft is heavy. One of the bolts on the carrier bearing was stripped, good thing I had a torch and new bolts. Front driveshaft bolts are an engineering marvel, I have never seen a T40 bit designed to fit that close to the u-joint. Had to jack the front end up to get enough angle to get the bit in sideways.
I cleaned everything off and sealed it up and stuck it back together. I also drilled a vent hole in the top side of the overdrive as instructed by the factory rep. Stuck in a brass fitting and ran a plastic vent line up and over the torque convertor.
There is a very small puddle on my garage floor this morning, hoping it is just residual fluid draining off the crossmember. Hate to say it but I almost feel bad for the guy who had to do this 10 times. Almost

Thread
Thread Starter
Forum
Replies
Last Post
dezl-andy
2nd Gen. Dodge Ram - No Drivetrain
8
09-14-2009 05:47 PM
Rod_Montana
3rd Gen High Performance and Accessories (5.9L Only)
2
01-20-2008 02:27 AM
Rod_Montana
3rd Gen High Performance and Accessories (5.9L Only)
7
01-10-2008 02:59 PM
reb0957
3rd Generation Ram - Non Drivetrain - All Years
16
03-21-2007 11:56 AM