What did you do to your Gen 1 today?
 07-24-2015, 09:48 AM
#1156
Registered User


 07-25-2015, 06:50 AM
#1158
Administrator

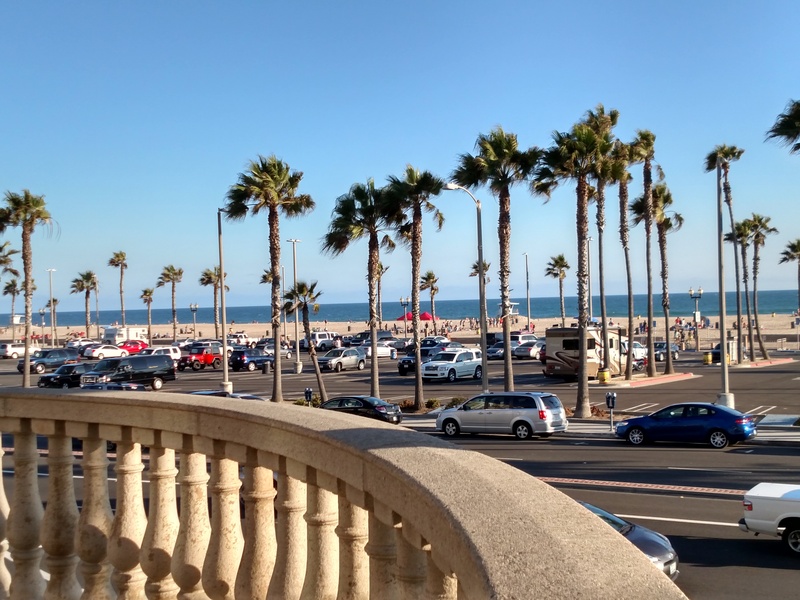
Our Wedding Anniversary was on July 20th and we went to the Hillton Waterfront in Huntington Beach for the day.
This is from the front of the hotel looking over Pacific Coast Highway

This is looking at the Huntington Pier, Dukes is at the front and Ruby's at the end, both good food but Dukes is much more expensive.

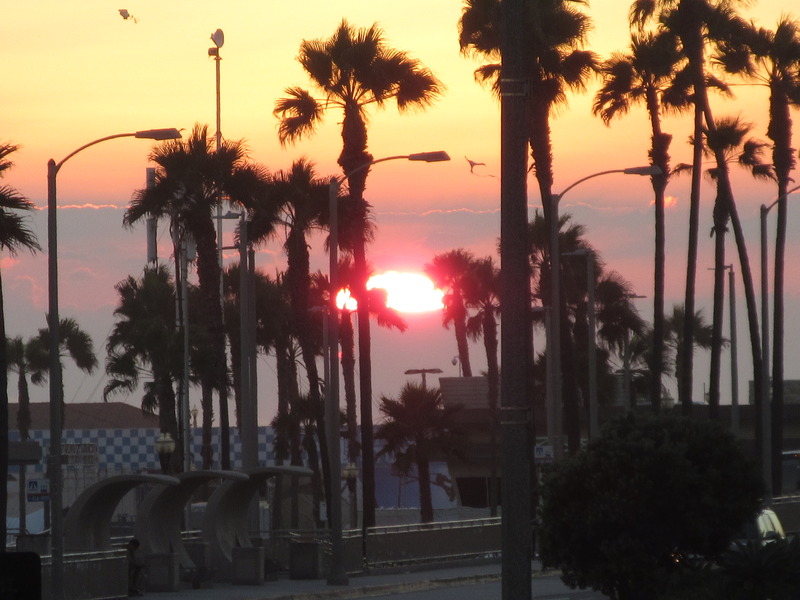
The perfect ending to a perfect day.
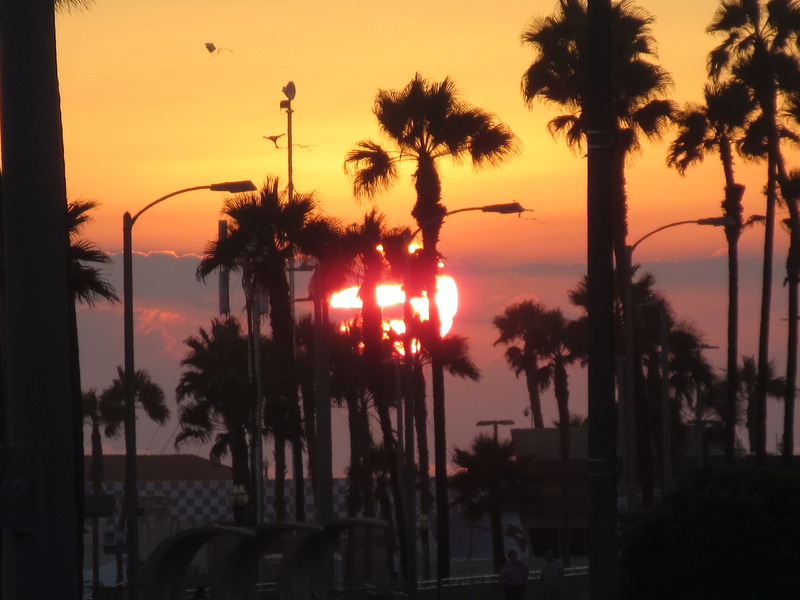
I just love sunsets.
This weekend Huntington Beach will be crawling with hundreds of thousands surfers for the annual Surfing Championships, everything will be televised, lots of bikinis will be on display.
A glimpse of Southern California weather.
Jim
This is from the front of the hotel looking over Pacific Coast Highway


This is looking at the Huntington Pier, Dukes is at the front and Ruby's at the end, both good food but Dukes is much more expensive.

The perfect ending to a perfect day.

I just love sunsets.

This weekend Huntington Beach will be crawling with hundreds of thousands surfers for the annual Surfing Championships, everything will be televised, lots of bikinis will be on display.
A glimpse of Southern California weather.
Jim
 07-25-2015, 06:25 PM
#1161
Registered User
Join Date: Dec 2010
Location: Land of the Toxic Avenger
Posts: 6,789
Received 1,647 Likes
on
1,120 Posts
07-25-2015, 07:36 PM
#1162
Administrator
Hey guys,
You are right about the brain turning to mush around the 28th year but I do not remember this well.
It has actually been 41 years and yes to the same person, that is always the next question.
We were married back when there were a lot of hippies, air was dirty, love was free but the gas was rationed, go figure, but you could get into Disneyland for under $20.00.
Rent was $115.00 month minimum wage was $2.02 and a brand new truck was around $3000.00.
Enjoy being young and keep dumb things to a minimum, life really sneaks up on you when you aren't looking.
Southern California really does have the perfect weather pretty much year round, where I live I am 30 miles from the beach, 30 miles to the snow, 30 miles from Los Angeles and 30 miles from a desert.
Jim
07-26-2015, 03:32 PM
#1163
Registered User
I almost attempted to build a Jim Lane relay and resistor harness for my truck so that I could run LEDs in the front and side marker light positions. After examining the wiring physically and then via wiring schematics in my FSM, I found out that it'll take a bit more work than it did for Mr. Lane on his truck.
In his write-up, Mr. Lane tapped into a 4-way connector for the front lighting system found behind the core support. This 4-way connector does not exist in my truck. I pulled the split loom apart to expose the harness and traced it back to the firewall and did not find this connector. Opened up the FSM to the wiring diagrams and discovered each wire runs through the bulkhead connector individually.
According to the 1990 FSM, this 4-way connector was only present on gas-engine trucks. Dodge must have made another yearly change and began to use this connector in the following year model trucks. Luckily, I hadn't yet bought the relays, resistors, terminals and other parts I needed to build the harness. I saved this project for another day.
However, I can say that I've discovered how the front and side markers function as running lights and then turn signal lights and flash the way they do when the turn signal switch is actuated. At least, I think I understand it. Definitely a complicated way of achieving this. I don't know why they had to flash alternately as opposed to simply flashing simultaneously but, it is what it is.
If my thinking is correct, I can take the TAN (right side) and LT GRN (left side) wires of the side markers and ground them with the BLK (ground) wire of the front marker lights. Doing so would turn the side marker into a running light only and still allow the front marker to flash as designed. Being a dual intensity bulb, the power from the turn signal flasher and switch still comes through the BRN wire into the bulb socket, through the brighter filament and then the ground. I tried to understand the wiring diagrams as best I could and it seems like it should work. Granted, I'd probably still need an inline resistor in the front wiring. Unless, these LED flashers have a small built-in resistor that make them compatible with LEDs?
First things first, I'm going to add the 4-way connectors to the front lighting system as shown in the wiring diagrams. Yesterday, I ordered a 1500pc. Weatherpack connector kit. Should be able to make things pretty and weather-tight
What say yous??
07-26-2015, 03:40 PM
#1164
Registered User
Jimbo....I did the headlight relays on my crewcab, and did not have to tie into any 4 way connector. All the triggers come off the existing headlight connector.
I tried to make the Canadian Day time running lights work, but could not. SO I disconnected the DRL module and hooked it up US style.
I tried to make the Canadian Day time running lights work, but could not. SO I disconnected the DRL module and hooked it up US style.
07-26-2015, 04:41 PM
#1165
Registered User
I guess I could have specified a bit more. This is in regards to the just the front parking/turn signal and side marker lights. The relay and resistor harness that Jim built were to allow the system to switch polarity (if that's exactly what it does) and so the flashers function as designed.
07-26-2015, 05:29 PM
#1166
Registered User
Join Date: Dec 2010
Location: Land of the Toxic Avenger
Posts: 6,789
Received 1,647 Likes
on
1,120 Posts
Fwiw
I believe the turn signal and side marker light blink alternatively, so that there is always one bulb lit up, as a vehicle is indicating a turn. Just keeps the vehicle visible at a distance with amber lamp on, vs a momentary "lights out" condition
No 4 way plug on mine
I believe the turn signal and side marker light blink alternatively, so that there is always one bulb lit up, as a vehicle is indicating a turn. Just keeps the vehicle visible at a distance with amber lamp on, vs a momentary "lights out" condition
No 4 way plug on mine
07-26-2015, 07:13 PM
#1167
Administrator
When you remove the lower parking/ turn signal lamp, how / where does it connect into the trucks harness,
What connector is this?
This is the connector I used.
I am sure there was some federal safety issue that led to the lighting, I remember these back to the early 70's, my Mach-1 had them.
Jim
What connector is this?
This is the connector I used.
I am sure there was some federal safety issue that led to the lighting, I remember these back to the early 70's, my Mach-1 had them.
Jim
07-26-2015, 08:45 PM
#1168
Registered User
The side marker is connected between the parking/clearance lamp circuit and the turn signal circuit.
When the parking lamps are off, and the turn signal is on, the side marker gets 12V from the turn signal, and is grounded through all the other lamps in the parking light circuit in parallel, which looks like a wire to it.
When the parking lamps are on, the the turn signal is off, the side marker gets 12V from the parking light circuit, and is grounded through the turn signal filament, which is much heavier and looks like a wire to it.
When the parking lamps are on, and the turn signal is on, both wires to the side marker gets 12V from both circuits, and thus is out because there is no voltage across it.
The reason that LED's don't work there is because the current goes through the lamp in different directions depending on the circumstances. LED's are polarity sensitive.
The easiest fix is to wire a bridge rectifier into the side marker lamp wiring. This device has 4 terminals. Connect the + to the LED +, the - to the LED -, and the other two, marked ~ to the wires that originally went to the lamp. No matter which way the power is coming at it, the bridge rectifier steers it to the LED in the right polarity.
The part is a few bucks at Radio Gyp, and pennies in quantity from China.
The following users liked this post:
NJTman (11-10-2017)
07-27-2015, 06:29 AM
#1169
Registered User
Join Date: Dec 2010
Location: Land of the Toxic Avenger
Posts: 6,789
Received 1,647 Likes
on
1,120 Posts
Working on the Doodge yesterday..
Pulled the radiator. After 23 years, I figured it would use some "flushing". Taking the radiator to the specialists today...
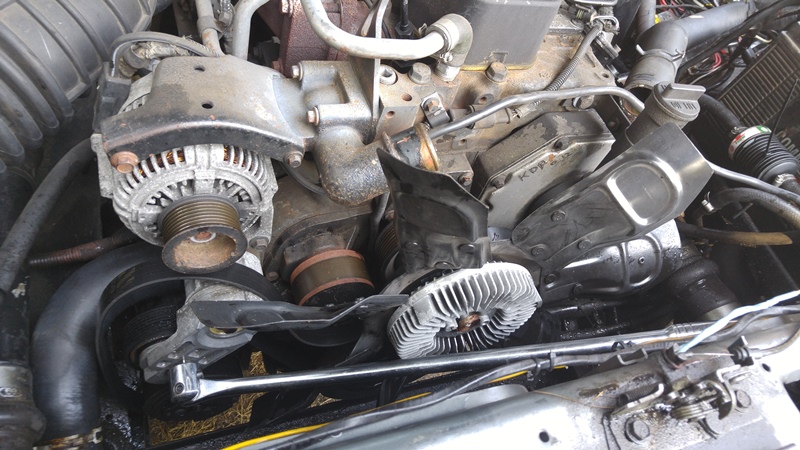
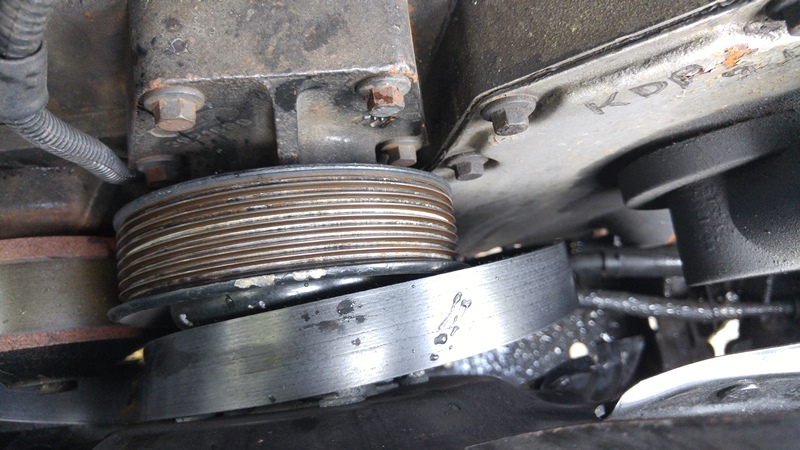
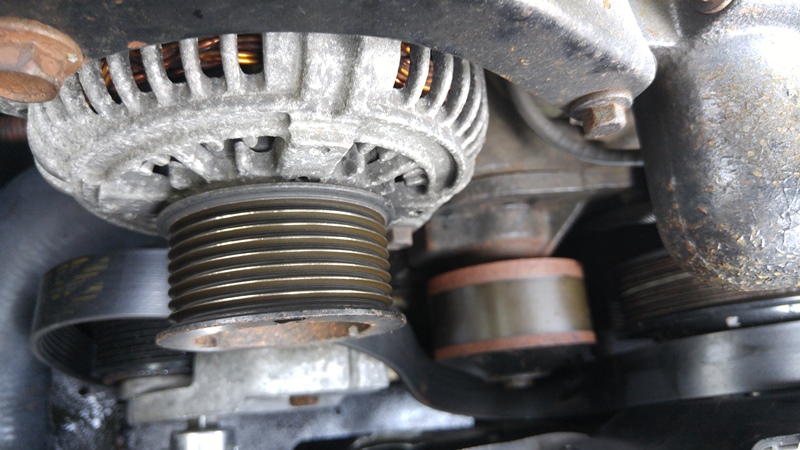
While in there, I figured I'd try to figure out the "squeaky belt" issue I've always had. J. Martin suggested the pullies were worn out, and to inspect to see whether or not they're shiny all the way in the bottom of the grooves. Well, I guess I have to keep looking...
Pulled the radiator. After 23 years, I figured it would use some "flushing". Taking the radiator to the specialists today...

While in there, I figured I'd try to figure out the "squeaky belt" issue I've always had. J. Martin suggested the pullies were worn out, and to inspect to see whether or not they're shiny all the way in the bottom of the grooves. Well, I guess I have to keep looking...


 07-27-2015, 06:33 AM
#1170
Registered User
Join Date: Dec 2010
Location: Land of the Toxic Avenger
Posts: 6,789
Received 1,647 Likes
on
1,120 Posts
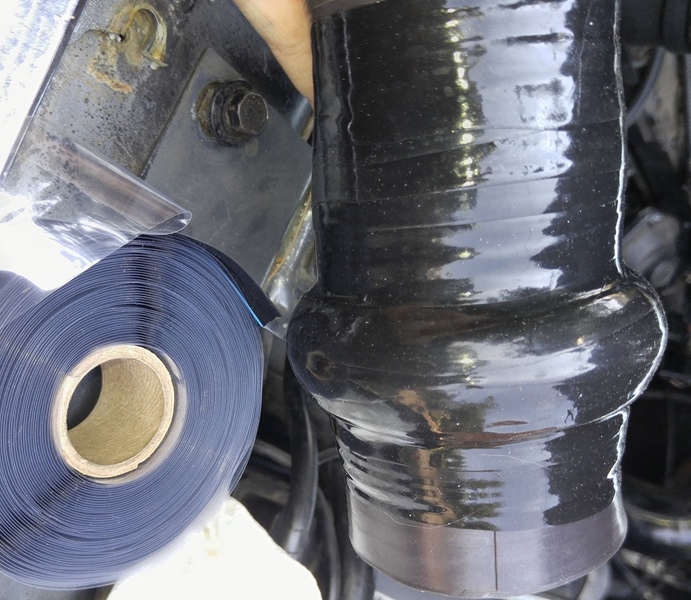
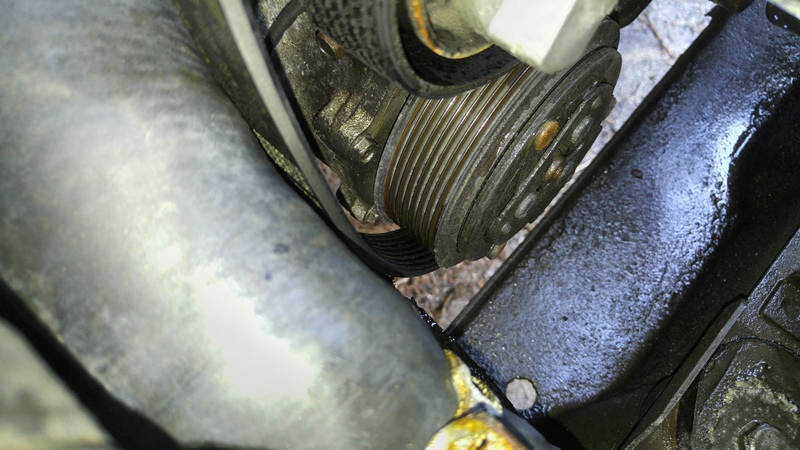
so, taking the radiator out, I inspect a few things such as the turbo IC Boots. Well, after 23 years, they're beginning to show signs of failure. I guess I have to look for new boots, but in the meantime, I used a self vulcanizing silicone wrap Bob VA told me about. This will extend the time I have to look for the correct boots, as no one makes the long ones anymore.