W250 frame off restoration
 01-23-2020, 07:58 AM
#31
Registered User
Thread Starter
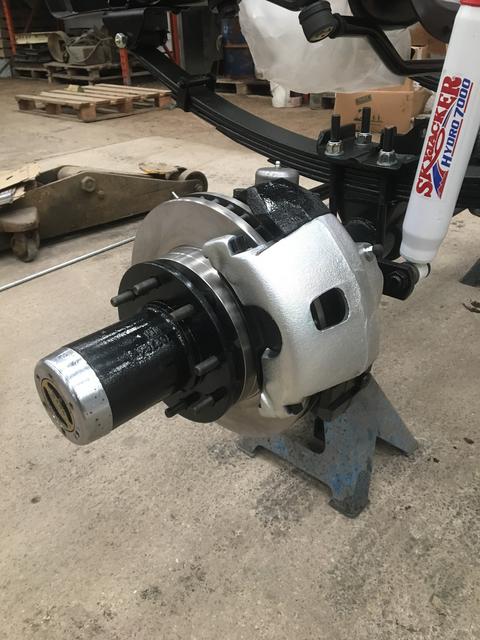
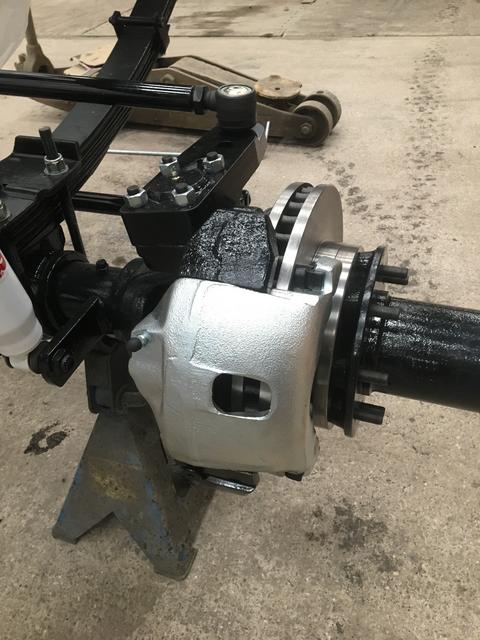
I'd bought a pair of new front calipers so I fitted them with some new pads.
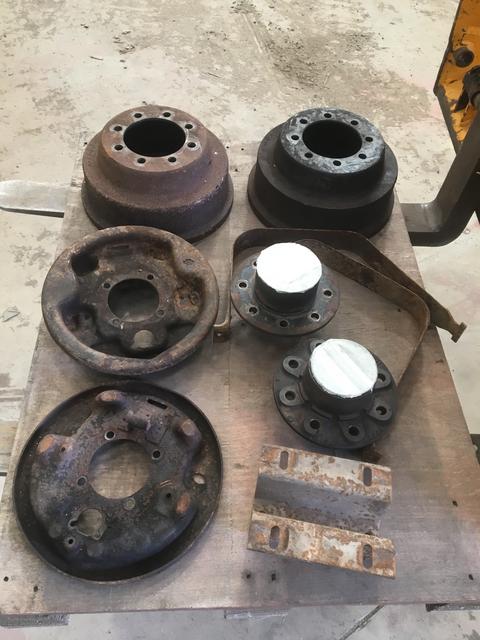
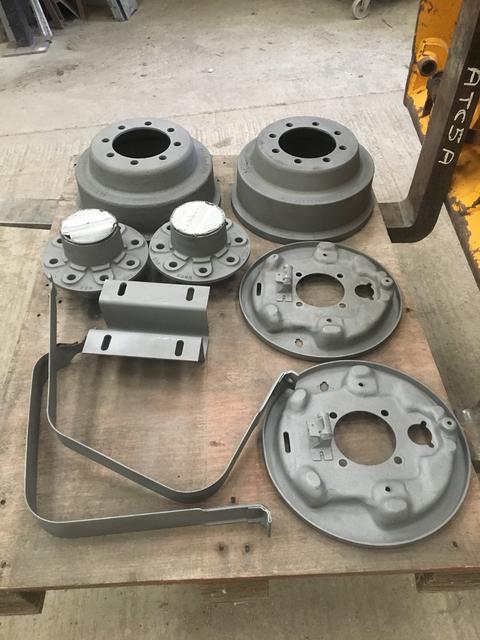
I did what will hopefully be my last batch of shot blasting truck parts, I love working with blasted parts but hate doing the blasting!
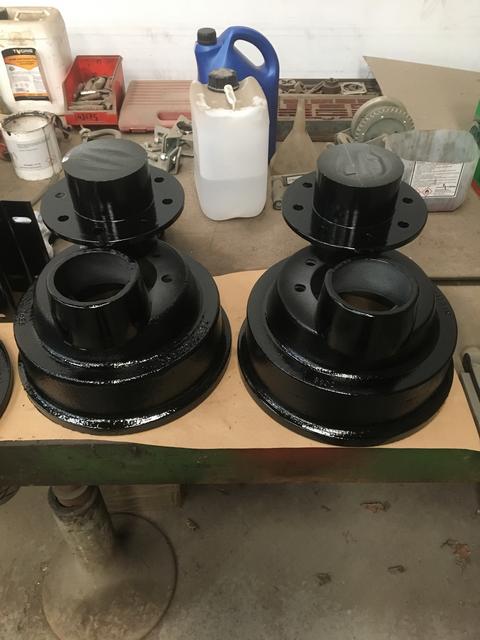
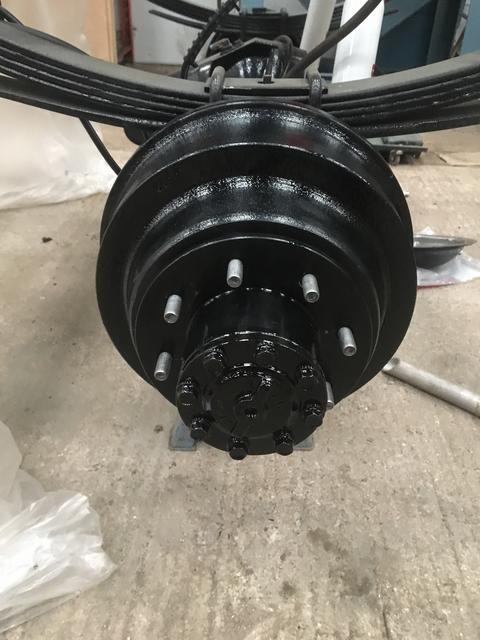
You might notice that I've blasted and painted my old drums, I think they are the only serviceable part I'm going to reuse.
This isn't by choice, but a number of my parts I ordered turned out to be wrong. I'm re-ordering everything but drums, mine seem to have had little use and have next to no lip inside them.
I did what will hopefully be my last batch of shot blasting truck parts, I love working with blasted parts but hate doing the blasting!
You might notice that I've blasted and painted my old drums, I think they are the only serviceable part I'm going to reuse.
This isn't by choice, but a number of my parts I ordered turned out to be wrong. I'm re-ordering everything but drums, mine seem to have had little use and have next to no lip inside them.
 01-23-2020, 08:00 AM
#32
Registered User
Thread Starter
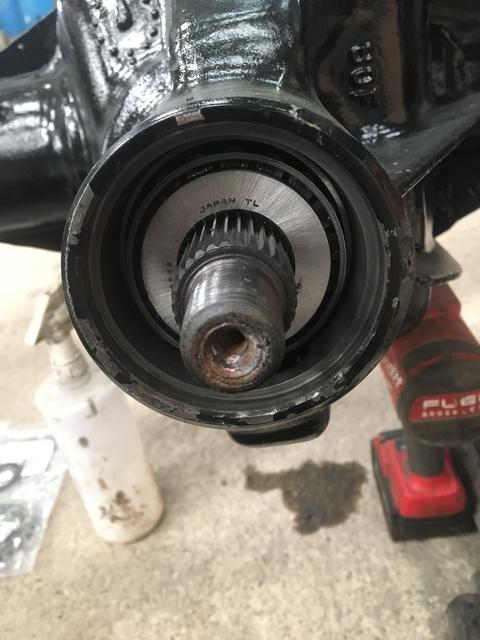
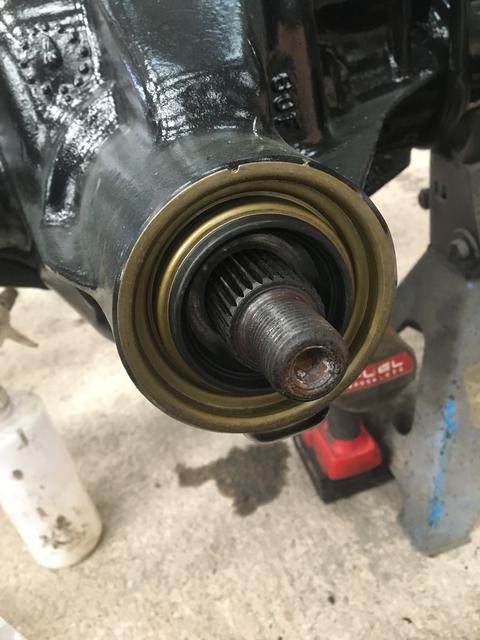
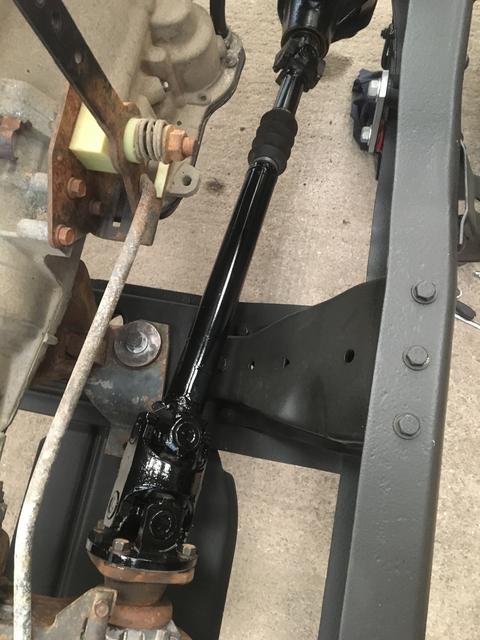
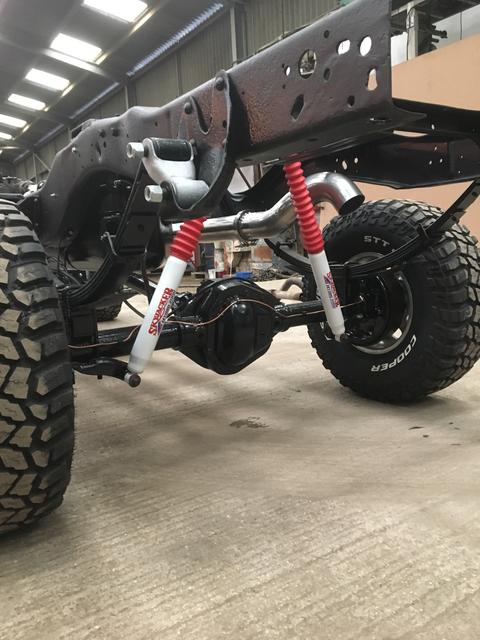
New pinion seal in the Dana 60
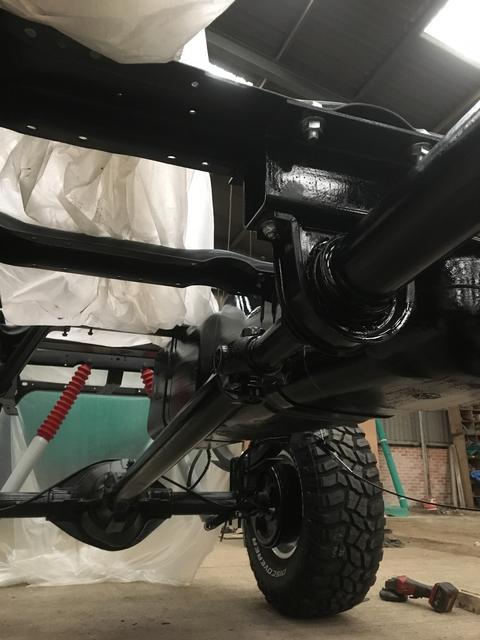
I got the engine, trans and transfer box back in on new mounts. This was a nice milestone to hit.
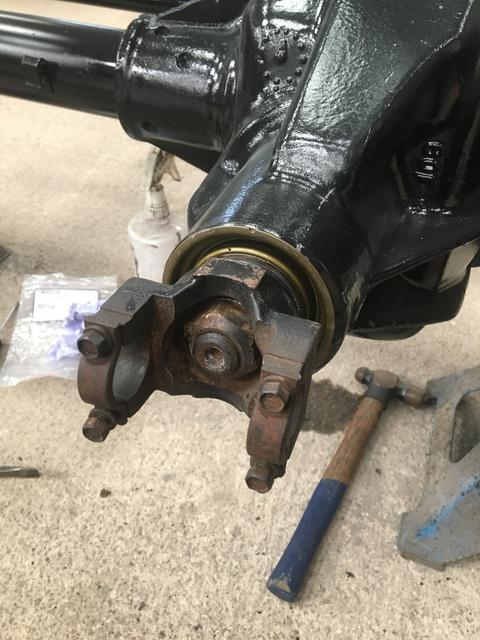
Painted the front shaft up and fitted 3 new UJ's
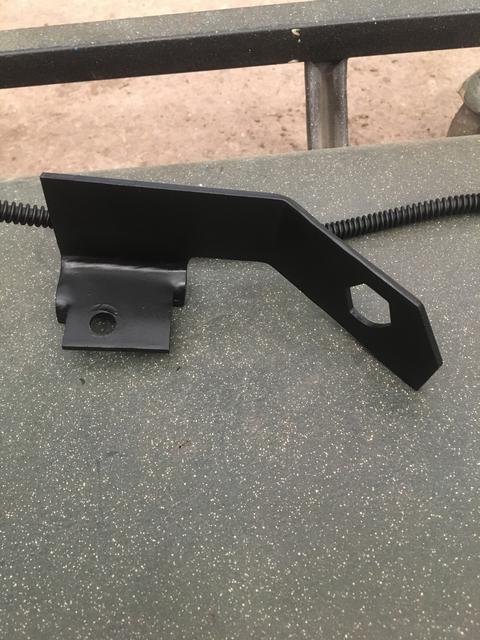
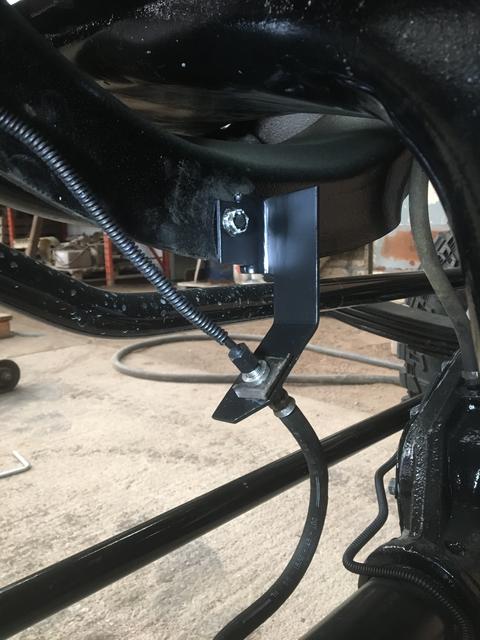
One thing I'd overlooked when parts ordering is the extended brake hoses I would need because of my lift.
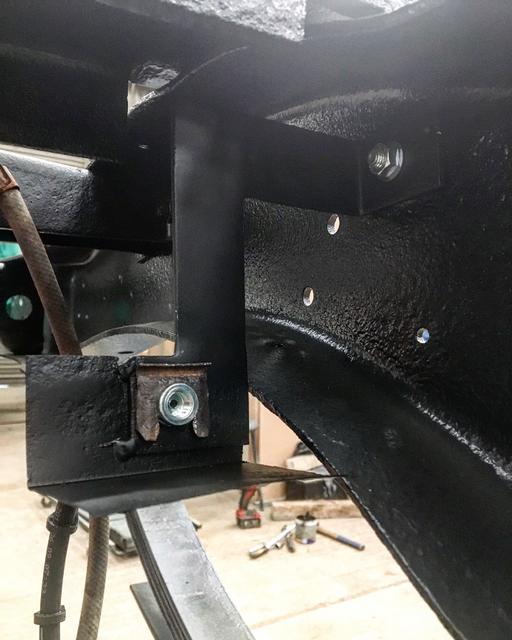
I wasn't willing to wait for these so I modified the front bracket to extend it 4" so I could use a standard hose.
I got the engine, trans and transfer box back in on new mounts. This was a nice milestone to hit.
Painted the front shaft up and fitted 3 new UJ's
One thing I'd overlooked when parts ordering is the extended brake hoses I would need because of my lift.
I wasn't willing to wait for these so I modified the front bracket to extend it 4" so I could use a standard hose.
The following users liked this post:
12v_IH (03-27-2022)
01-23-2020, 08:02 AM
#33
Registered User
Thread Starter
There was a few parts I'd forgot to order that were really holding me up and I couldn't wait 2 months to get them shipped over so very nice member on the cummins forum offered to help me. I made a few orders and shipped them all to him, he re-boxed and air mailed them all over to me so I could carry on.
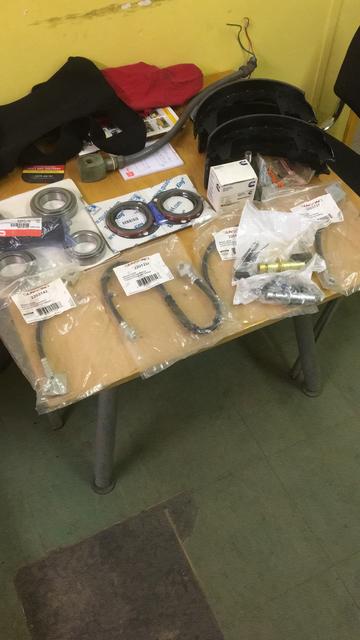
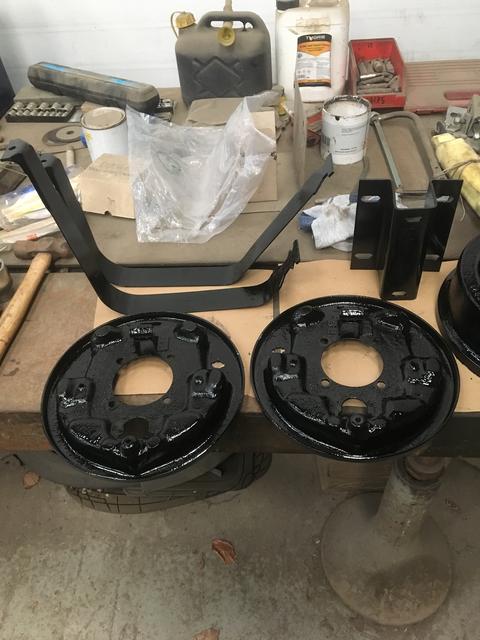
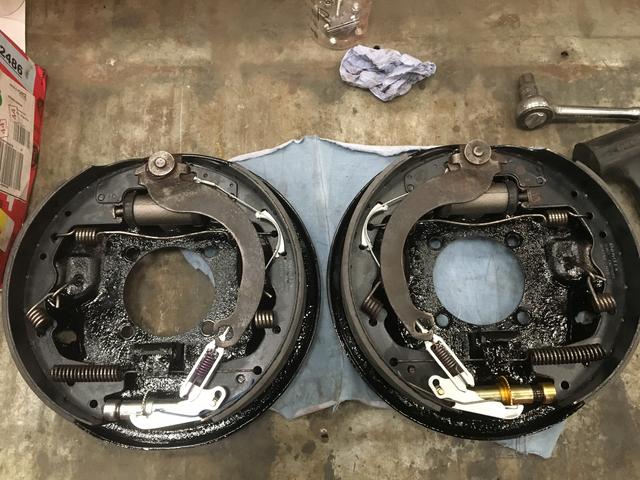
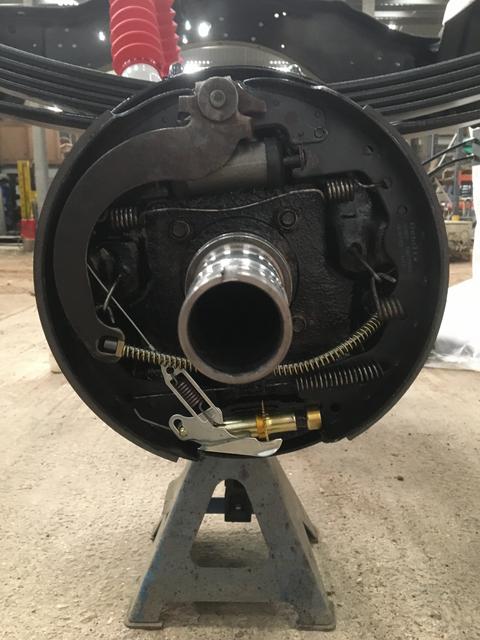
I assembled the rear brakes with new shoes, wheel cylinders and adjuster hardware and fitted them to the axle.
I needed all the adjuster hardware because strangely the brakes on both sides were missing everything when I took them apart, no lever, springs, cable, nothing.
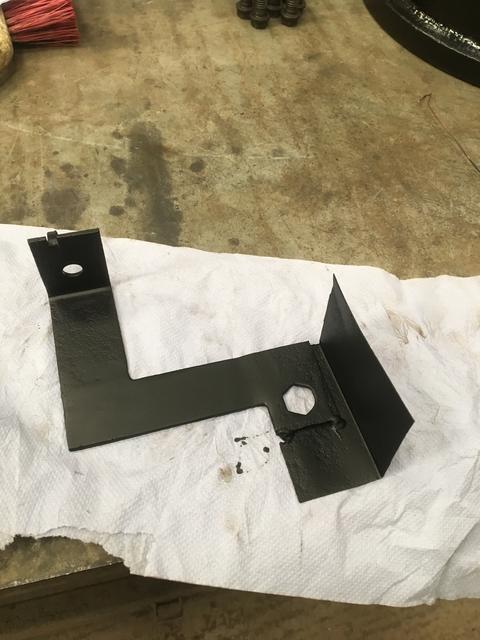
With the rear brakes on I had to give the rear brake hose mount the same treatment as the front. This seemed to work great but I did have to modify it slightly later as it touched the tank when I put it in.
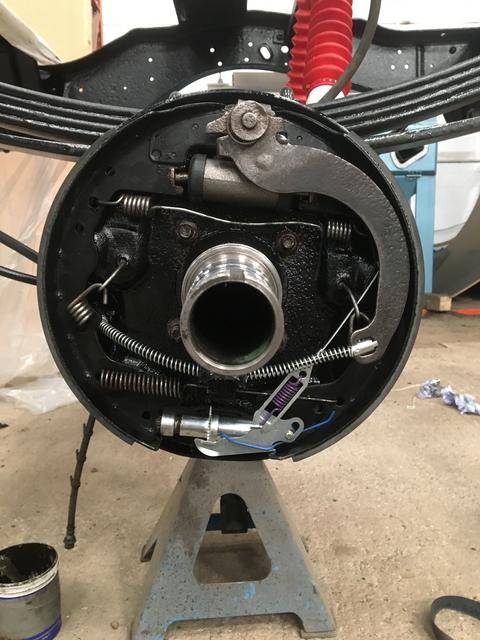
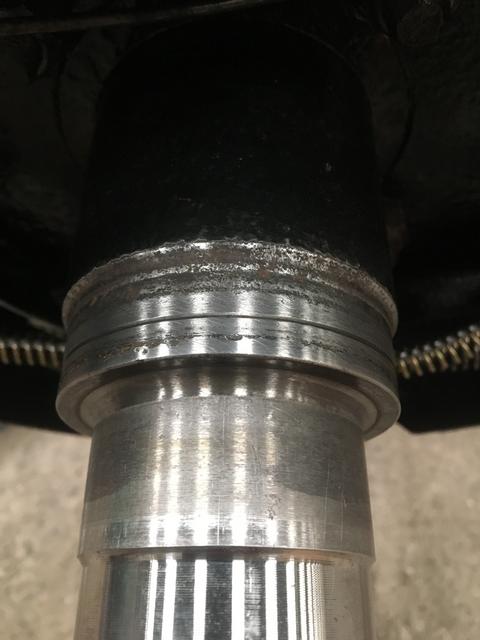
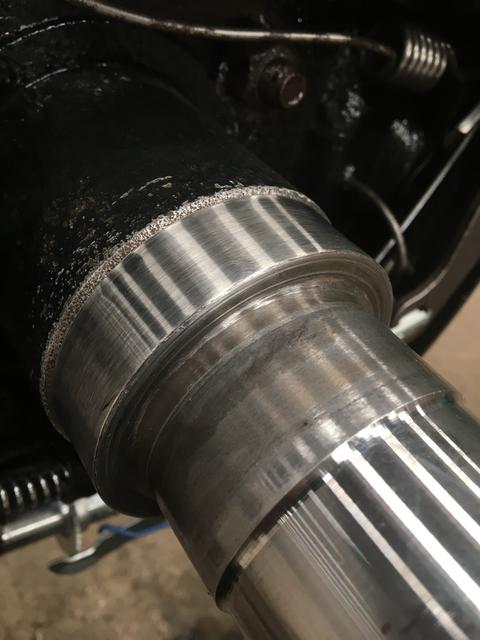
The seal surfaces on the rear axle had definitely seen better days, would definitely explain why one side had a big leak.
The one pictured was the worst of the two but the other was hit and miss as to whether it would cause a future leak.
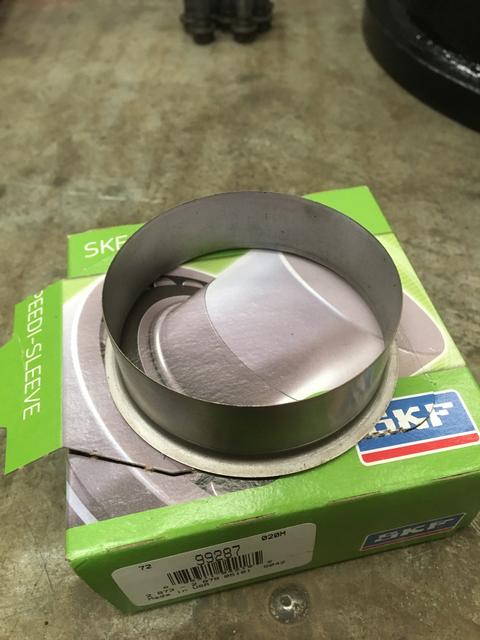
I decided to fit some of these SKF repair sleeves, I'd never used them before but was quite happy with the result. They only took a couple of minutes to fit but then about another hour each side to file them down flush carefully as you can only get them in one length.
I assembled the rear brakes with new shoes, wheel cylinders and adjuster hardware and fitted them to the axle.
I needed all the adjuster hardware because strangely the brakes on both sides were missing everything when I took them apart, no lever, springs, cable, nothing.
With the rear brakes on I had to give the rear brake hose mount the same treatment as the front. This seemed to work great but I did have to modify it slightly later as it touched the tank when I put it in.
The seal surfaces on the rear axle had definitely seen better days, would definitely explain why one side had a big leak.
The one pictured was the worst of the two but the other was hit and miss as to whether it would cause a future leak.
I decided to fit some of these SKF repair sleeves, I'd never used them before but was quite happy with the result. They only took a couple of minutes to fit but then about another hour each side to file them down flush carefully as you can only get them in one length.
01-23-2020, 08:03 AM
#34
Registered User
Thread Starter
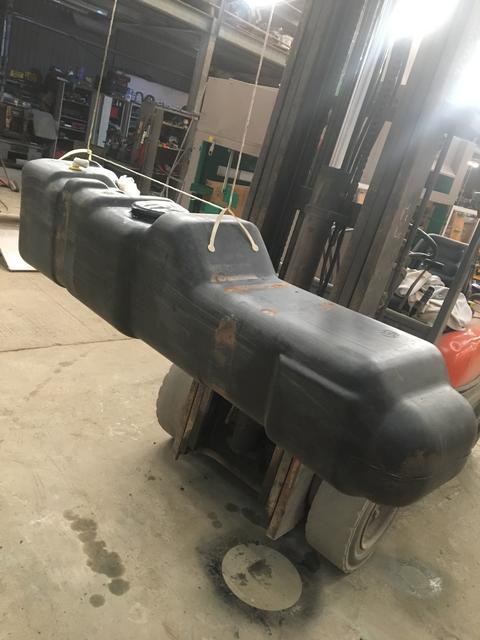
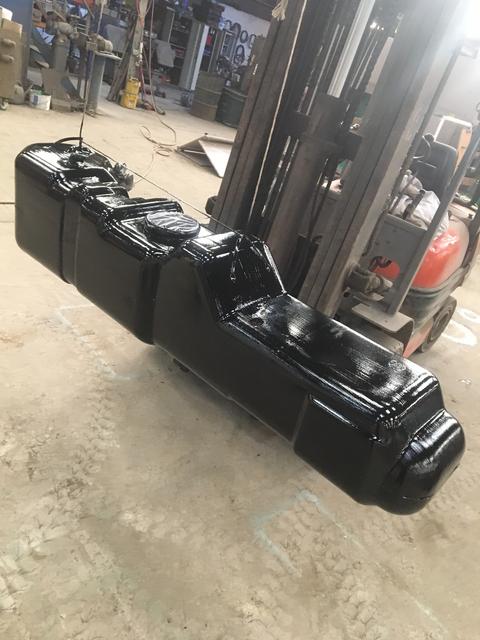
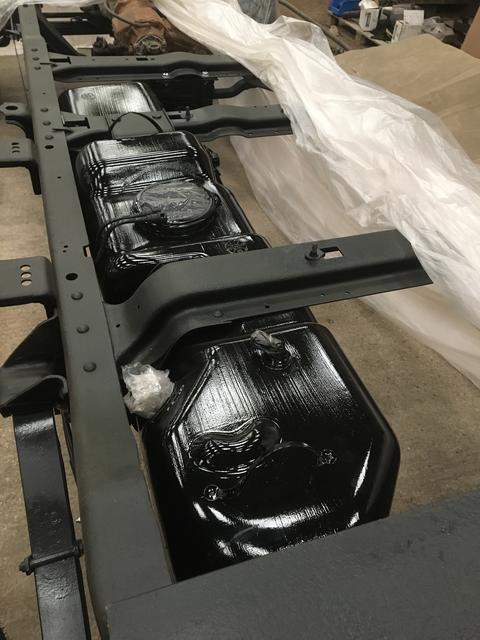
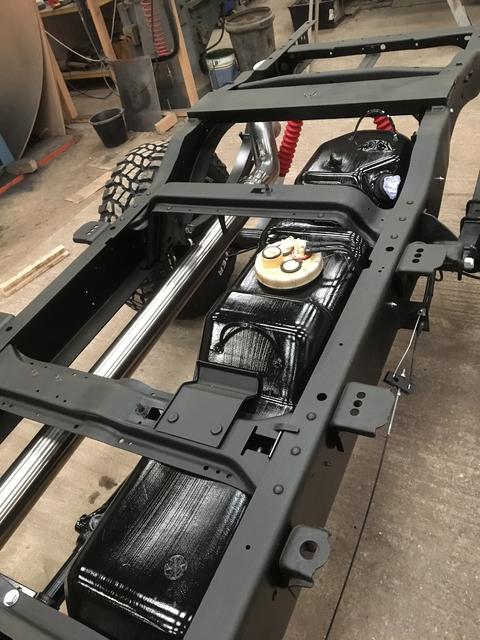
I gave the tank a good clean up and clean out and gave it a quick paint
Drums on, new wheel bearings, axle shafts in and wheels on.

I painted the rear driveshaft, the UJ's were tight so I left the old ones. I have since ordered new UJ's and a new hanger bearing for the shaft. I fitted the tank just before I fitted the driveshaft.
Drums on, new wheel bearings, axle shafts in and wheels on.
I painted the rear driveshaft, the UJ's were tight so I left the old ones. I have since ordered new UJ's and a new hanger bearing for the shaft. I fitted the tank just before I fitted the driveshaft.
01-23-2020, 08:03 AM
#35
Registered User
Thread Starter
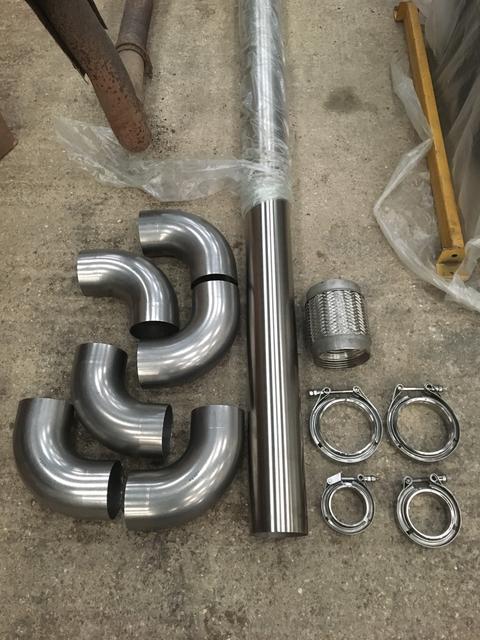
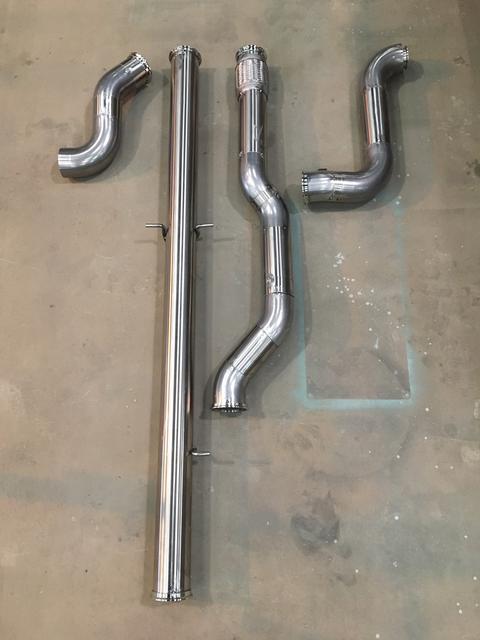
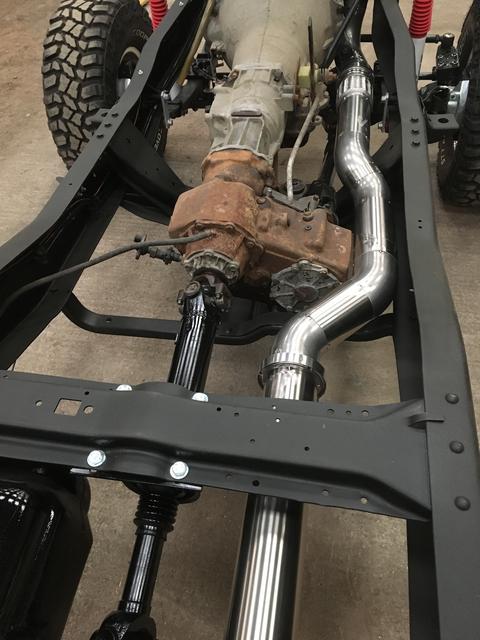
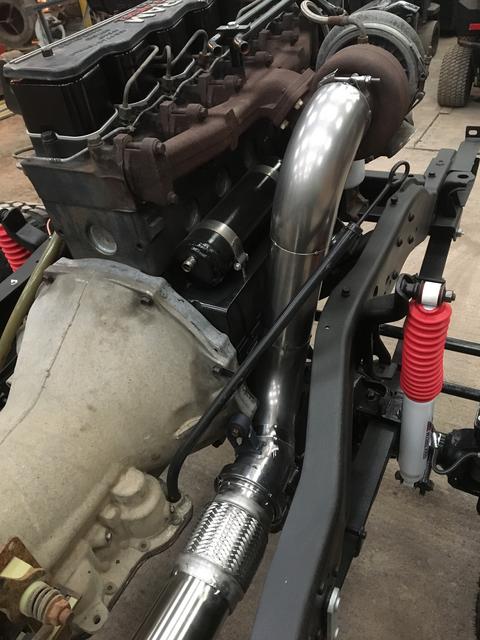
Next job was the exhaust, I wanted a 4" straight through from the turbo back and I wanted it in stainless.
All the off the shelf exhausts seem pretty crappy and the stainless ones are low grade. If I lived in the states I'd make do with one but I wasn't going to pay to ship such a large package over here for me to not be that happy with it.
The only option this left was to make my own.
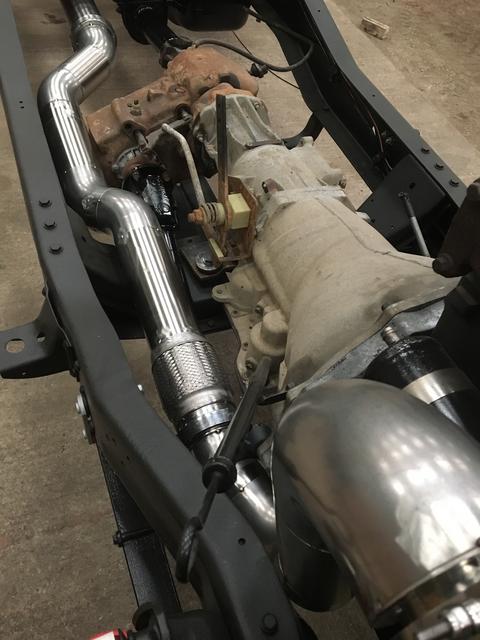
I ordered a 6m length of 304 tube, a length of 12mm rod, 7 x 304 90degree bends, a selection of stainless v bands and a stainless flexy.
My plan was to tack the full exhaust using stainless wire in my mig, then after the body was fitted and I new it wouldn't foul anywhere I would pull it out and get my welder friend to tig the full thing up.
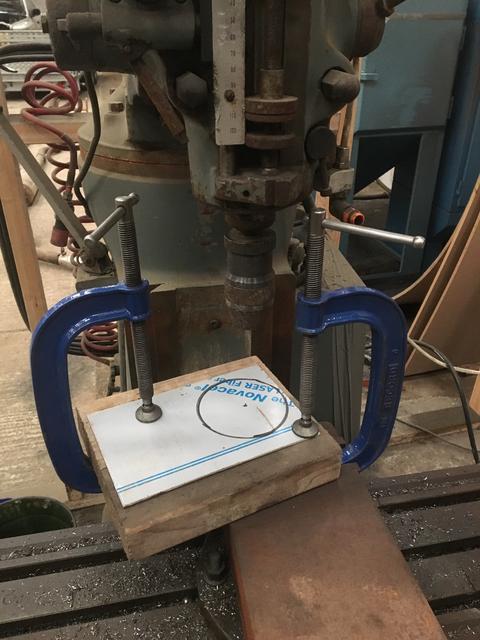
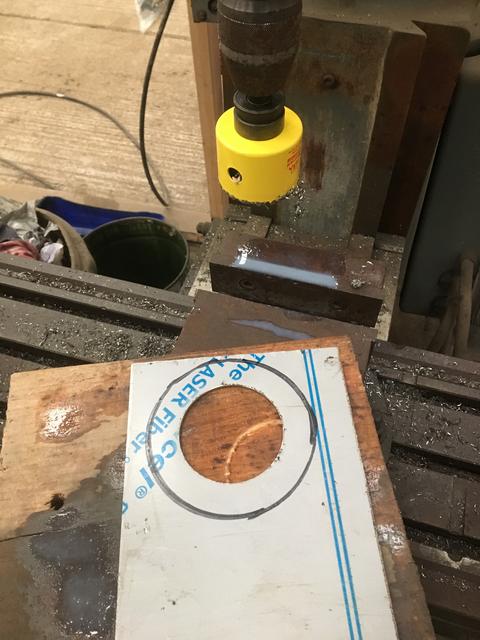
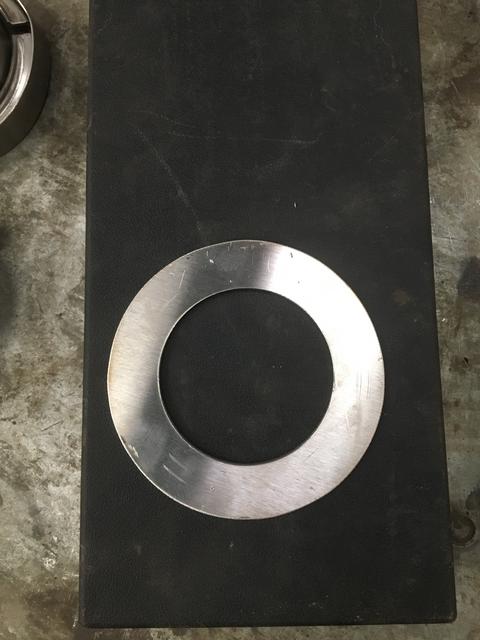
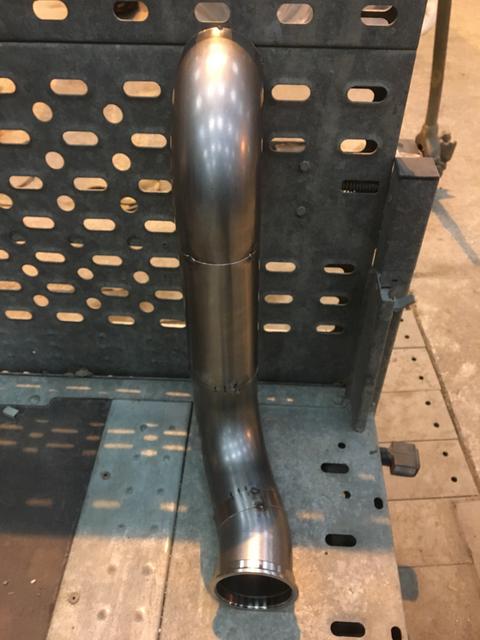
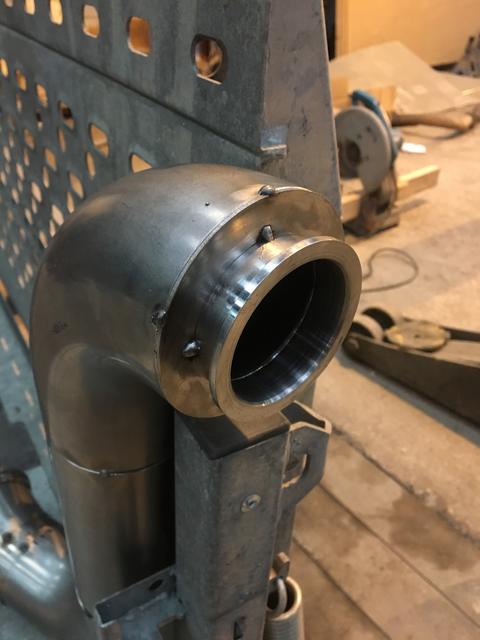
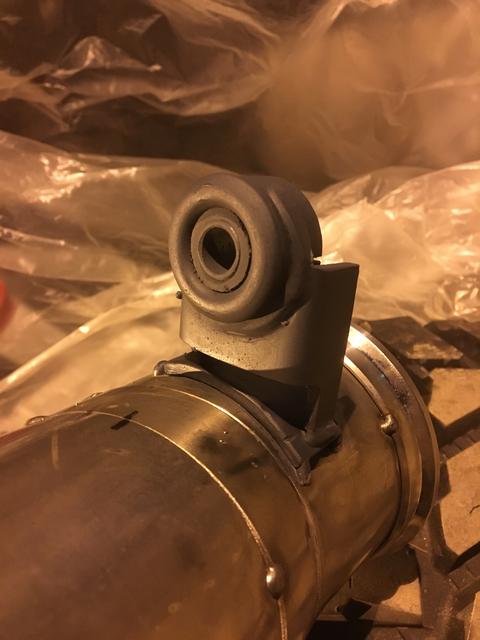
To go from the 2.5" turbo outlet to my 4" tube I would have liked to use a cone but there just wasn't enough room between the turbo and firewall for this so I would copy how Diamond Eye seem to make their downpipes and make a 2.5" - 4" adaptor.
I made a mount to attach to the bottom of the downpipe that would bolt to the bell housing to take the weight of the exhaust off the turbo. I made this so it would take an ebay rubber bush so it wasn't totally solid mounted.
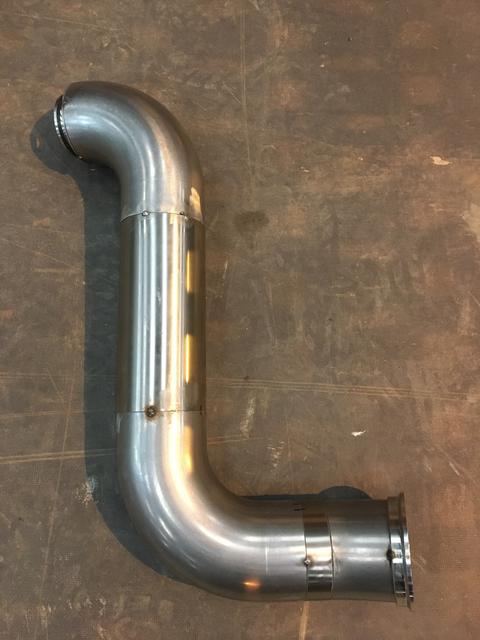
I could only fabricate the exhaust to the rear axle at this time, I plan to exit on the passenger side behind the rear wheel but need the bed on so I can get the tailpipe where I want it.
All the off the shelf exhausts seem pretty crappy and the stainless ones are low grade. If I lived in the states I'd make do with one but I wasn't going to pay to ship such a large package over here for me to not be that happy with it.
The only option this left was to make my own.
I ordered a 6m length of 304 tube, a length of 12mm rod, 7 x 304 90degree bends, a selection of stainless v bands and a stainless flexy.
My plan was to tack the full exhaust using stainless wire in my mig, then after the body was fitted and I new it wouldn't foul anywhere I would pull it out and get my welder friend to tig the full thing up.
To go from the 2.5" turbo outlet to my 4" tube I would have liked to use a cone but there just wasn't enough room between the turbo and firewall for this so I would copy how Diamond Eye seem to make their downpipes and make a 2.5" - 4" adaptor.
I made a mount to attach to the bottom of the downpipe that would bolt to the bell housing to take the weight of the exhaust off the turbo. I made this so it would take an ebay rubber bush so it wasn't totally solid mounted.
I could only fabricate the exhaust to the rear axle at this time, I plan to exit on the passenger side behind the rear wheel but need the bed on so I can get the tailpipe where I want it.
01-23-2020, 08:04 AM
#36
Registered User
Thread Starter
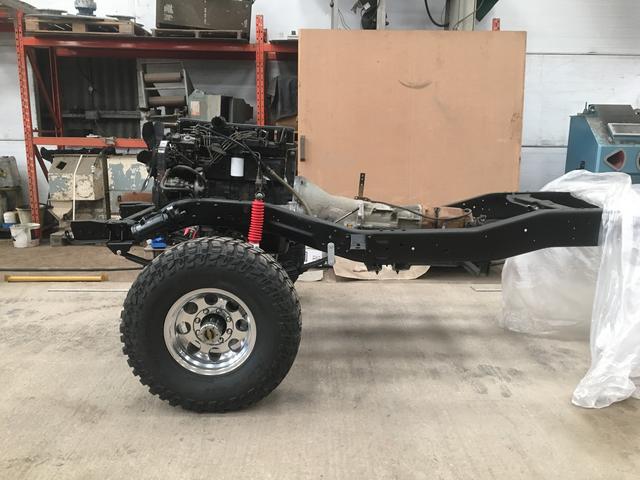
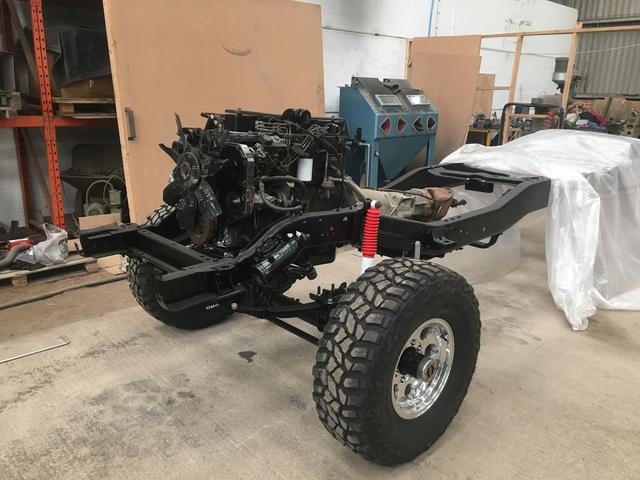
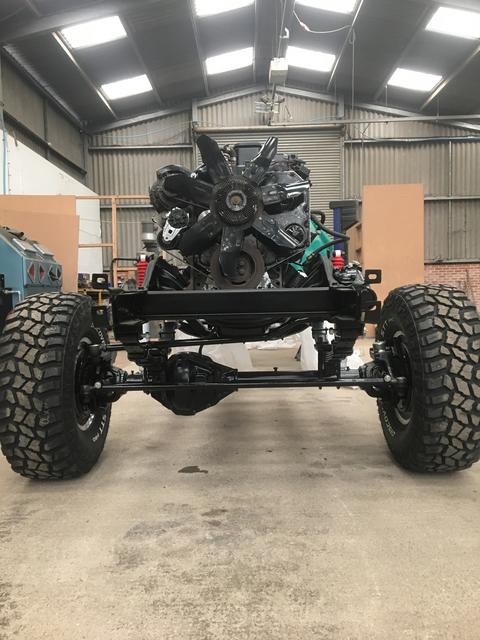
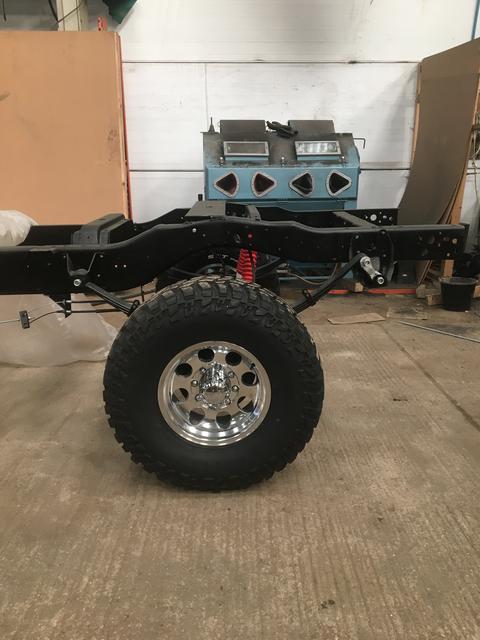
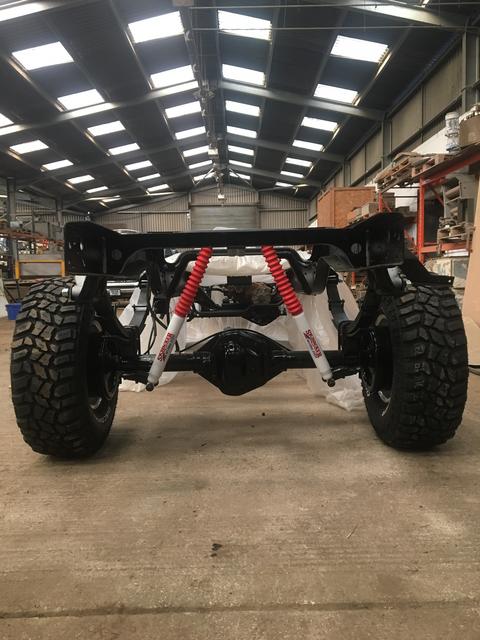
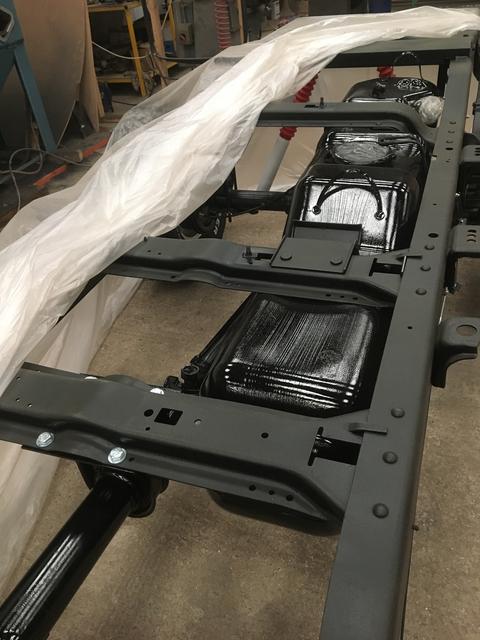
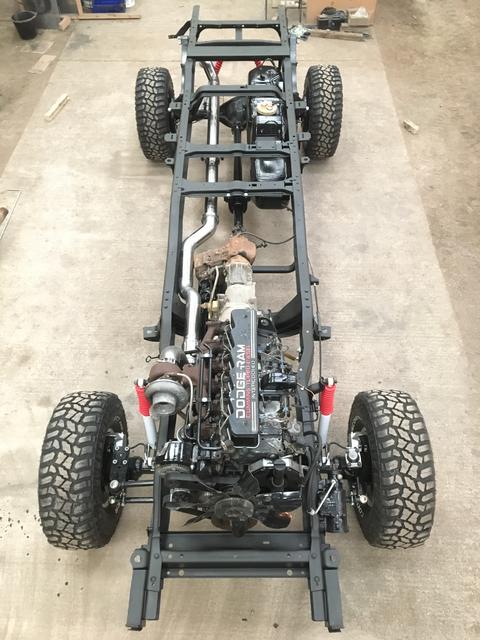
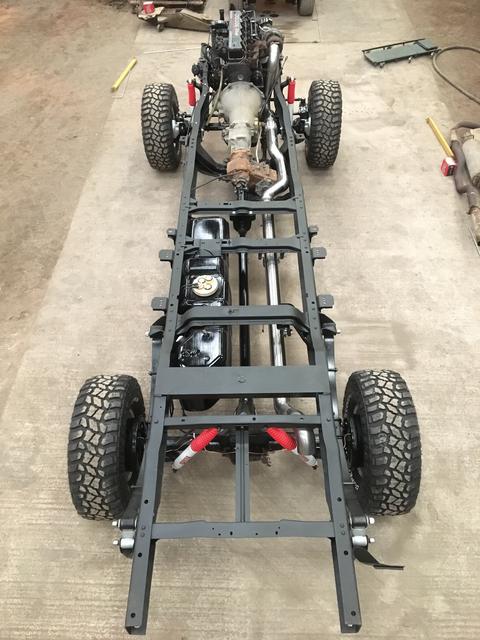
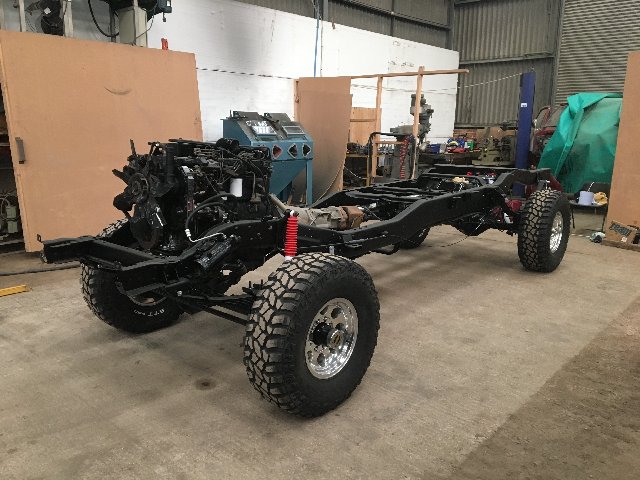
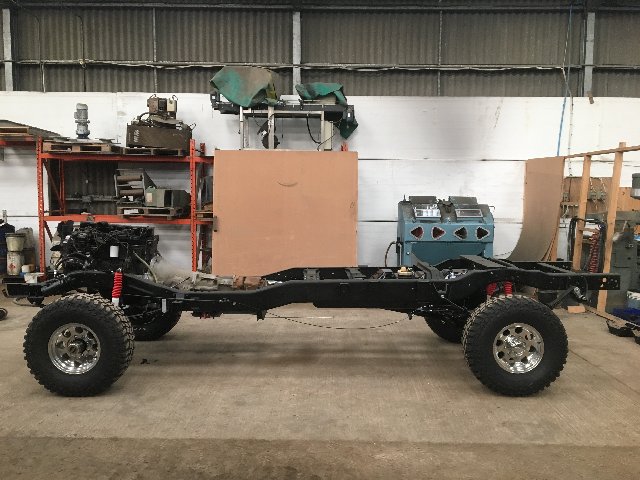
After I'd filled the engine and axles up with oil this brought me to another big milestone, the rolling frame is complete!
Next step is bodywork, rust photos to follow.
But first here is how it sits now.
Next step is bodywork, rust photos to follow.
But first here is how it sits now.
01-23-2020, 08:05 AM
#37
Registered User
Thread Starter
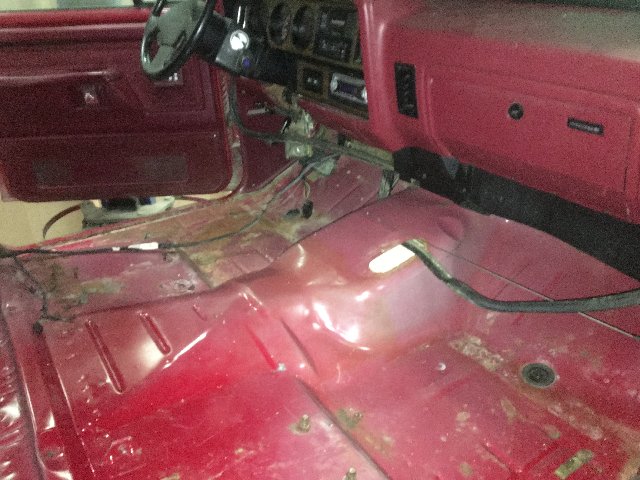
So the rolling frame is put to one side and on to the bodywork.
I don't know about anyone else but I hate bodywork, it seems so slow going and boring.
I was tempted to pay a body shop to do it all, I had one guy come out and give me a quote but it was ridiculous and I'm extremely tight so on with it I go.
The original plan was to pull the seats and carpet, weld all the underneath and rockers. Then for the bodyshop to do a small repair to the front of the roof where it was bubbling and then just paint the roof and bottom section of red all the way round.

 01-23-2020, 08:06 AM
#39
Registered User
Thread Starter
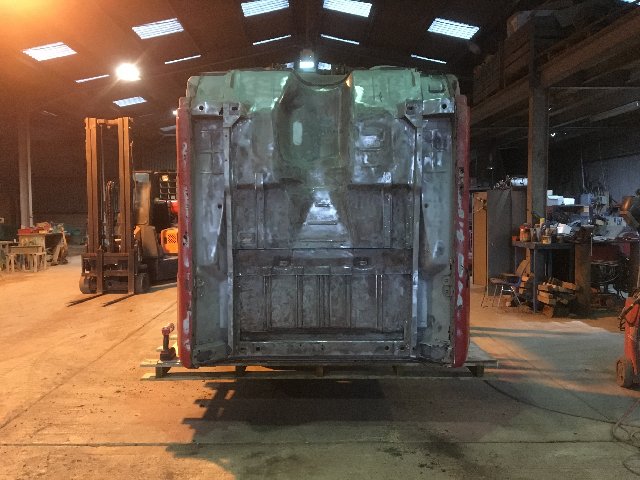
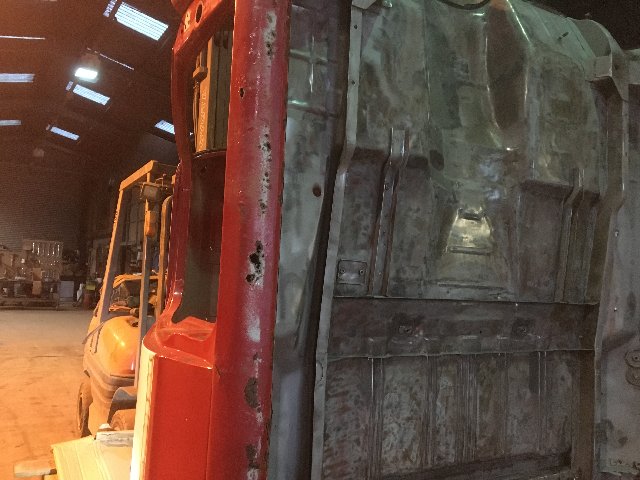
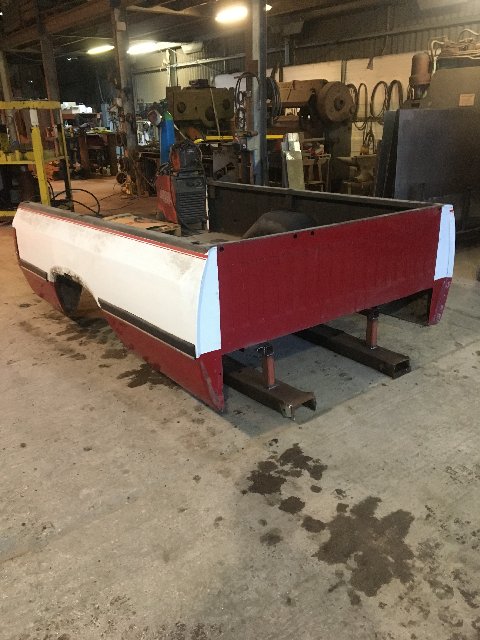
I wanted the bed out of the way and easier and quicker to move. The easier it is to move the more likely I am to move it if I'm working near it and the less likely it is to get damaged.
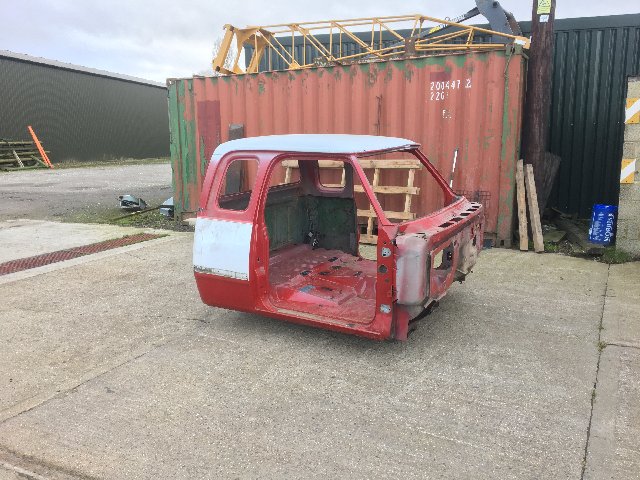
It is a long way from a good condition bed, I can't see anyone in the US or Canada repairing a bed as bad as mine, surely you'd just go get a solid southern bed.
Unfortunately I don't have this option, this is what my bed looks like after tipping it on its end and removing the arch moldings.
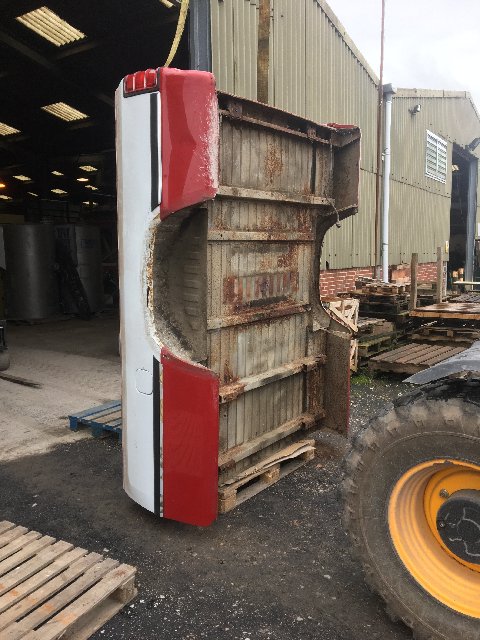
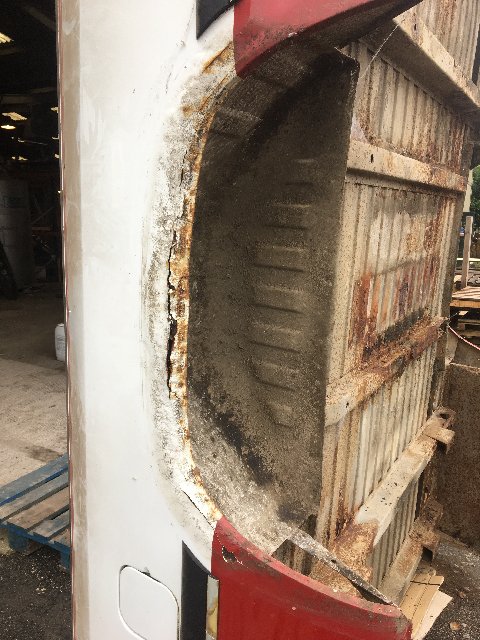
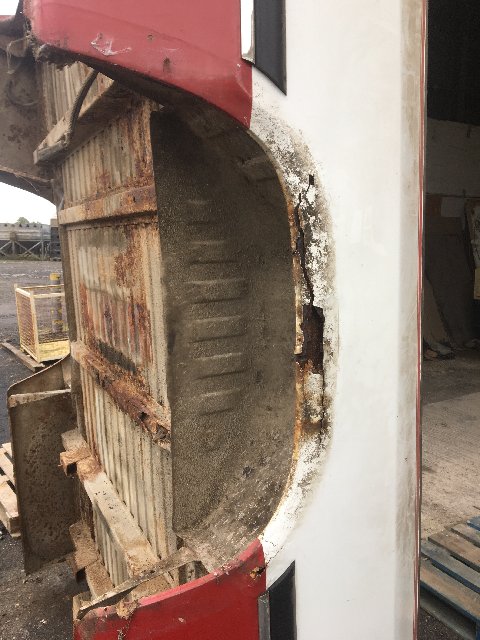
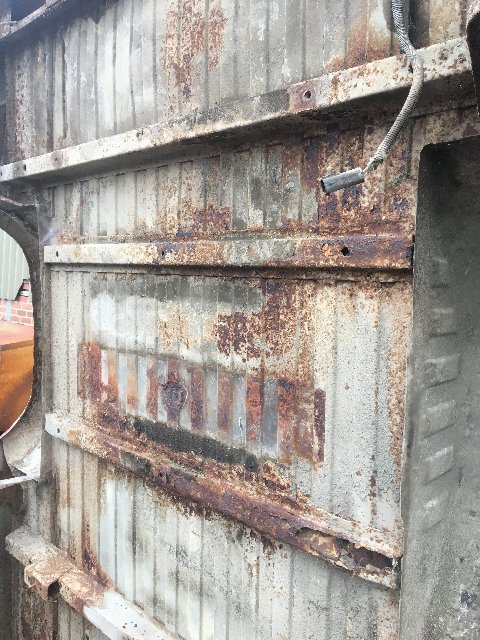
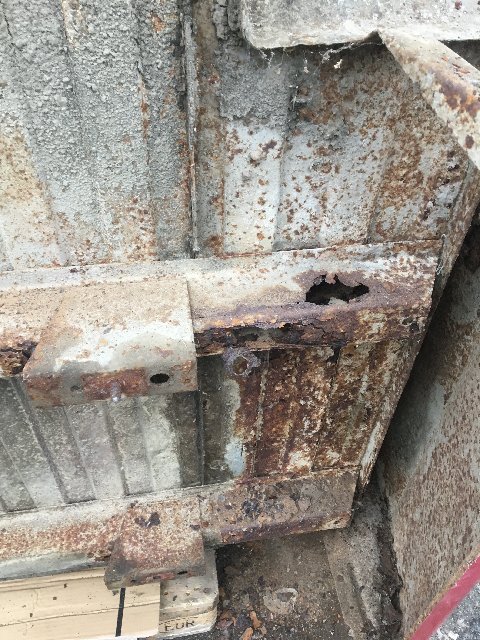
It is a long way from a good condition bed, I can't see anyone in the US or Canada repairing a bed as bad as mine, surely you'd just go get a solid southern bed.
Unfortunately I don't have this option, this is what my bed looks like after tipping it on its end and removing the arch moldings.
01-23-2020, 08:07 AM
#40
Registered User
Thread Starter
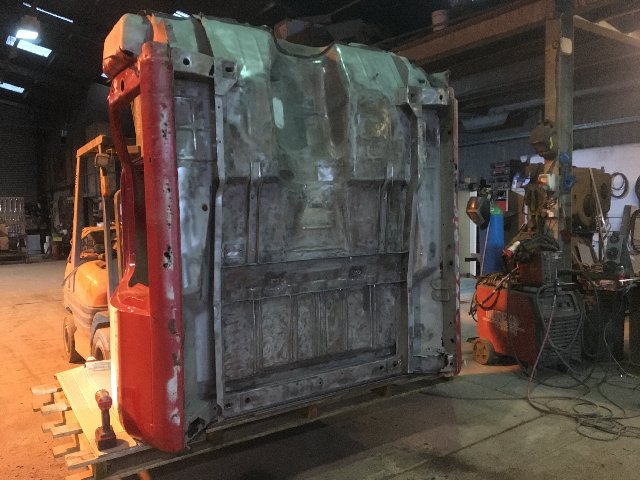
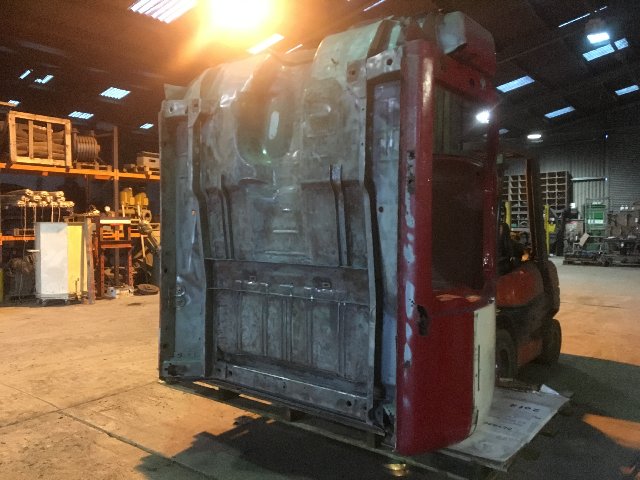
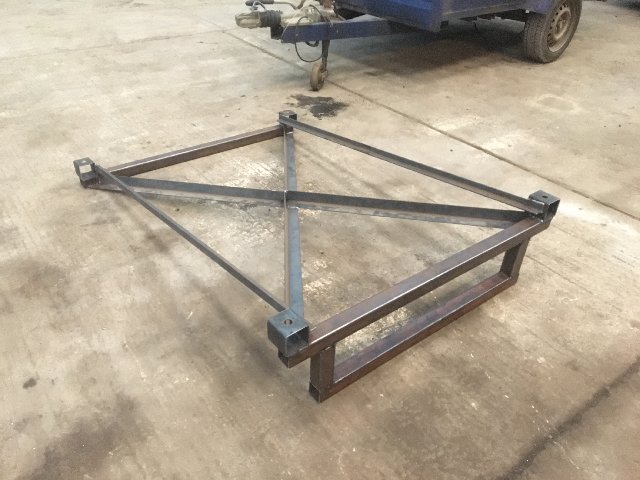
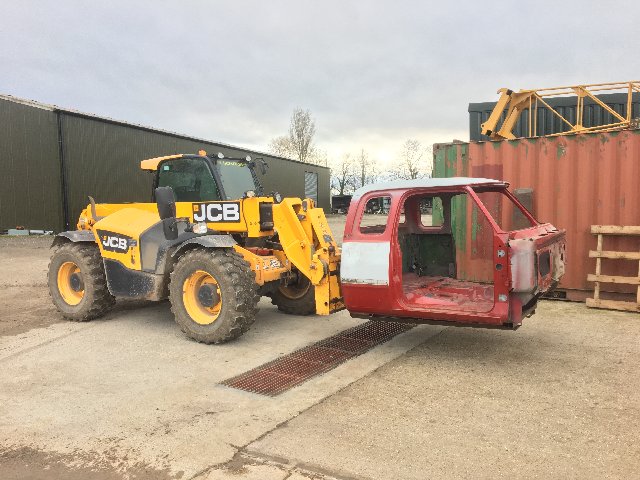
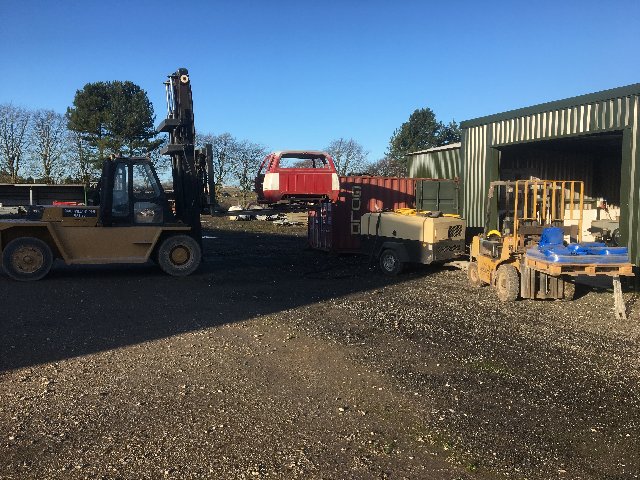
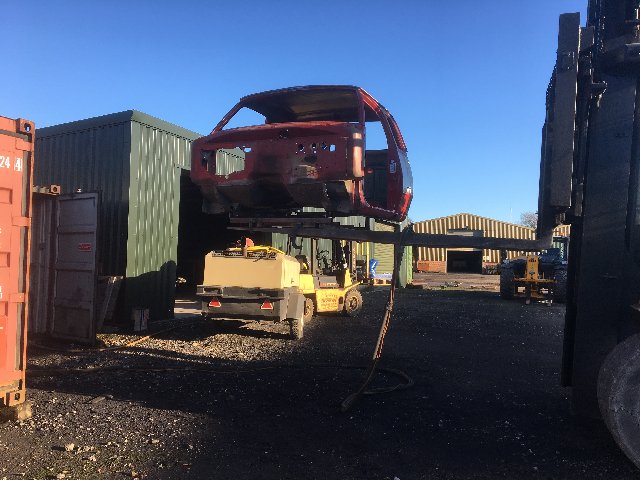
Currently I was moving it around by way of 2 straps and 4 D shackles through the holes in the stake/post holders in each corner and then sit it down on 4 stacked pallets.
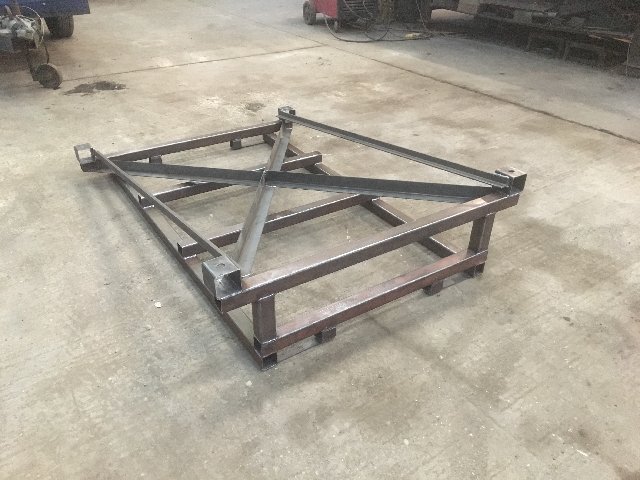
I wanted to have it so I could go straight in with a forklift and pick it up, carry it without risk of dropping it then just sit it down anywhere with the bed sides off the floor.
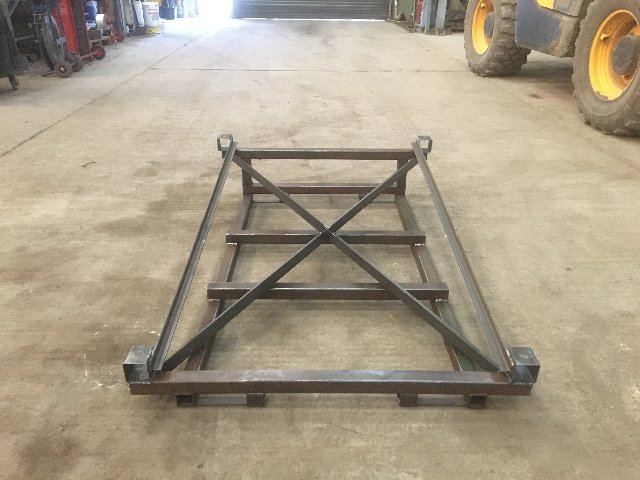
I needed some channel iron that I could fit forklift tines in and that bolted to the bed mounts so it was fixed in place. It needed to be made out of scrap steel as when the truck is finished it will hopefully never be needed again and will be chopped up and the steel re purposed.
This is what I ended up with.

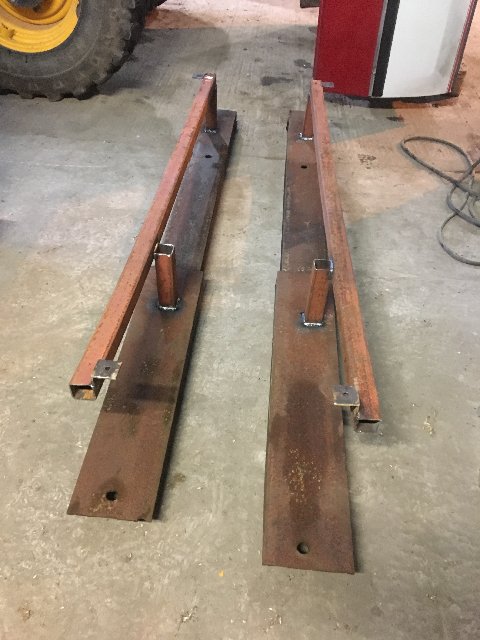
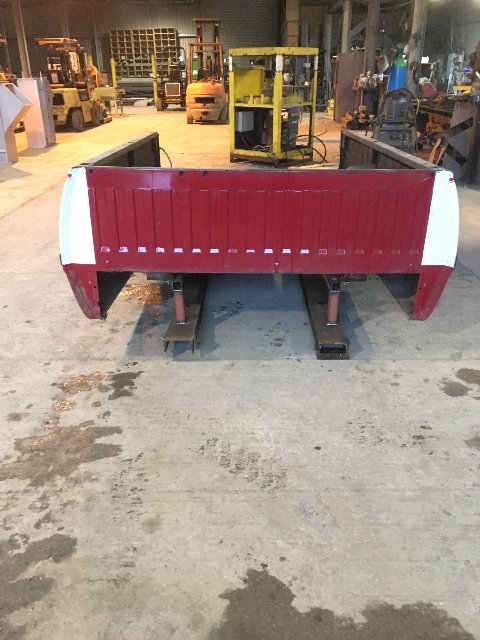
I wanted to have it so I could go straight in with a forklift and pick it up, carry it without risk of dropping it then just sit it down anywhere with the bed sides off the floor.
I needed some channel iron that I could fit forklift tines in and that bolted to the bed mounts so it was fixed in place. It needed to be made out of scrap steel as when the truck is finished it will hopefully never be needed again and will be chopped up and the steel re purposed.
This is what I ended up with.
01-23-2020, 08:07 AM
#41
Registered User
Thread Starter
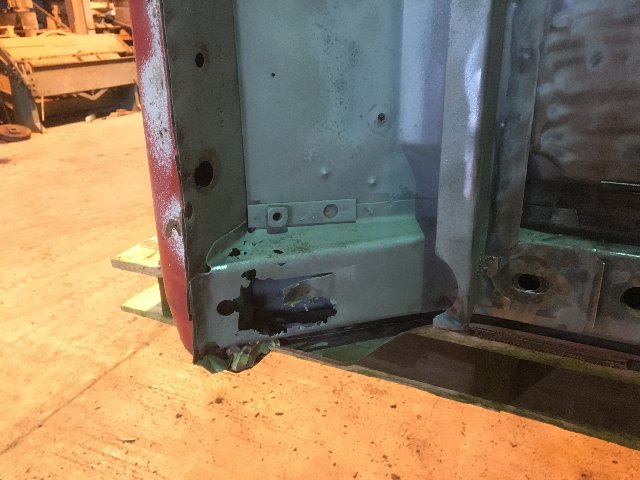
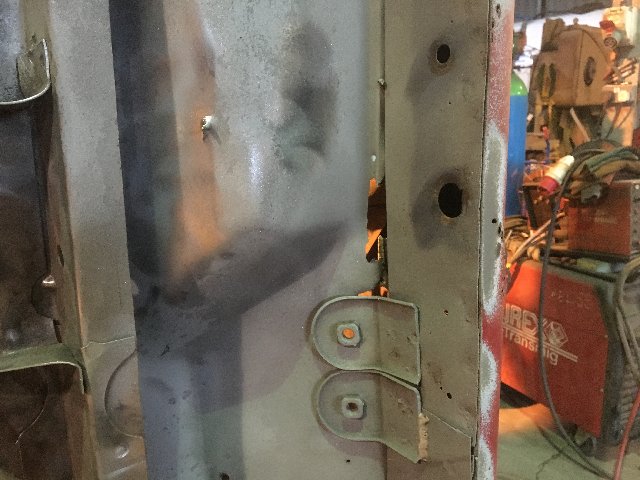
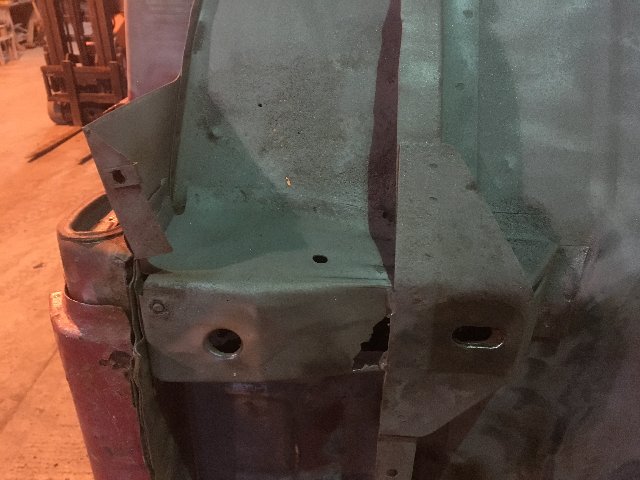
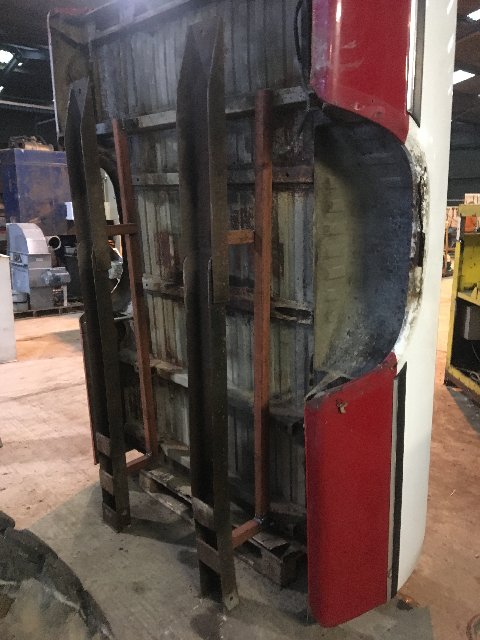
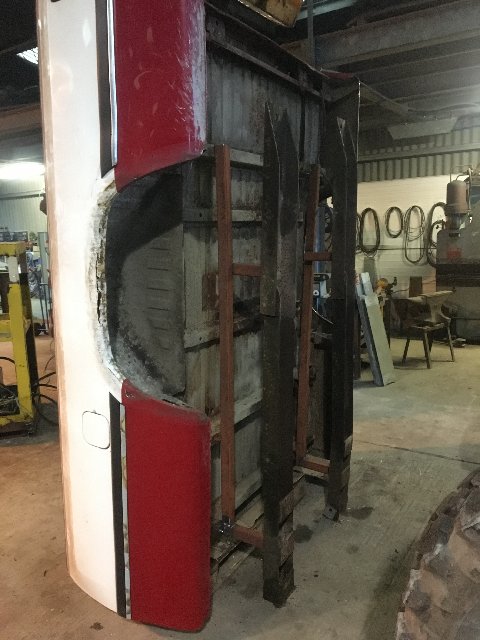
I wanted something similar for the cab, not just to be able to move it around and transport to and from paint, but since my front cab mounts would need removing and totally re fabricating I wanted a jig that I could use to make new ones and ensure they were fabricated at the correct and height and position as the original ones.
This was only made from approximately 50% scrap steel as it was slightly more important then the frames for the bed.
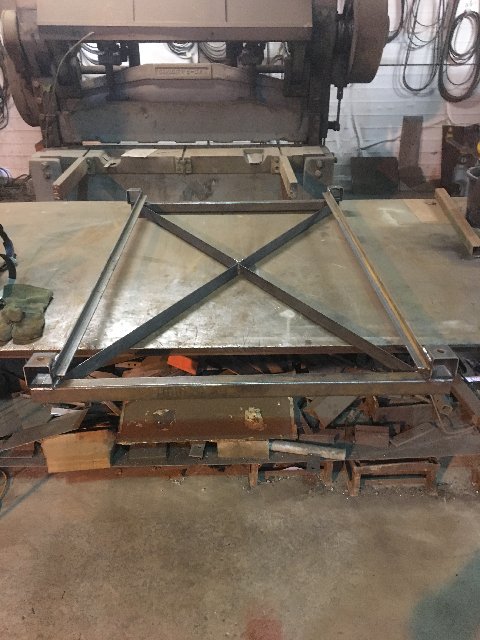
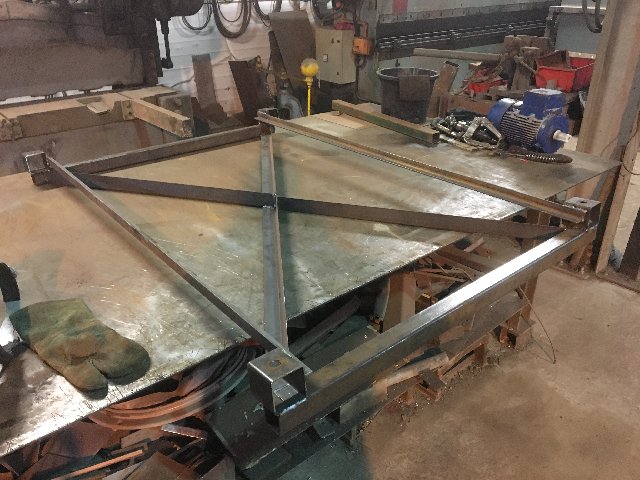
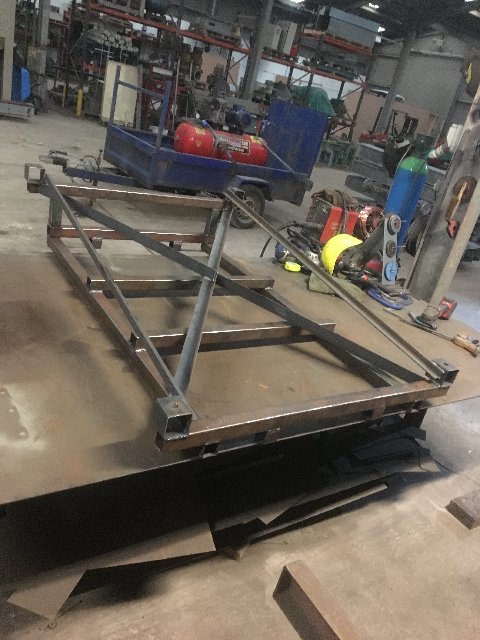
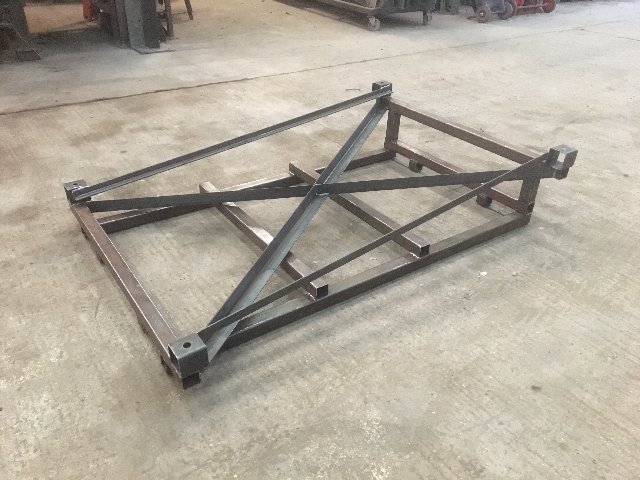
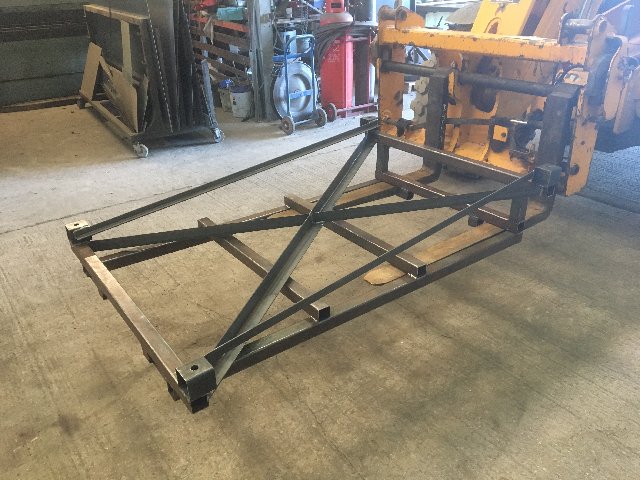

This was only made from approximately 50% scrap steel as it was slightly more important then the frames for the bed.
01-23-2020, 08:08 AM
#42
Registered User
Thread Starter
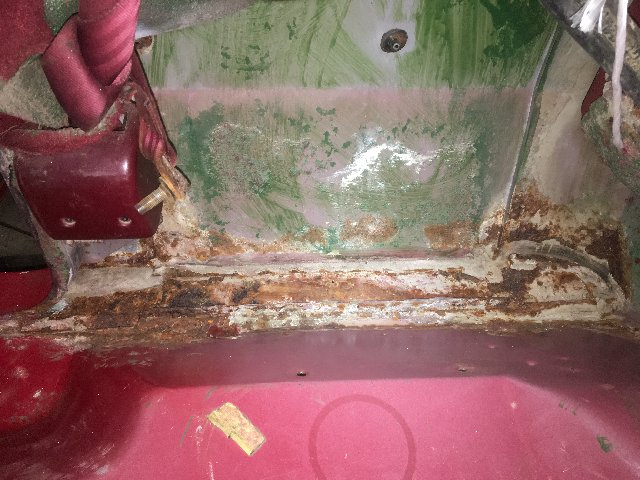
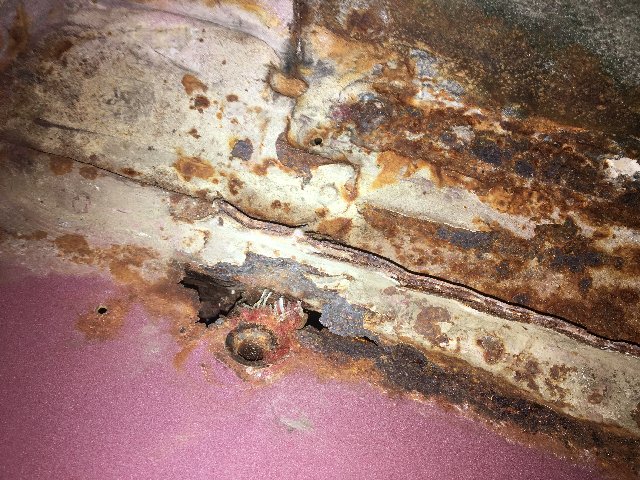
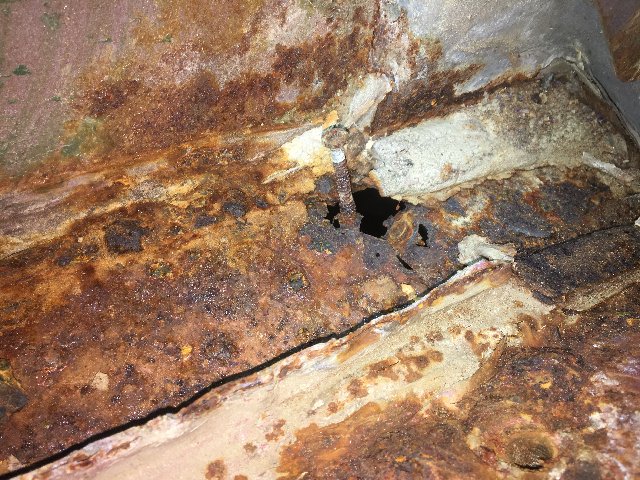
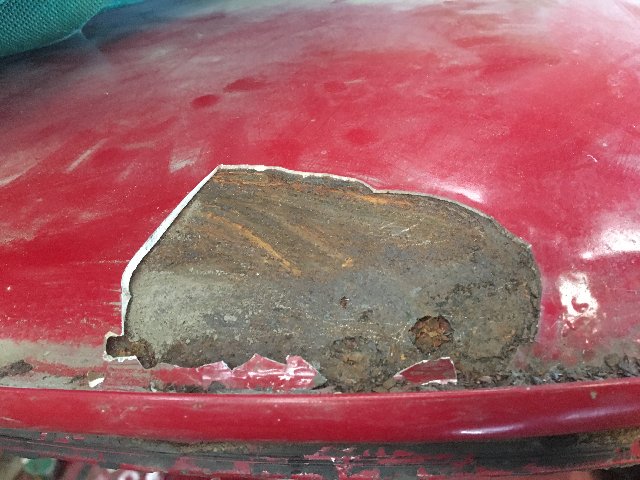
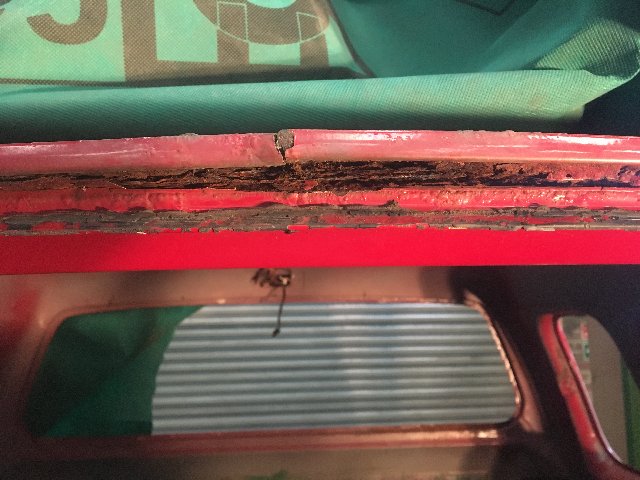
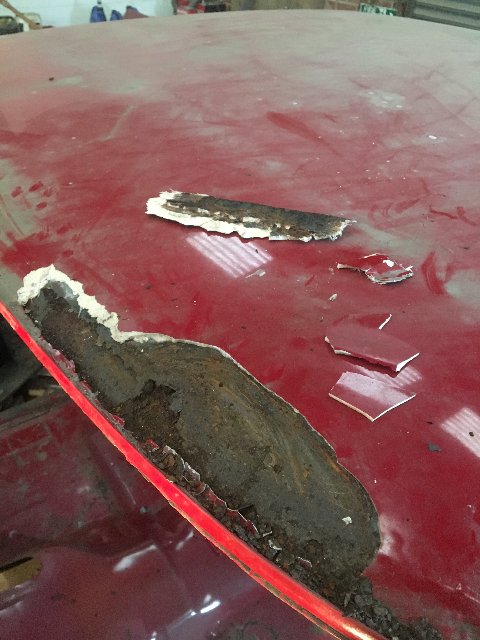
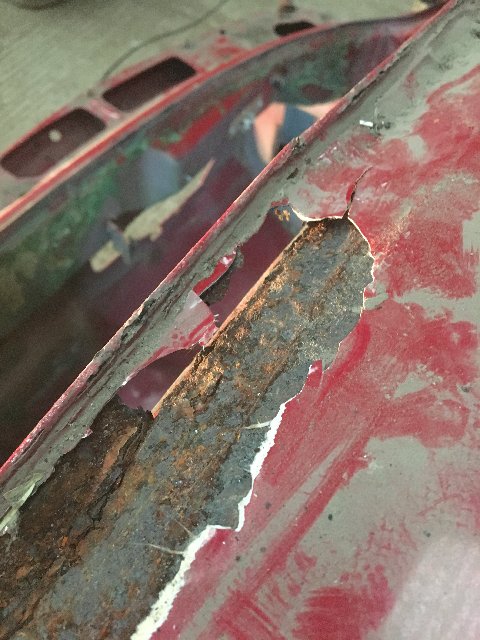
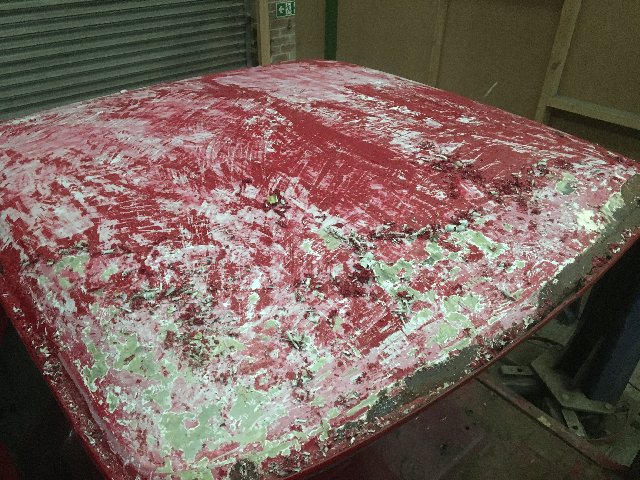
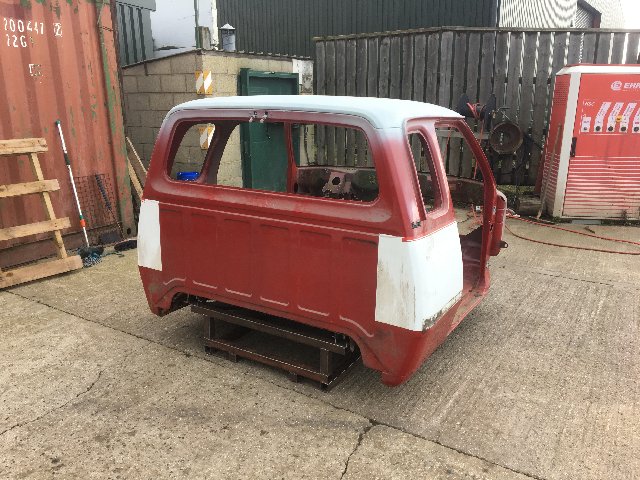
So one day when I was just looking at the cab and thinking about it been finished I started poking at the bubbling paint on the front of the roof.
I hoped it would just be a small area of surface rust that might not even need cutting out, I was very wrong.
It looks that when the truck was painted a few years back and the roof could have been repaired much easier, they just bodged it up with fiberglass and filler.
I have seen worse first gen roofs on the forums, but those people have done a roof swap. Again this isn't really a possibility for me.
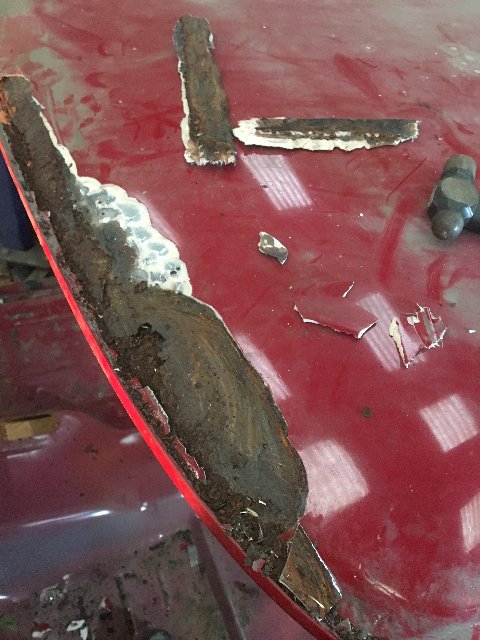
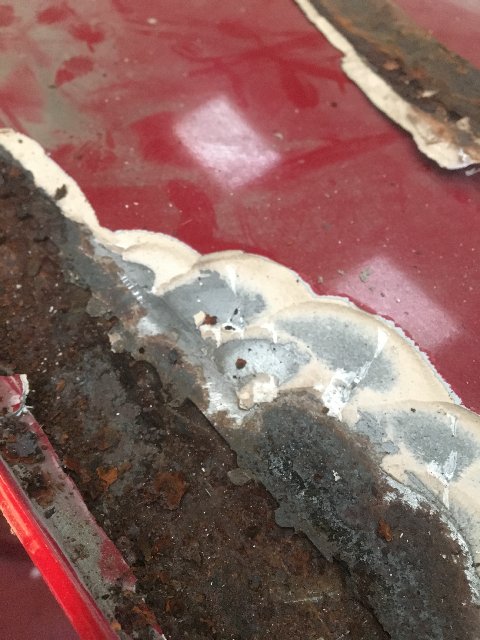
This discovery in the roof has changed everything, now the whole cab was going to have to be stripped bare, I really didn't want to do this because if the windshield was damaged it would be a nightmare trying to get another one and my dash was already cracked and so brittle I didn't want it to break anymore. But needs must.
I got some professionals to remove the front and back windows with no damage to the glass or seals.
The dash did fall apart a bit but hopefully I can try and do some repairs when it goes back together.

I hoped it would just be a small area of surface rust that might not even need cutting out, I was very wrong.
It looks that when the truck was painted a few years back and the roof could have been repaired much easier, they just bodged it up with fiberglass and filler.
I have seen worse first gen roofs on the forums, but those people have done a roof swap. Again this isn't really a possibility for me.
This discovery in the roof has changed everything, now the whole cab was going to have to be stripped bare, I really didn't want to do this because if the windshield was damaged it would be a nightmare trying to get another one and my dash was already cracked and so brittle I didn't want it to break anymore. But needs must.
I got some professionals to remove the front and back windows with no damage to the glass or seals.
The dash did fall apart a bit but hopefully I can try and do some repairs when it goes back together.
01-23-2020, 08:09 AM
#43
Registered User
Thread Starter
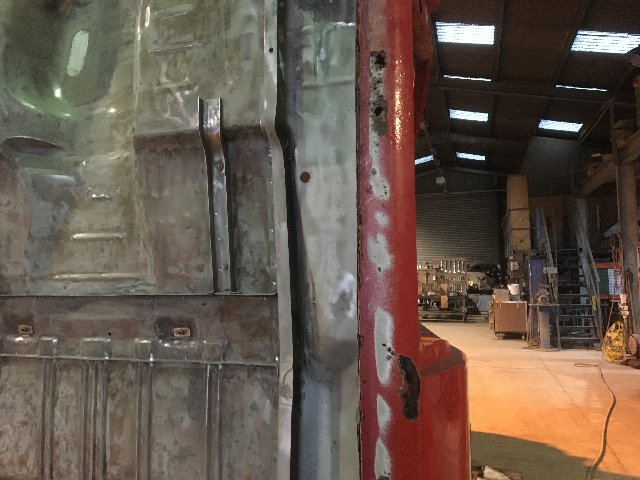
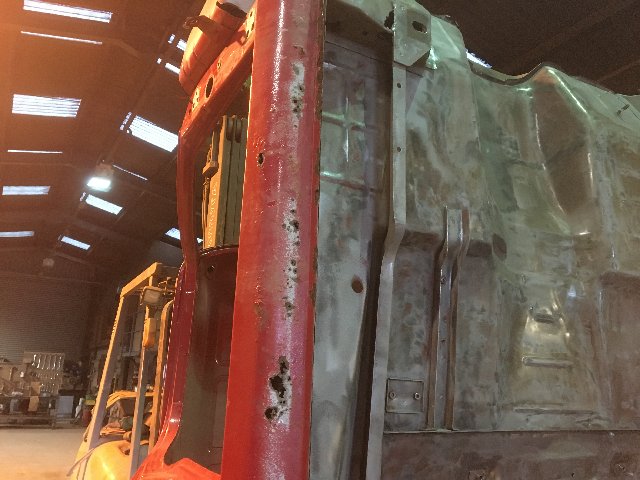
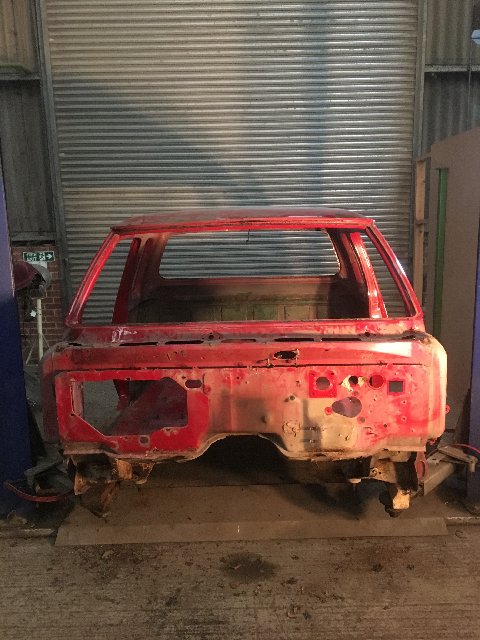
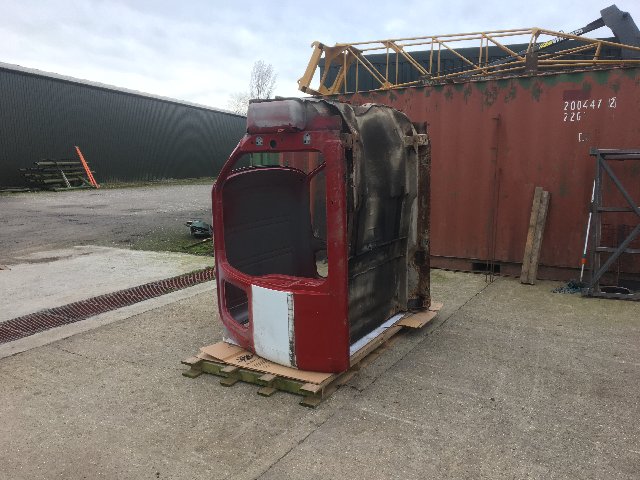
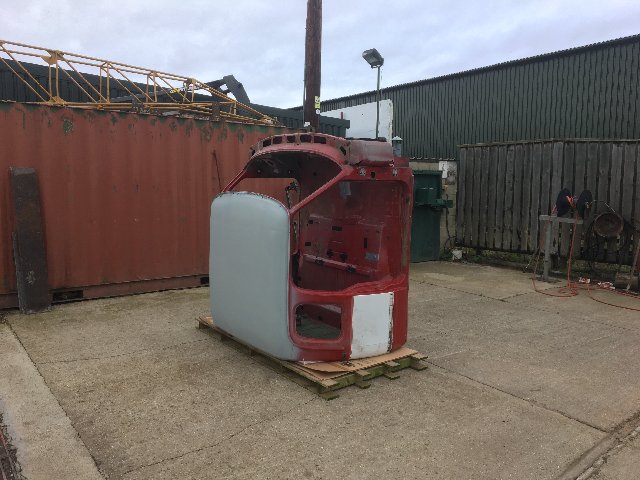
I went to see a local body guy who is into the old school panel beating and english wheeling etc. and showed him some photos. First thing he said was I need to get it all in bare metal then come back to see him as it could be hiding anything.
So I hit it with paint stripper and then 80 grit on the sander, this took a long time and a lot of discs, there was so much filler in this roof.
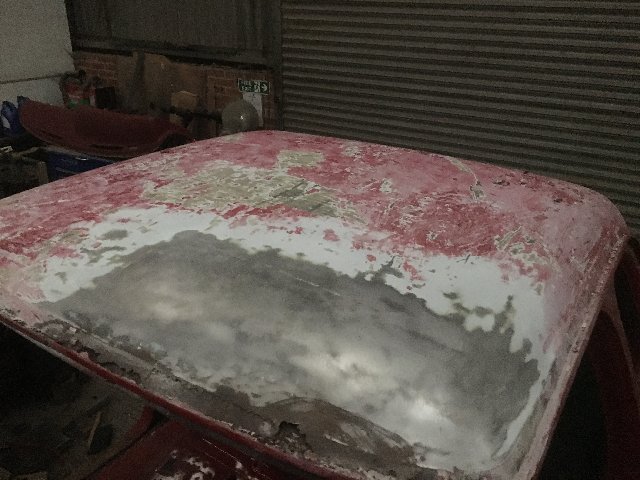

It actually looks a lot better for doing this then it did before. Both sides of the roof near the back of the doors are rusty but not rusted through yet, thankfully there wasn't anything else hiding except a couple dents.
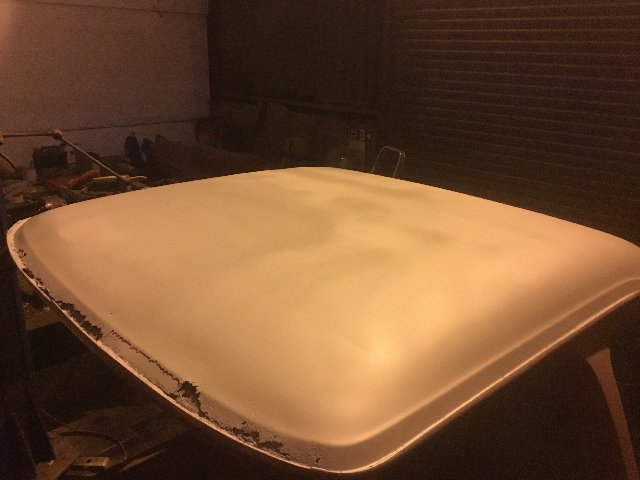
I've been and showed him these photos and he's said he can make a new front roof panel but he has about a 6 month wait! Also he has no interest in painting it so I'll have to find someone else for the paint.
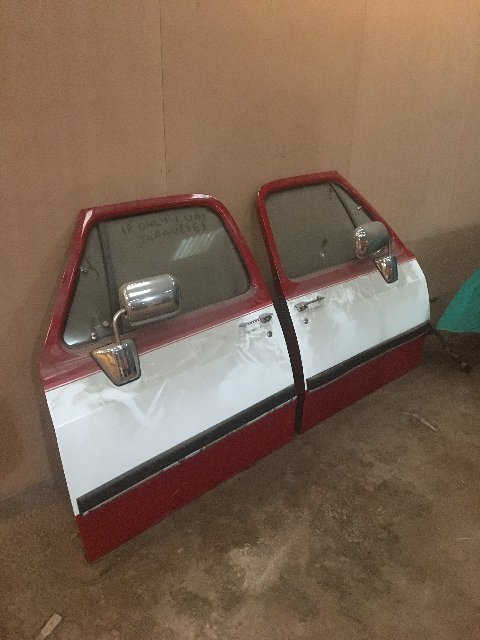
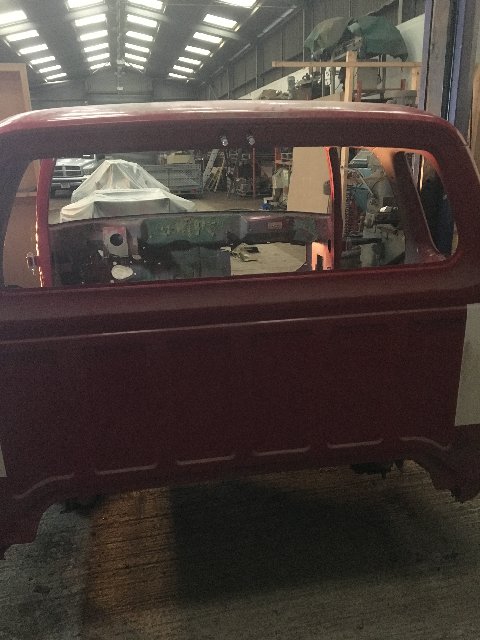
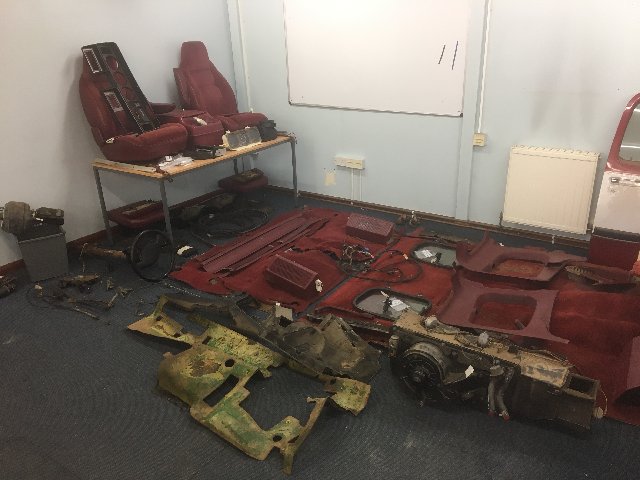
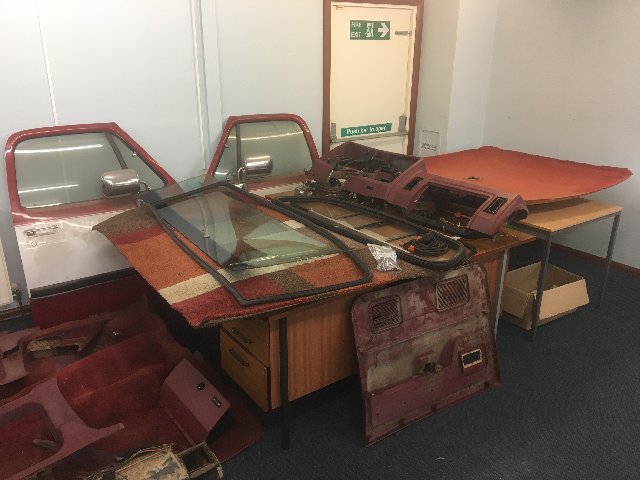
Another change to the plan has happened, since the cab is bare and will need a full re paint now, I will be changing the colour. I don't mind the white over red but it wouldn't have been my choice, it will be going a factory colour and I will be keeping the body trim.
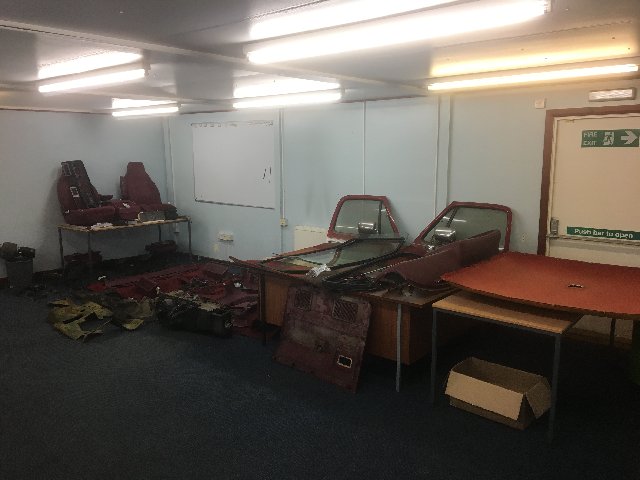
This is all the cab interior laid out for storage.
So I hit it with paint stripper and then 80 grit on the sander, this took a long time and a lot of discs, there was so much filler in this roof.
It actually looks a lot better for doing this then it did before. Both sides of the roof near the back of the doors are rusty but not rusted through yet, thankfully there wasn't anything else hiding except a couple dents.
I've been and showed him these photos and he's said he can make a new front roof panel but he has about a 6 month wait! Also he has no interest in painting it so I'll have to find someone else for the paint.
Another change to the plan has happened, since the cab is bare and will need a full re paint now, I will be changing the colour. I don't mind the white over red but it wouldn't have been my choice, it will be going a factory colour and I will be keeping the body trim.
This is all the cab interior laid out for storage.
01-23-2020, 08:10 AM
#44
Registered User
Thread Starter
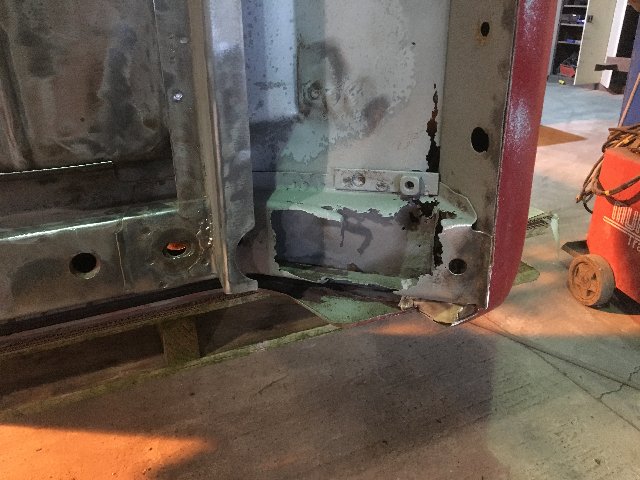
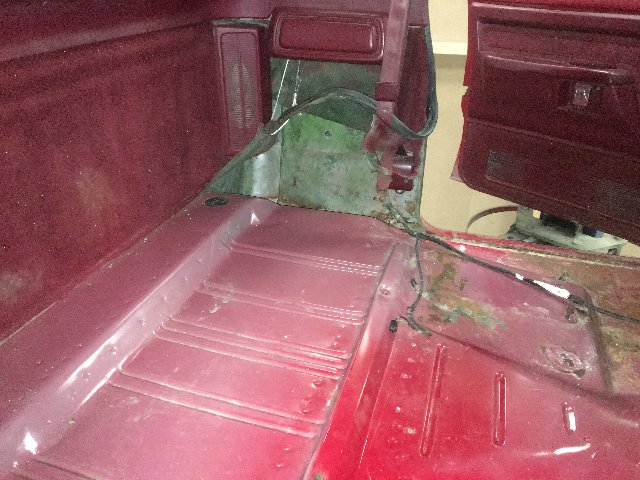
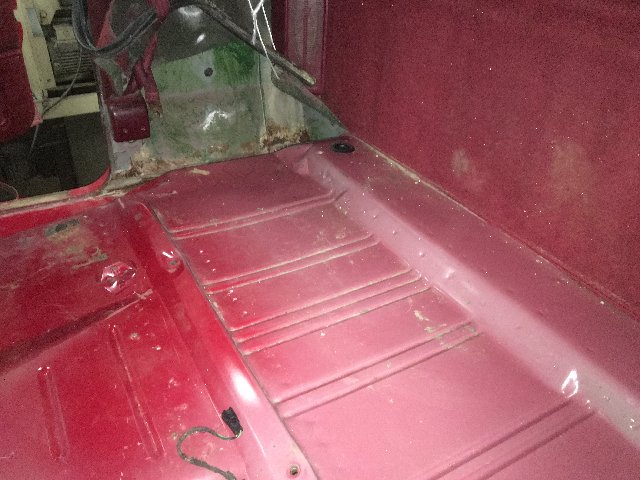
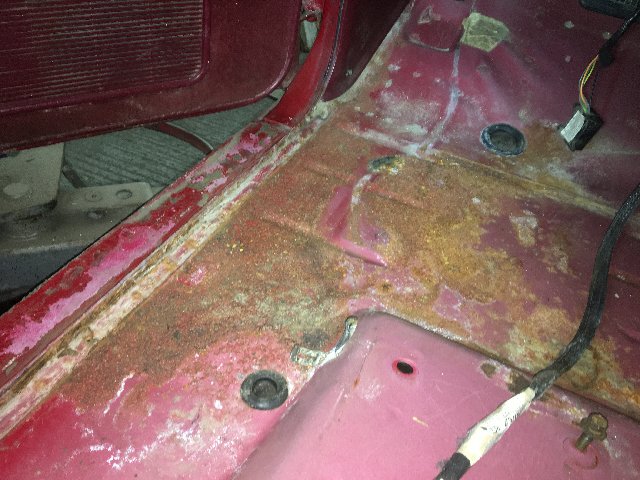
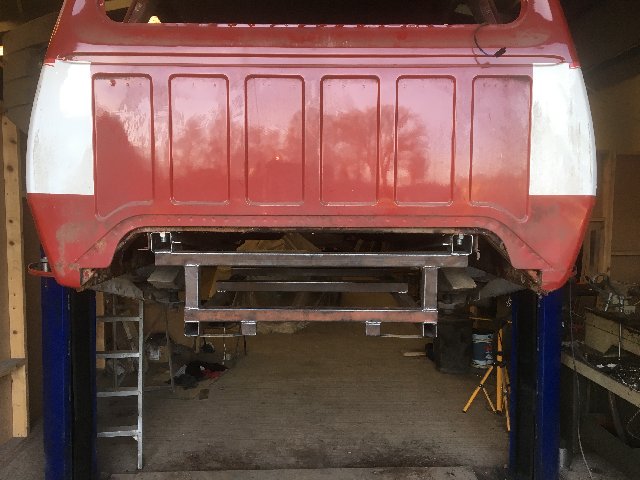
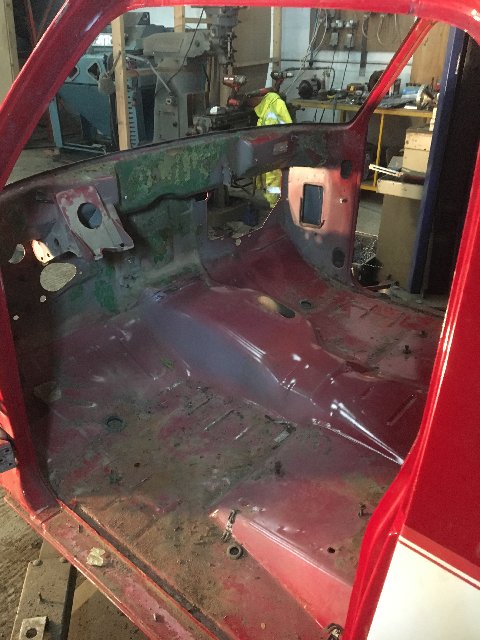
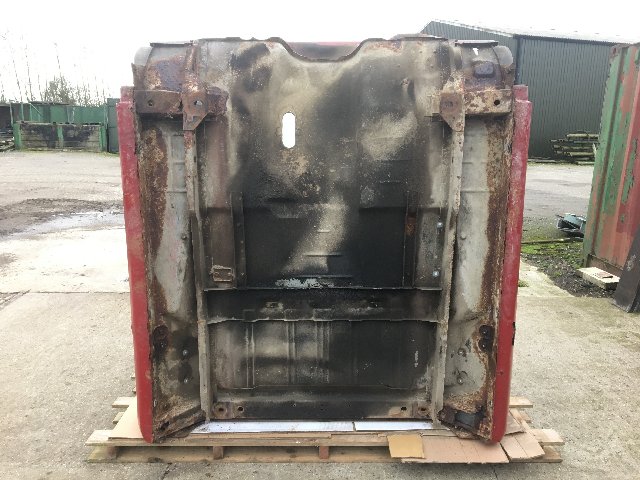
I couldn't put off welding the cab up any more. So I took it off my 2 post lift where it has sat for 2 weeks short of a year and took it outside, flipped it on its back, washed all the oil off the underside.
Then I shot blasted the underneath from the body mounts outwards, then just cleaned up the centre with a wire wheel as the good 'ol leaking cummins had kept all this steel in pristine condition.
Then a coating of primer on the bare steel.

Then I shot blasted the underneath from the body mounts outwards, then just cleaned up the centre with a wire wheel as the good 'ol leaking cummins had kept all this steel in pristine condition.
Then a coating of primer on the bare steel.