
VE rebuild with pics Look inside
 04-27-2008, 02:07 PM
#16
Registered User
Thread Starter
Join Date: Dec 2006
Location: Jonesboro, TEXAS
Posts: 1,269
Likes: 0
Received 0 Likes
on
0 Posts
Well here goes.
This is not a FULL rebuild just enough to help out 99% of people that will get into there own pumps and do a reseal and some pump mods.
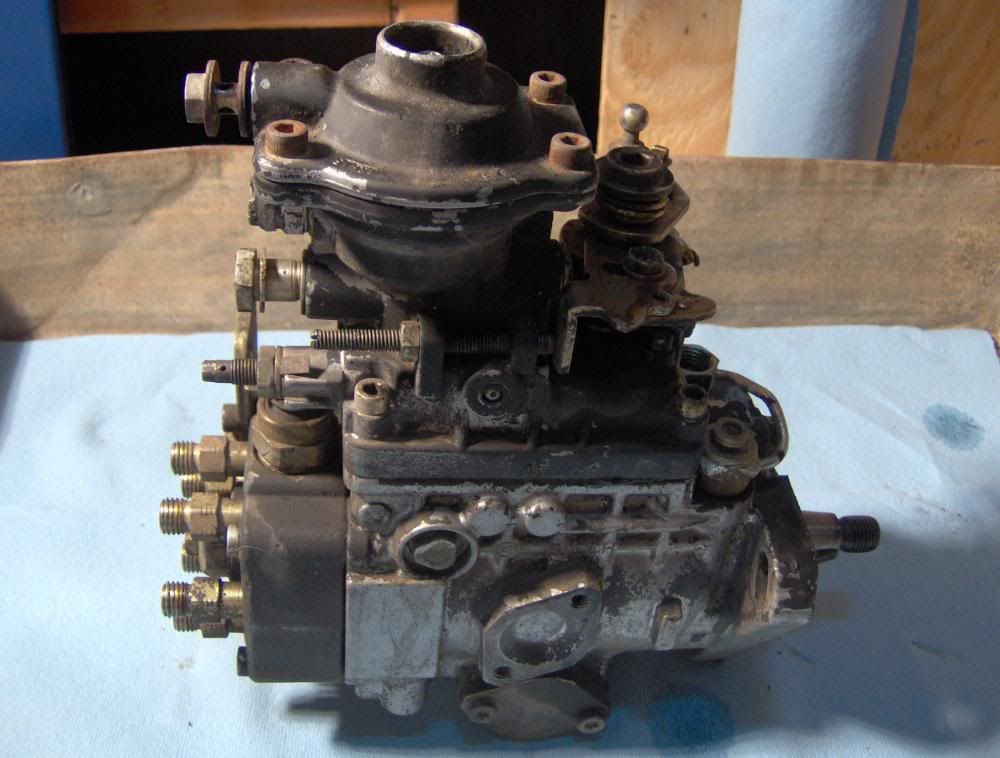
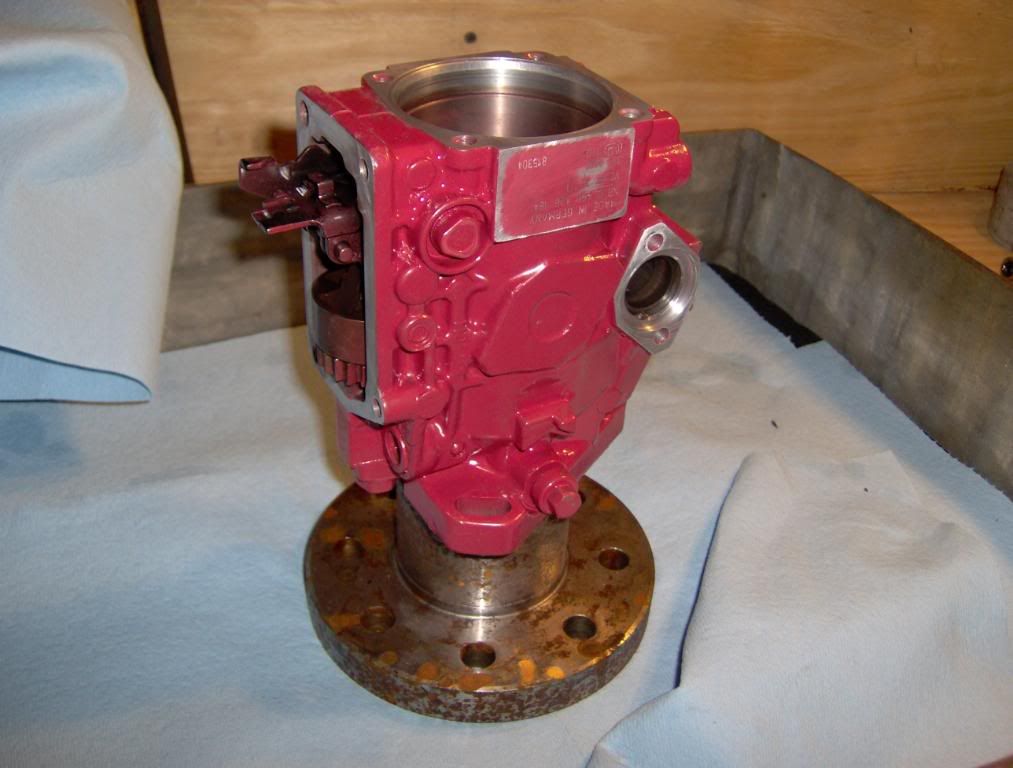
I am going to start with the pump removed. If You cant get the pump off You don't need to get inside it.
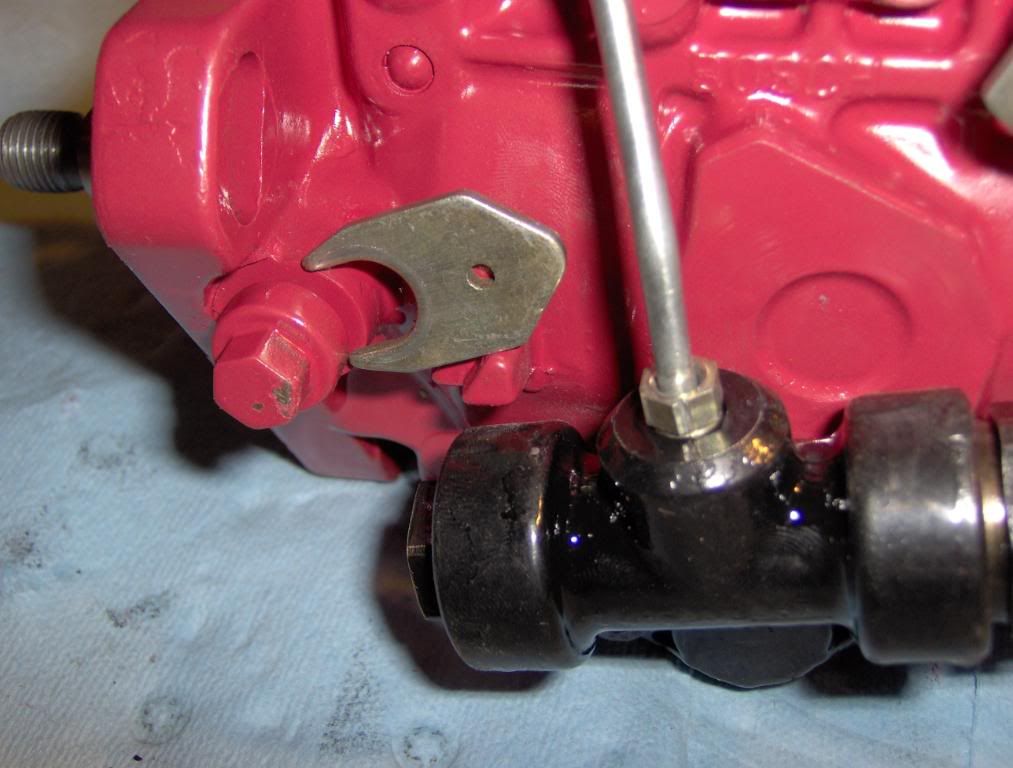
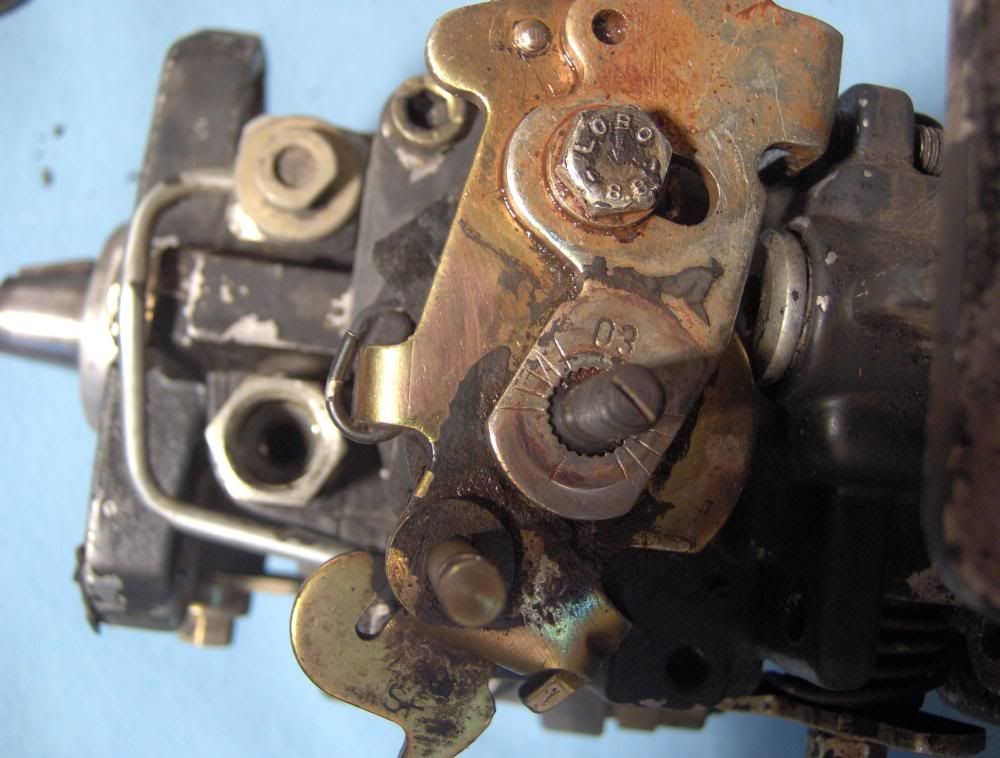
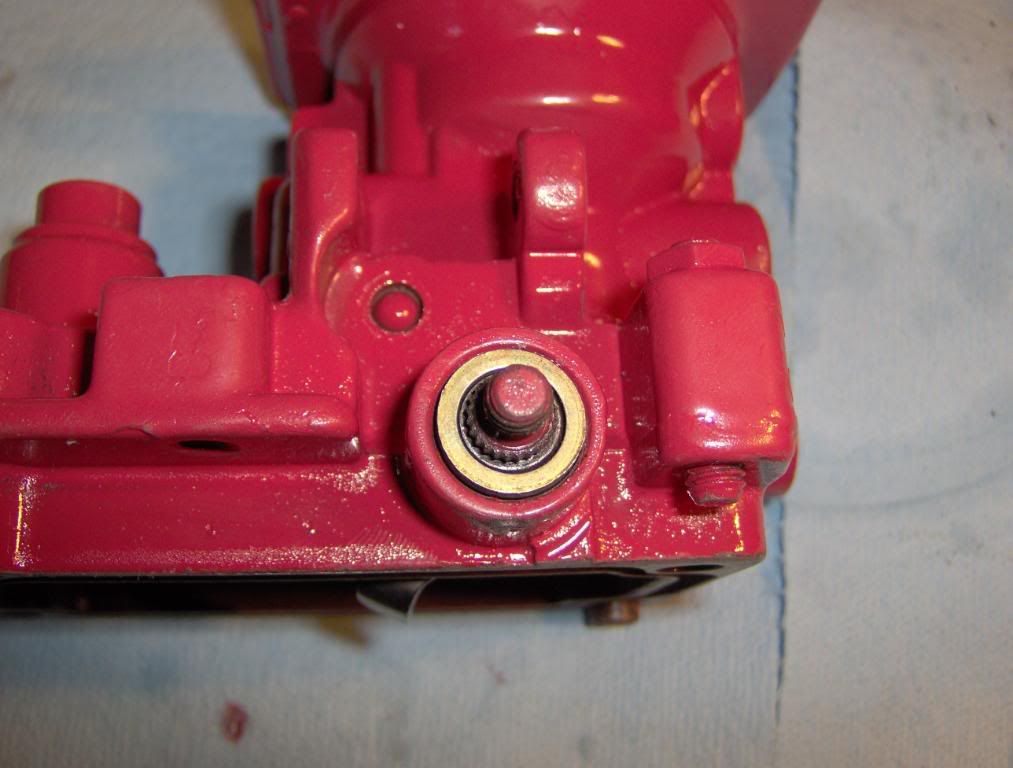
Well here is one thing you need to loosen the bolt with the small tab and remove the tab and snug up the bolt to lock the pump from spinning. Don't over do it it only has to be snug.
Well here the nasty thing is.

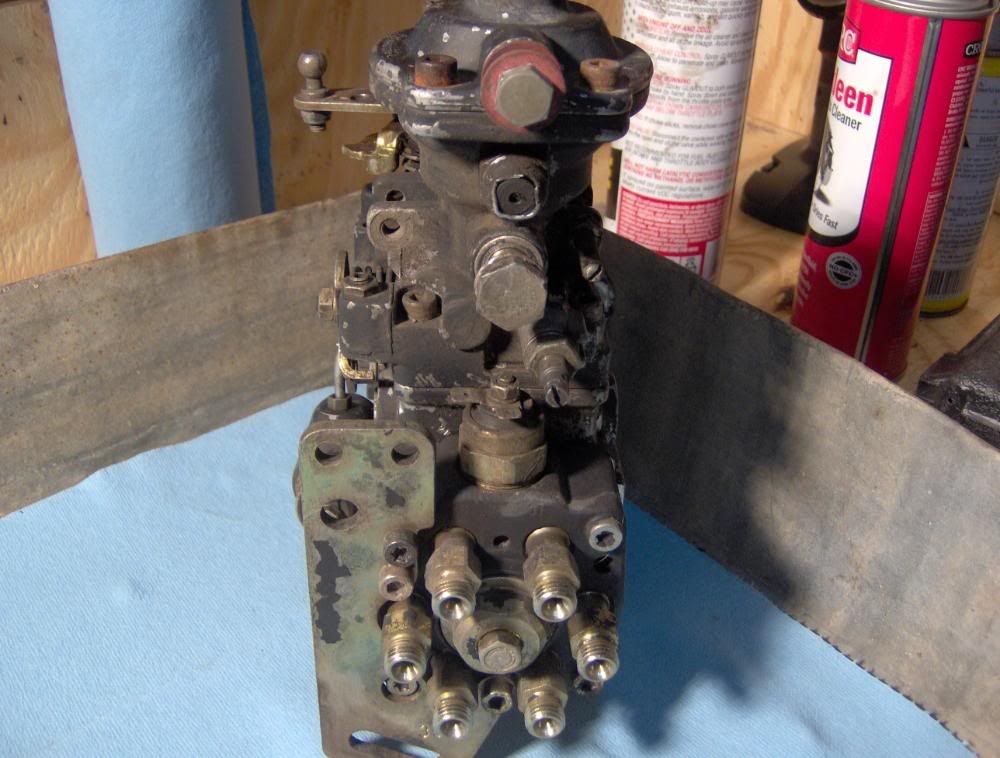
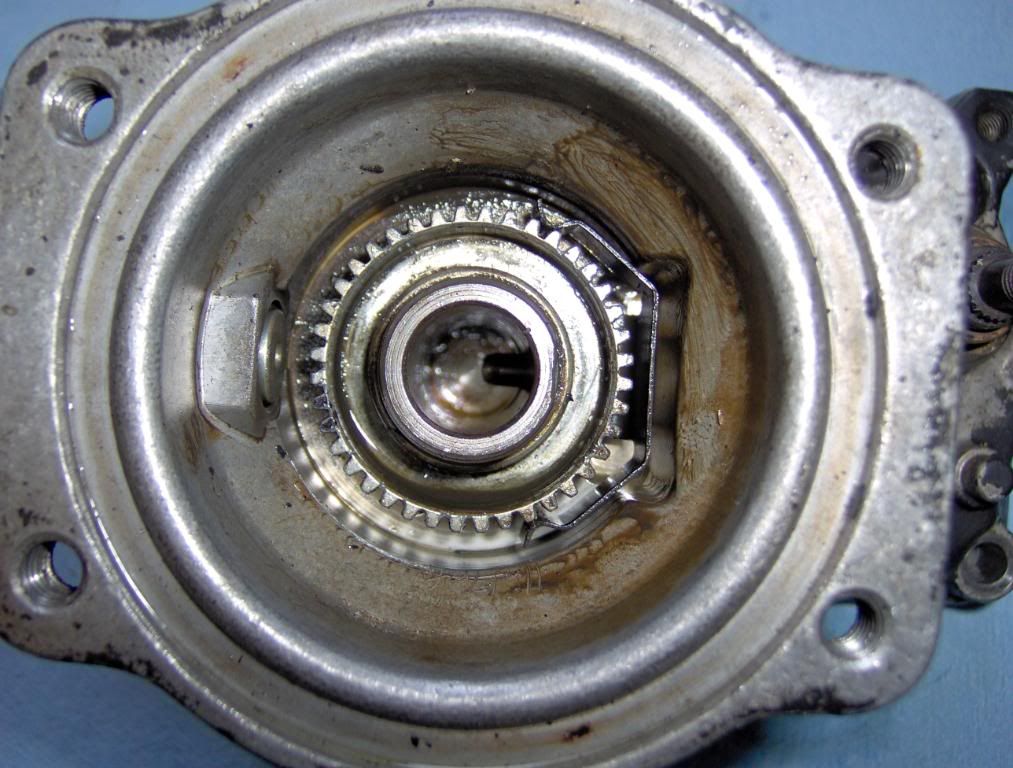
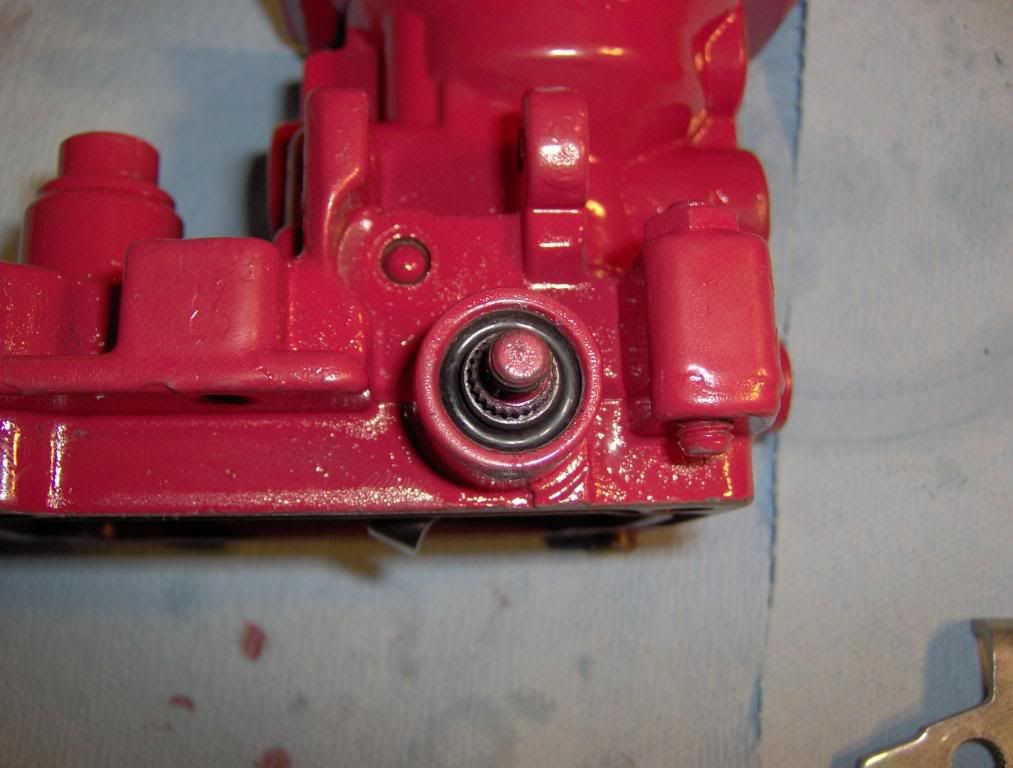
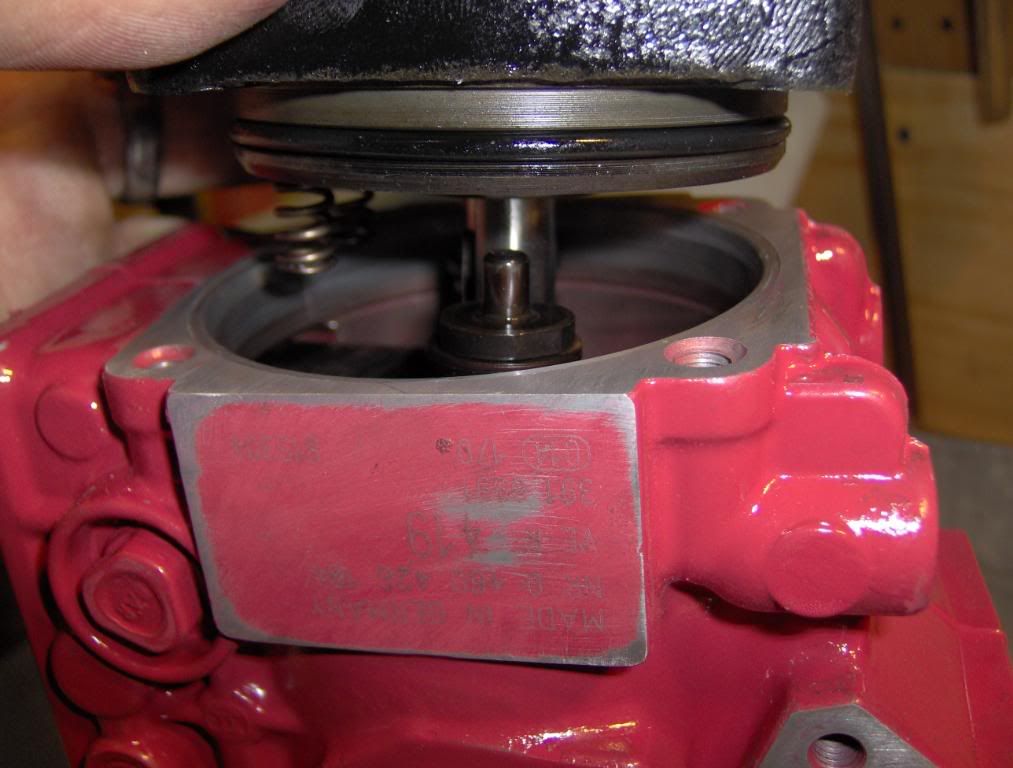
Here you can see the full fuel screw and lock nut on the bottom coming out of the back Just above it is the fuel return, you can also see the Idle adjustment screw and jam nut on the side of the pump. You can also see the Shut Down solenoid that is prone to failure. It can be removed and the spring and plunger taken out the reinstalled and use the manual shut down lever on the side of the pump. Above the fuel return is the Vent for the aneroid.
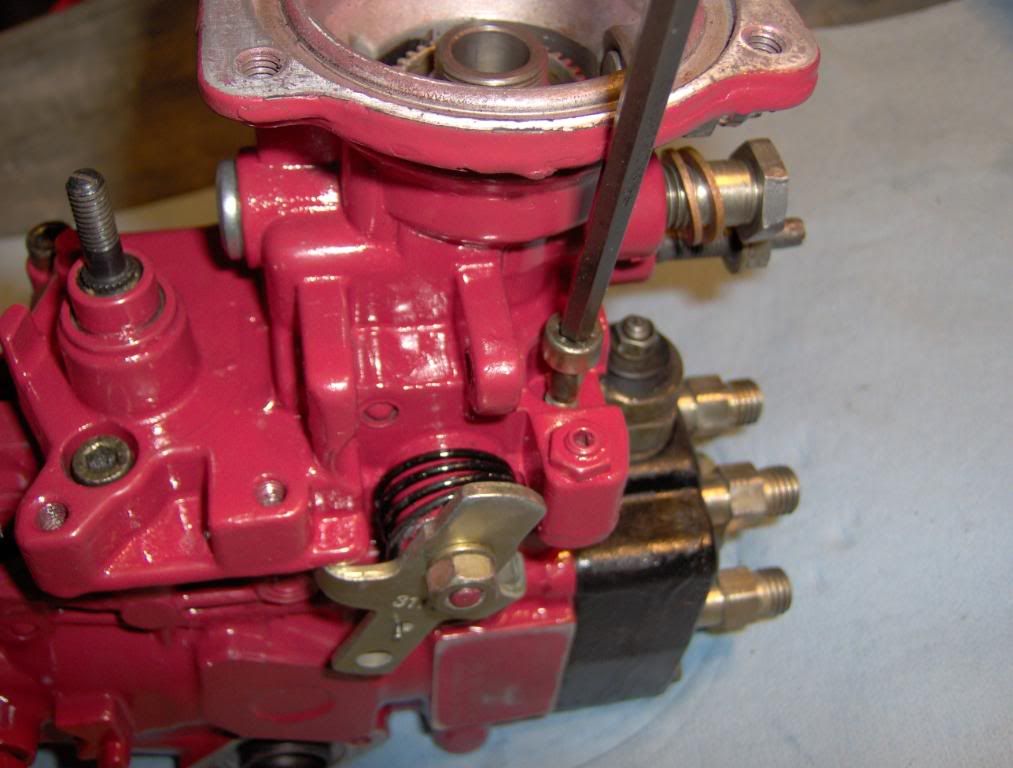
Lets start with the easy things remove the Allen head from the top of the throttle shaft and mark or note the position so that it can be indexed correctly when put back.
Remove the fuel pin and spring
 04-27-2008, 02:09 PM
#17
Registered User
Thread Starter
Join Date: Dec 2006
Location: Jonesboro, TEXAS
Posts: 1,269
Likes: 0
Received 0 Likes
on
0 Posts
10 pic limmet
Then remove the 4 bolts that holt the top on the pump.
Then slowly remove the top and watch for the spring under the top. It will not just fly out. This is your govener spring and it is attached to the throtle shaft and should be disconected so that you can remove the top.
Then remove it from the "Top Hat" and remove all of it from the pump.
You can now push the throttle rod out of the top and replace the O-ring.
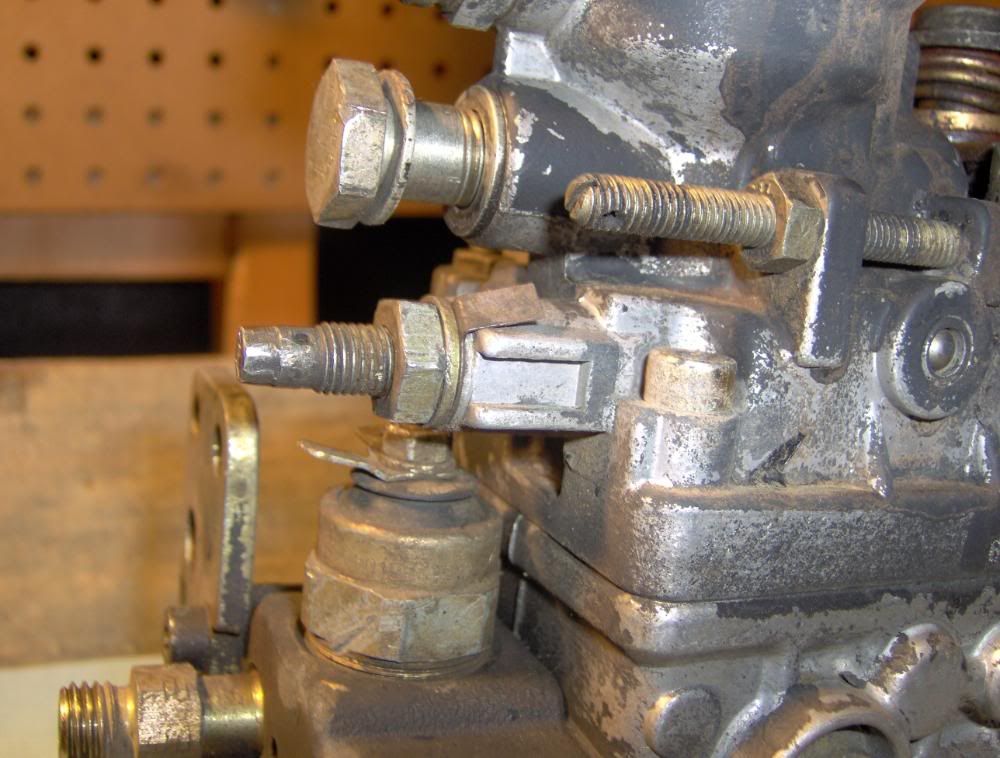
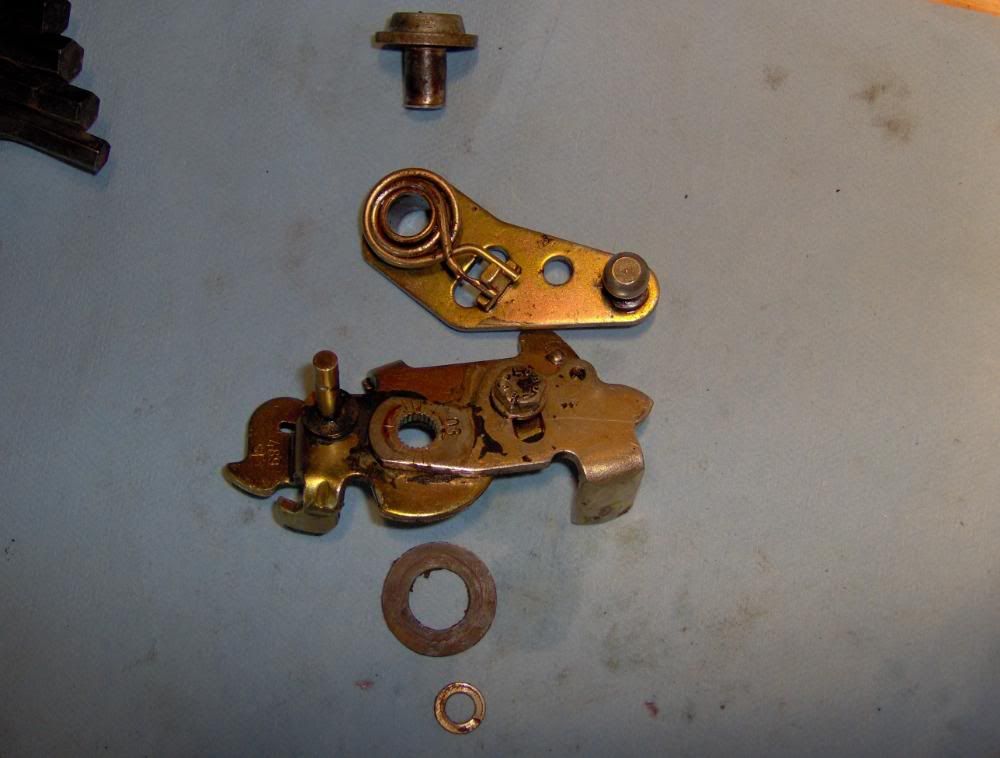
This is the lever that many people grind to get even more fuel it is the other end of the lever that rides on the fuel pin. The lever beside it is the manual Kill lever.
remove the nut but hold pressure on the lever so that it dose not slip. Mark how the Kill lever indexes to the shaft and then remove the lever, spring and washer. then you can you will see the o-ring and can replace it.
Then remove the 4 bolts that holt the top on the pump.
Then slowly remove the top and watch for the spring under the top. It will not just fly out. This is your govener spring and it is attached to the throtle shaft and should be disconected so that you can remove the top.
Then remove it from the "Top Hat" and remove all of it from the pump.
You can now push the throttle rod out of the top and replace the O-ring.
This is the lever that many people grind to get even more fuel it is the other end of the lever that rides on the fuel pin. The lever beside it is the manual Kill lever.
remove the nut but hold pressure on the lever so that it dose not slip. Mark how the Kill lever indexes to the shaft and then remove the lever, spring and washer. then you can you will see the o-ring and can replace it.
04-27-2008, 02:47 PM
#18
Registered User
Thread Starter
Join Date: Dec 2006
Location: Jonesboro, TEXAS
Posts: 1,269
Likes: 0
Received 0 Likes
on
0 Posts
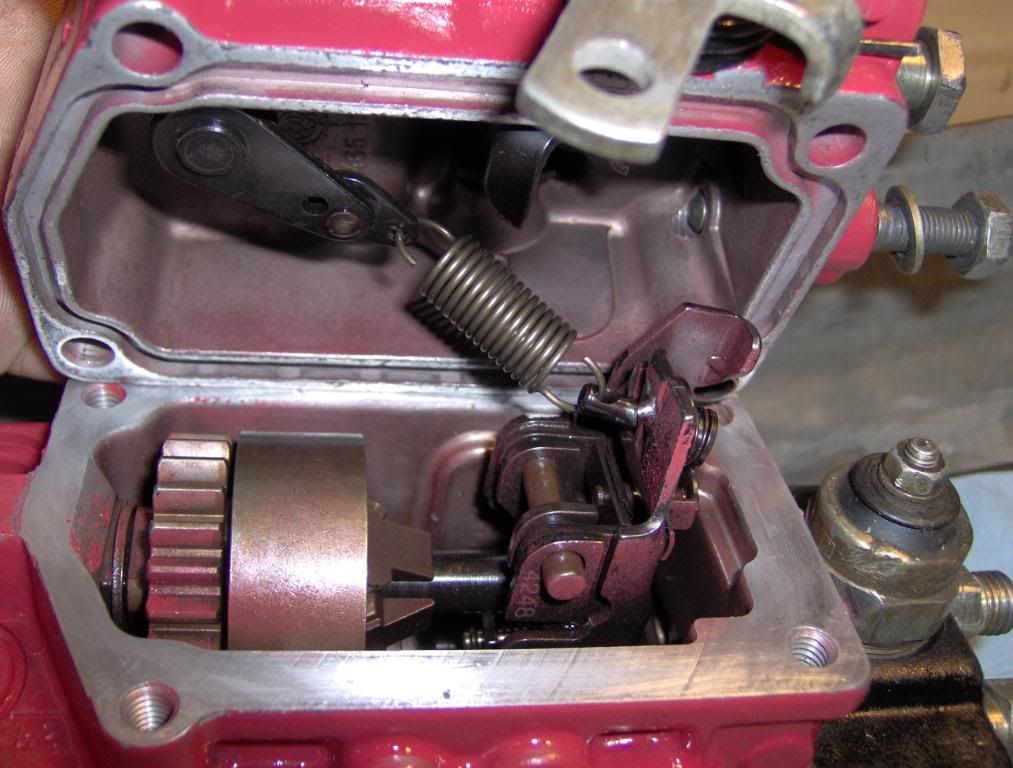
Now lets do the KSB
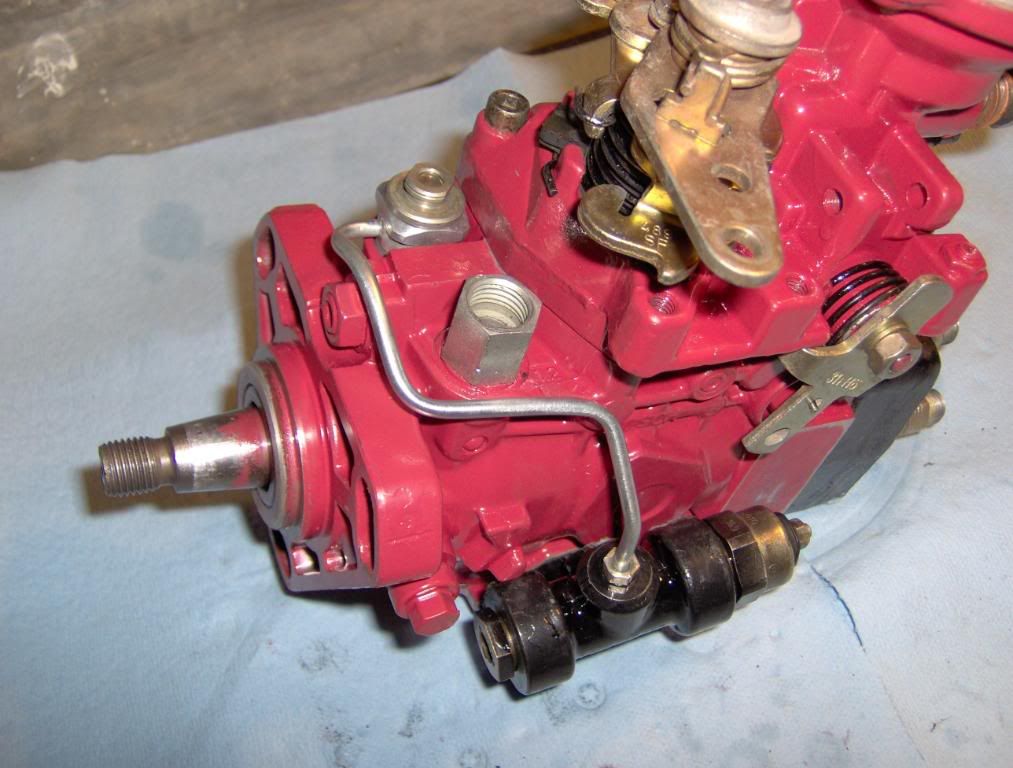
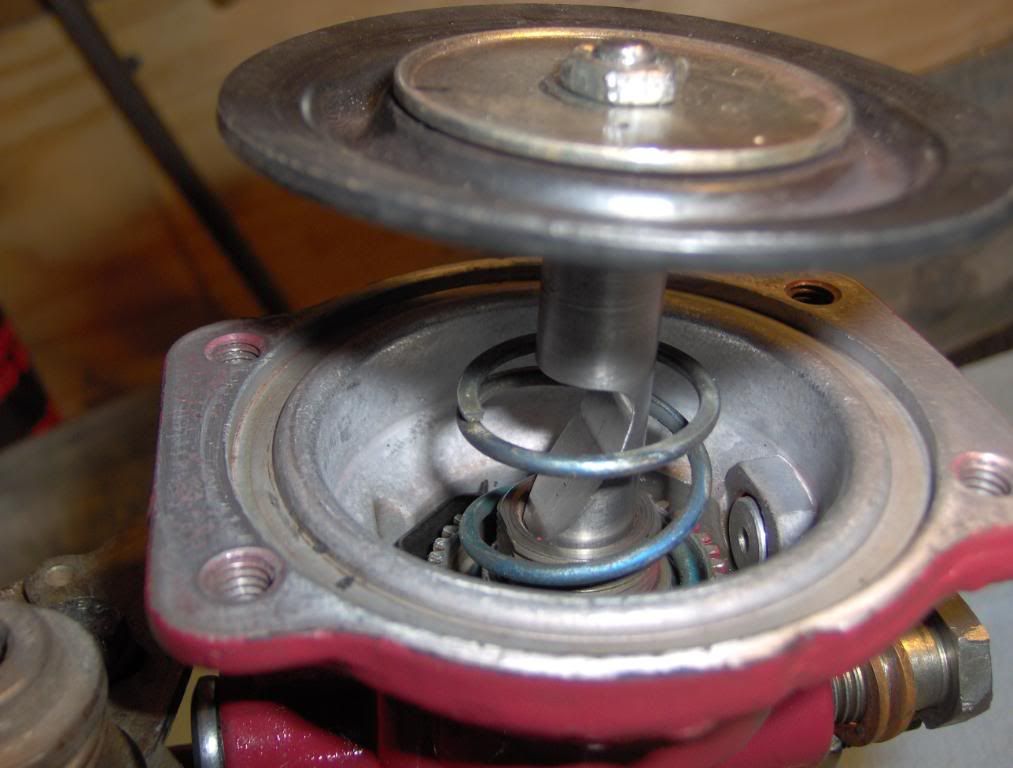
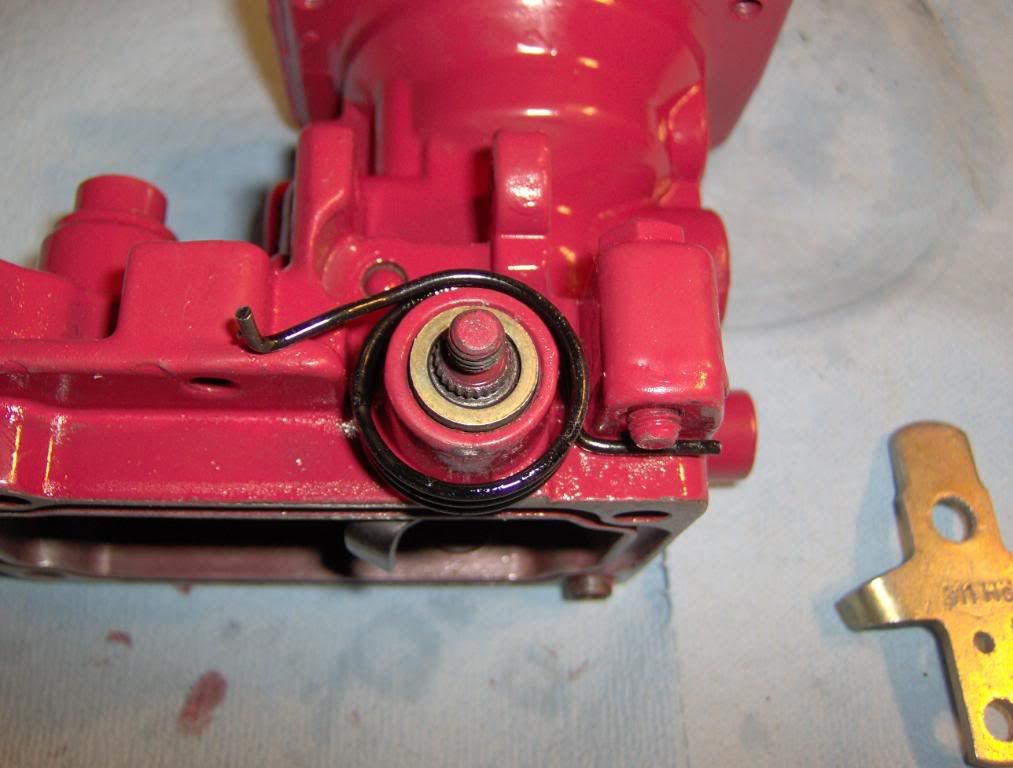
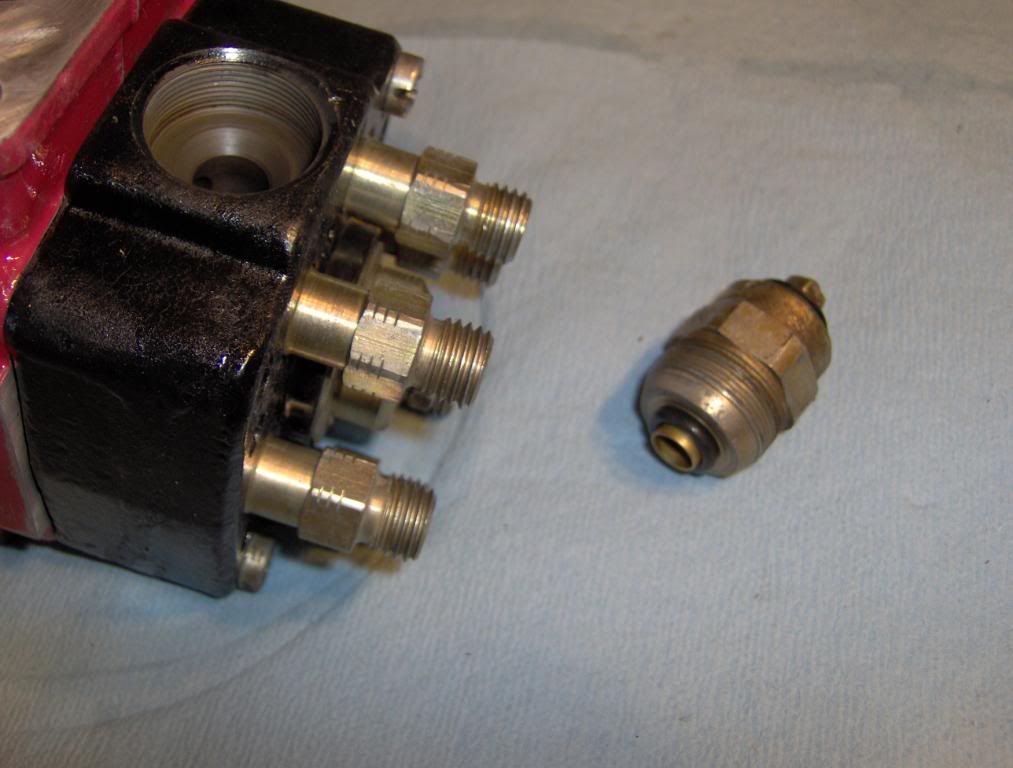
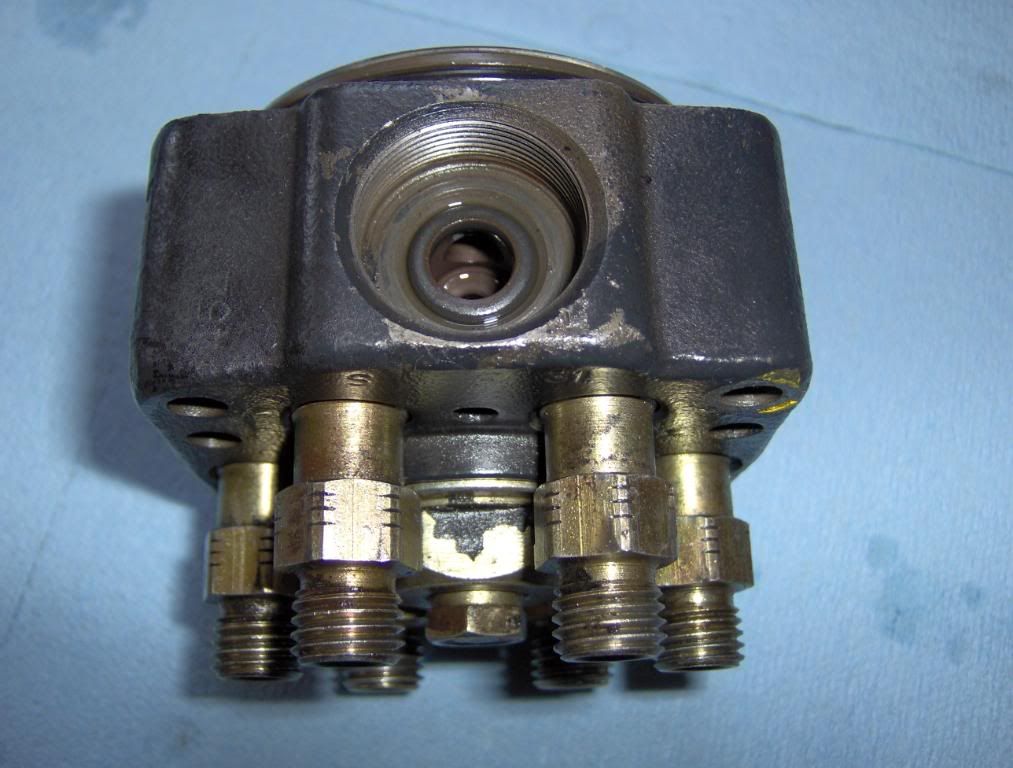
1st remove the Pressure Regulator The bolt on top of the pump there are 3 o-rings on it that need to be replaced.
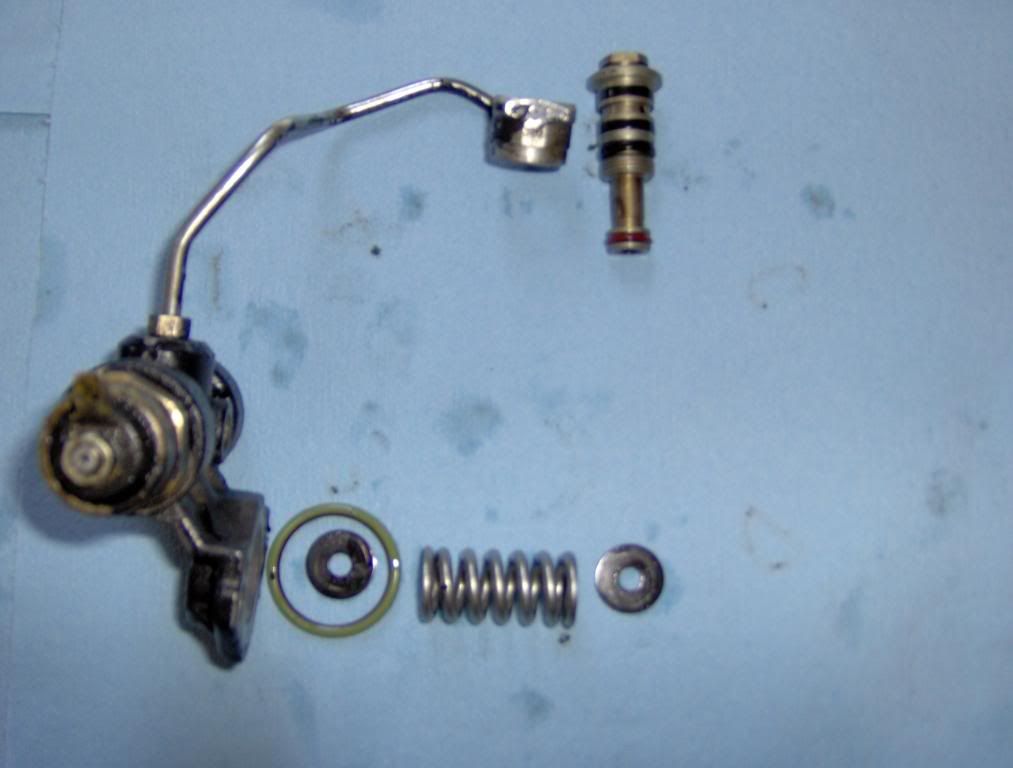
Then remove the KSB and line and you will find a spring and 2 washers and the o-ring .
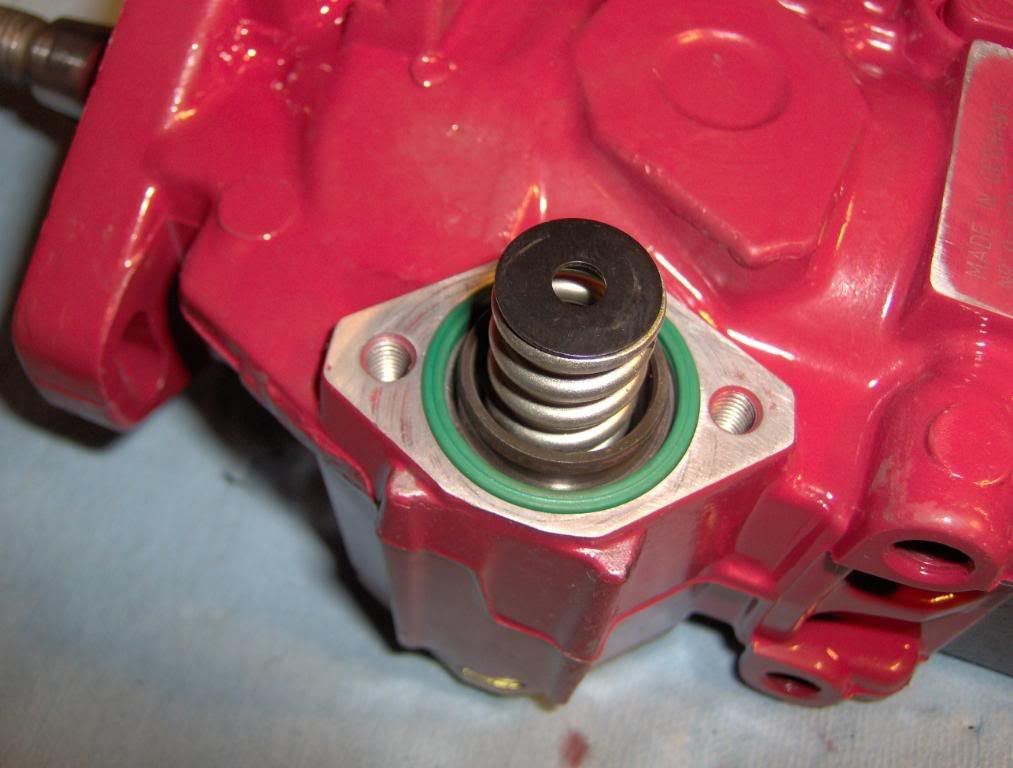
there is another one on the other side of the pump under a cover plate
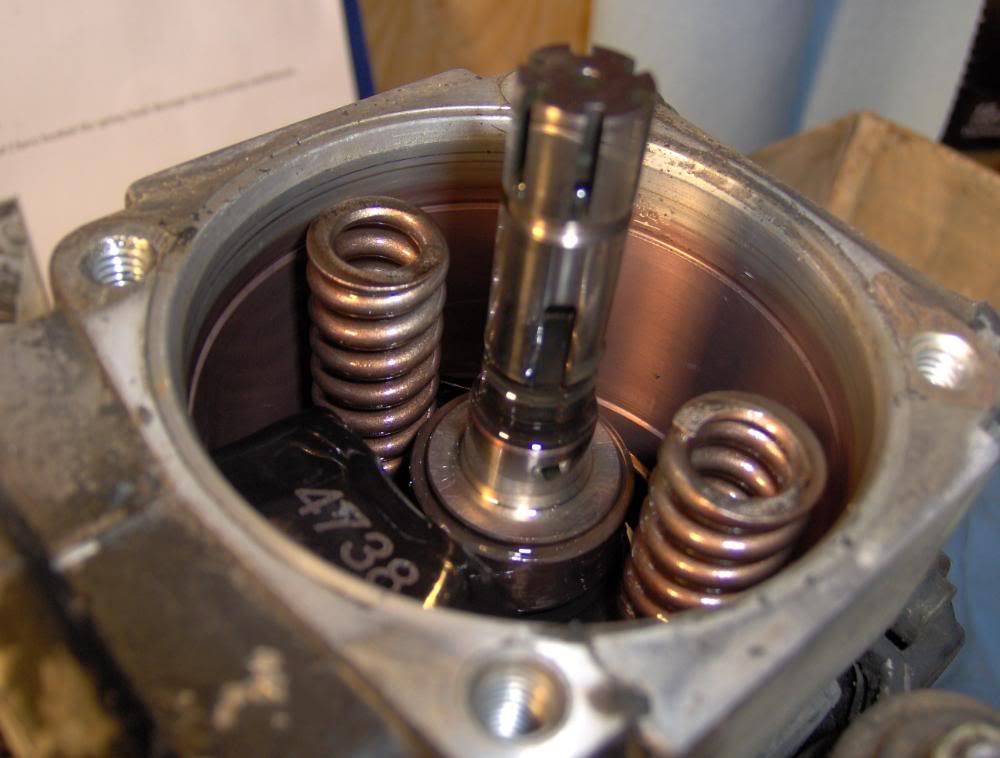
Here comes the fun part.
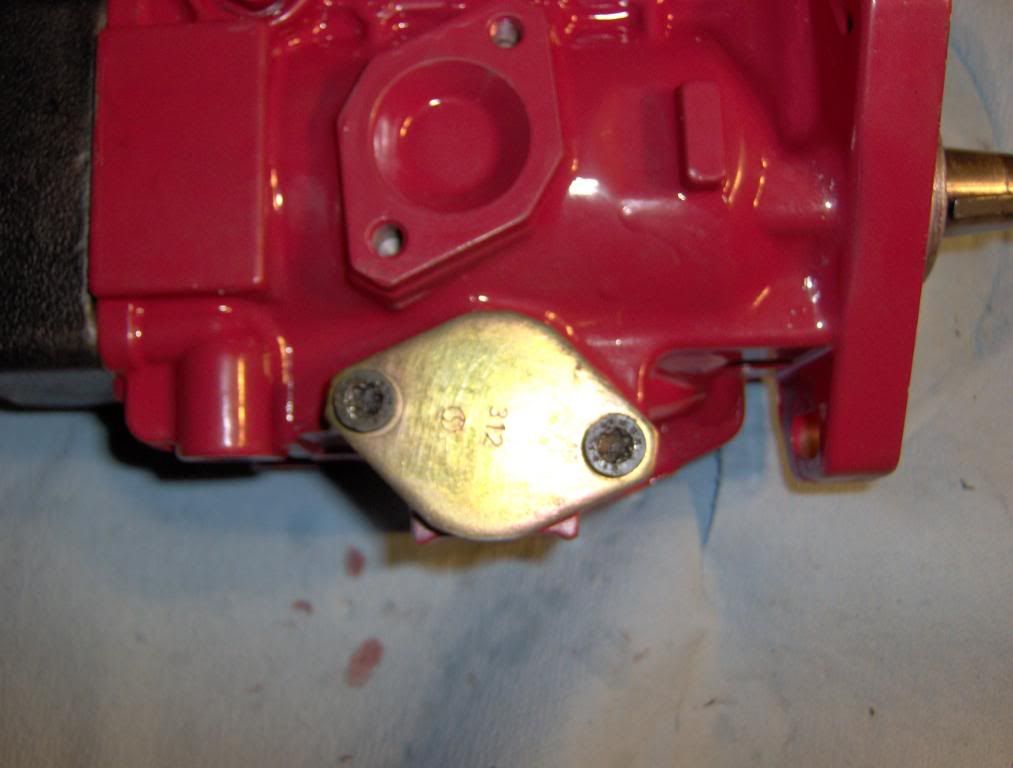
Start by removing the support bracket from the back or the pump head
then place pump on its end if you can but you don't have to. remove the other bolts that hold the head on.
slowly remove the pump head. If you only need to replace this seal you can just loosen the bolts and lift the head high enough to see the o-ring and then remove it and replace it and re install with no probs.
Here are the return springs for the cam plate and plunger.
1st remove the Pressure Regulator The bolt on top of the pump there are 3 o-rings on it that need to be replaced.
Then remove the KSB and line and you will find a spring and 2 washers and the o-ring .
there is another one on the other side of the pump under a cover plate
Here comes the fun part.
Start by removing the support bracket from the back or the pump head
then place pump on its end if you can but you don't have to. remove the other bolts that hold the head on.
slowly remove the pump head. If you only need to replace this seal you can just loosen the bolts and lift the head high enough to see the o-ring and then remove it and replace it and re install with no probs.
Here are the return springs for the cam plate and plunger.
04-27-2008, 03:04 PM
#19
Registered User
Thread Starter
Join Date: Dec 2006
Location: Jonesboro, TEXAS
Posts: 1,269
Likes: 0
Received 0 Likes
on
0 Posts
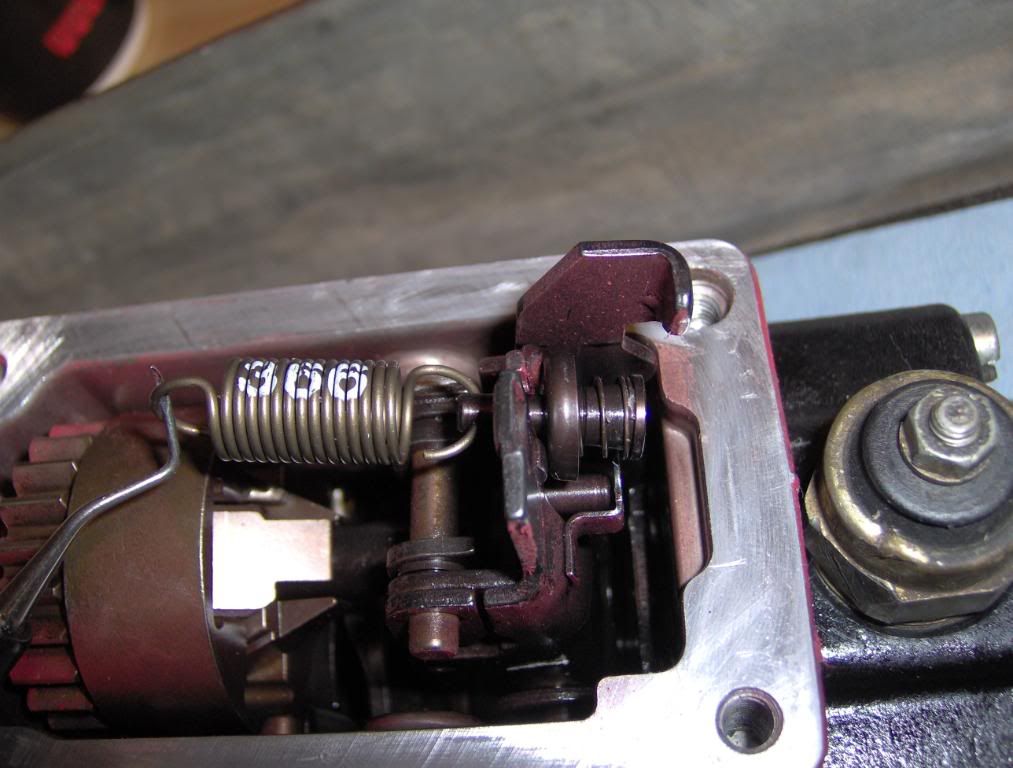
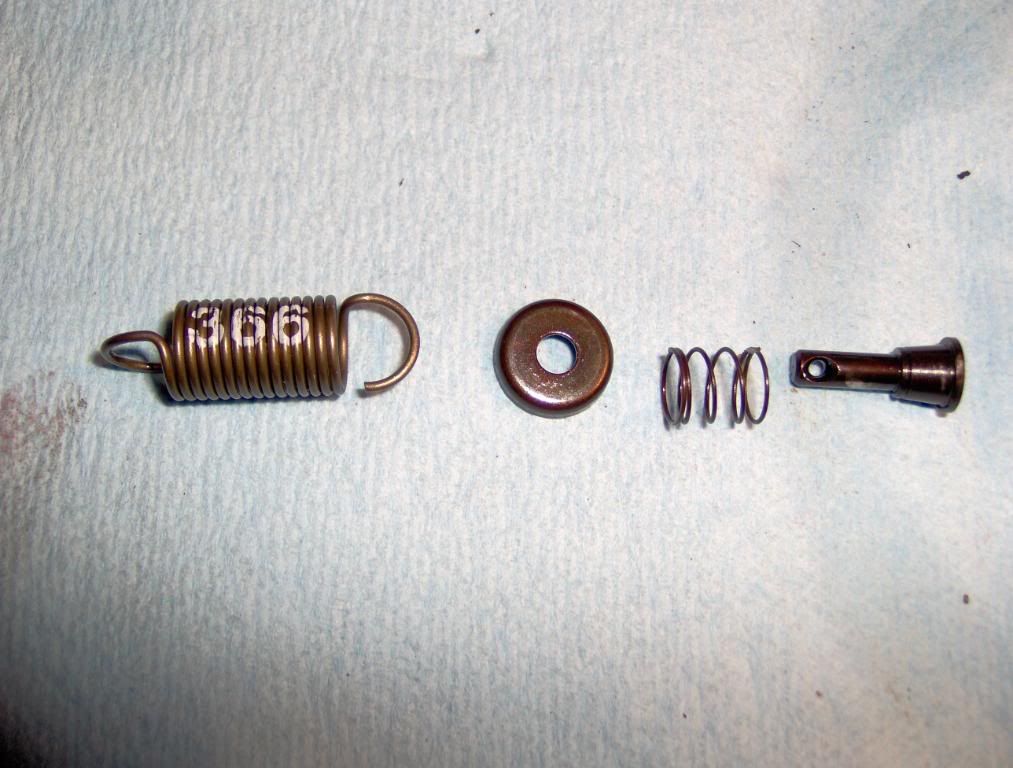
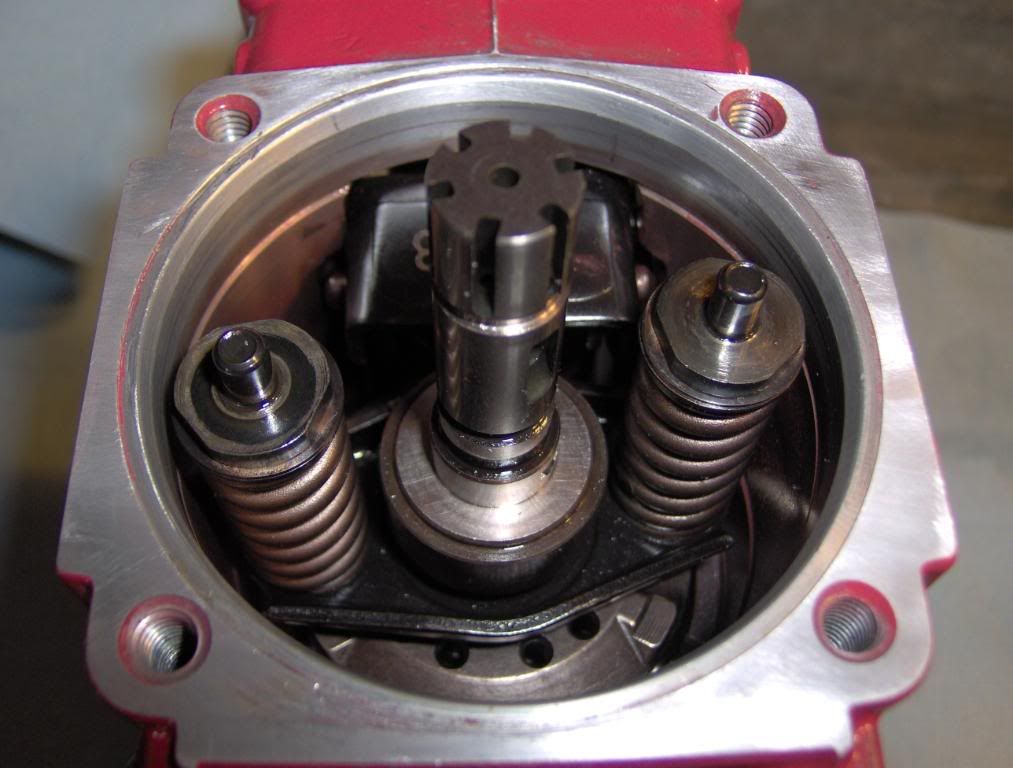
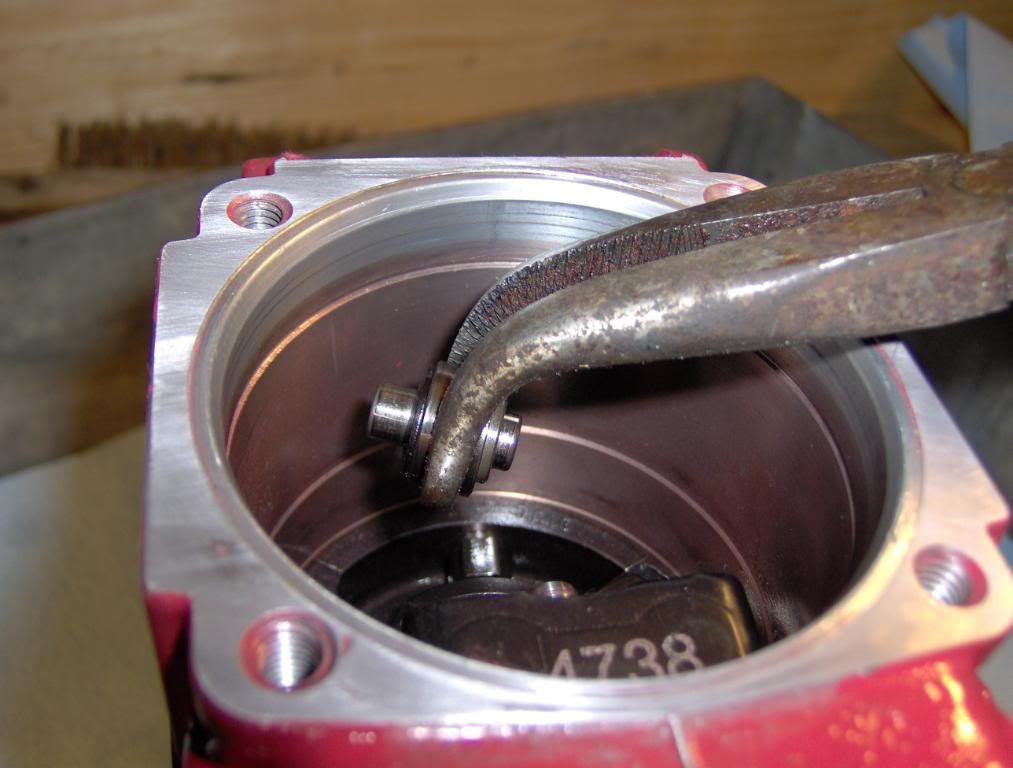
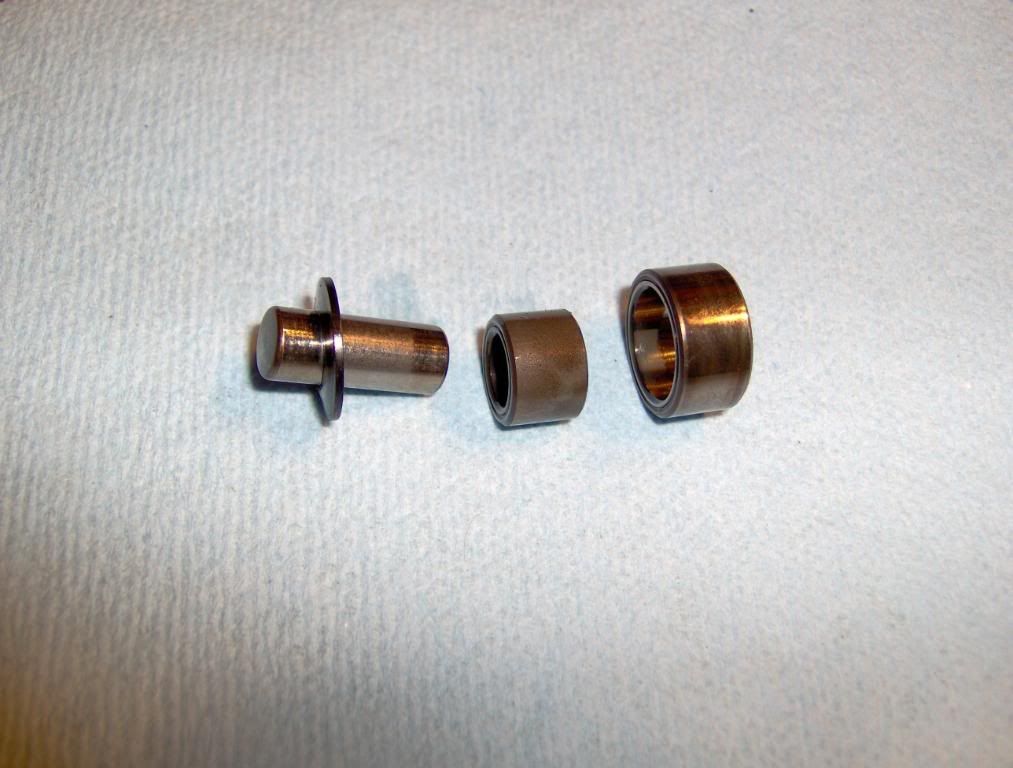
there are also 2 smaller springs that go in the head
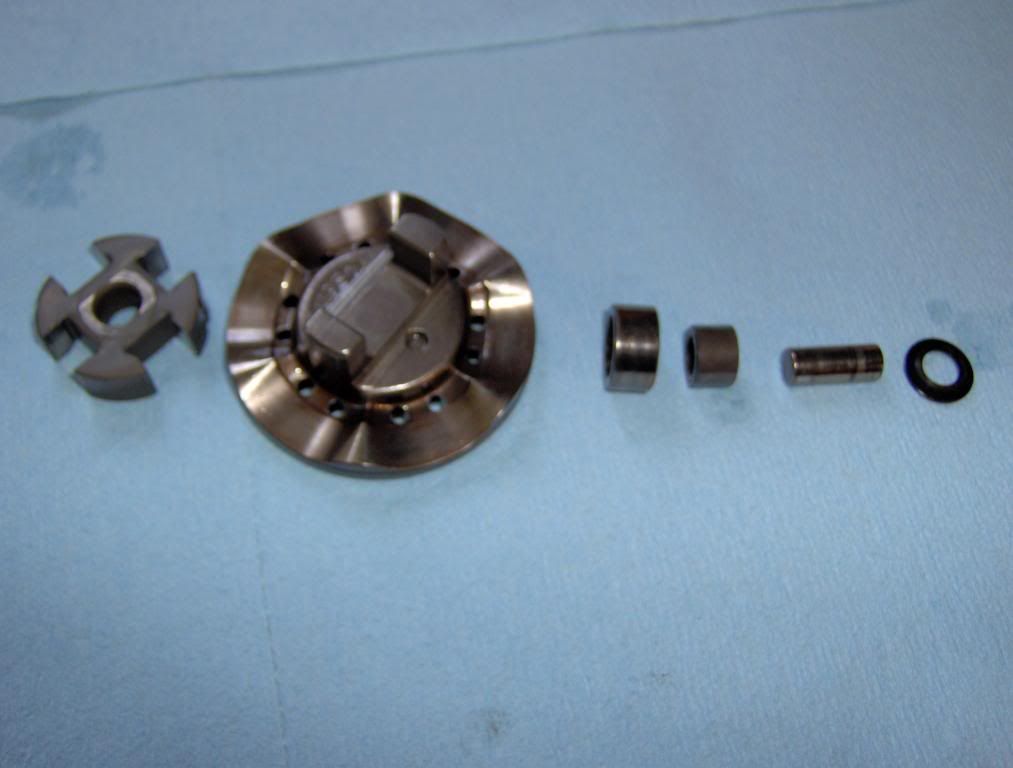
here is all the springs, shim's, pins and goodies. you must keep the pins, shims , and springs that go together together.
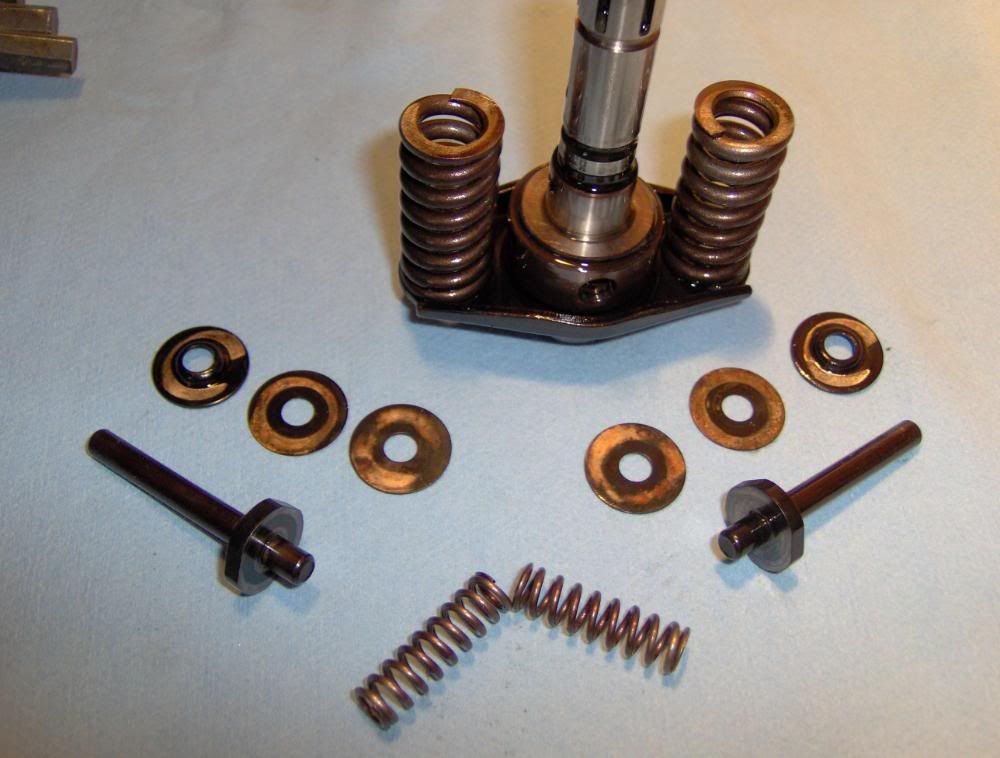
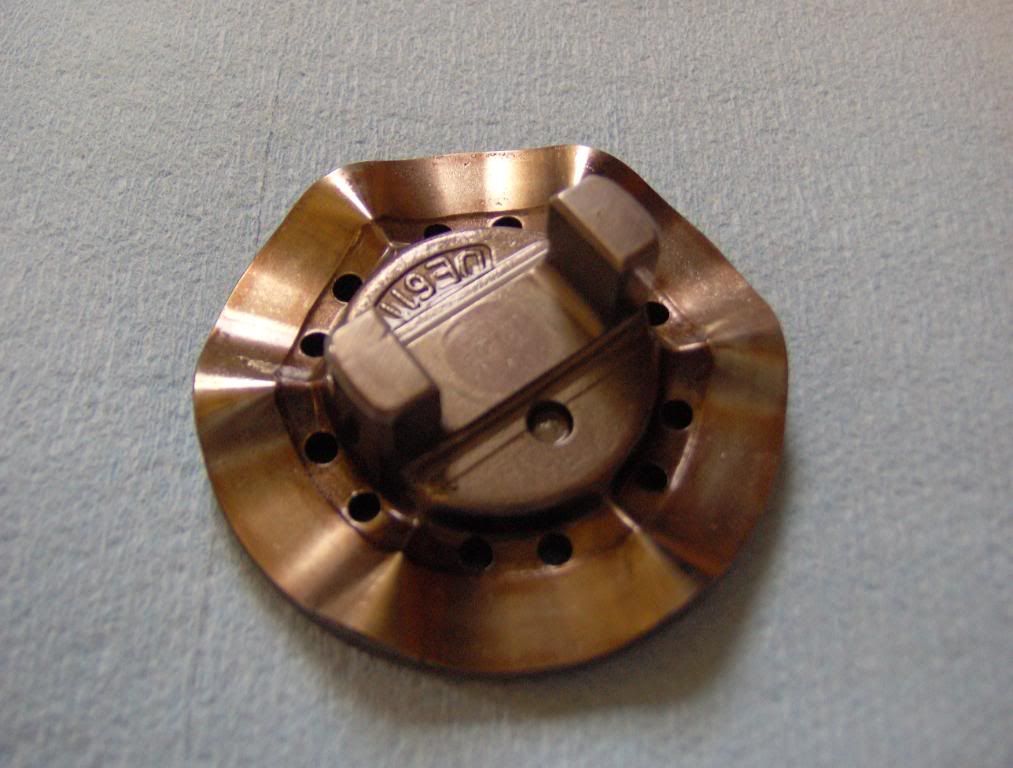
Here you can see where the ball goes into the slide collar on the piston the controls fuel delivery when you remove the piston there is a piece under it that is like a thick washer so keep track of it. the Piston keyed to the cam plate that it sits on.
Next remove the Cam Plate then you will see the rollers and + that connect it to the input shaft.
here is all the springs, shim's, pins and goodies. you must keep the pins, shims , and springs that go together together.
Here you can see where the ball goes into the slide collar on the piston the controls fuel delivery when you remove the piston there is a piece under it that is like a thick washer so keep track of it. the Piston keyed to the cam plate that it sits on.
Next remove the Cam Plate then you will see the rollers and + that connect it to the input shaft.
04-27-2008, 03:22 PM
#20
Registered User
Thread Starter
Join Date: Dec 2006
Location: Jonesboro, TEXAS
Posts: 1,269
Likes: 0
Received 0 Likes
on
0 Posts
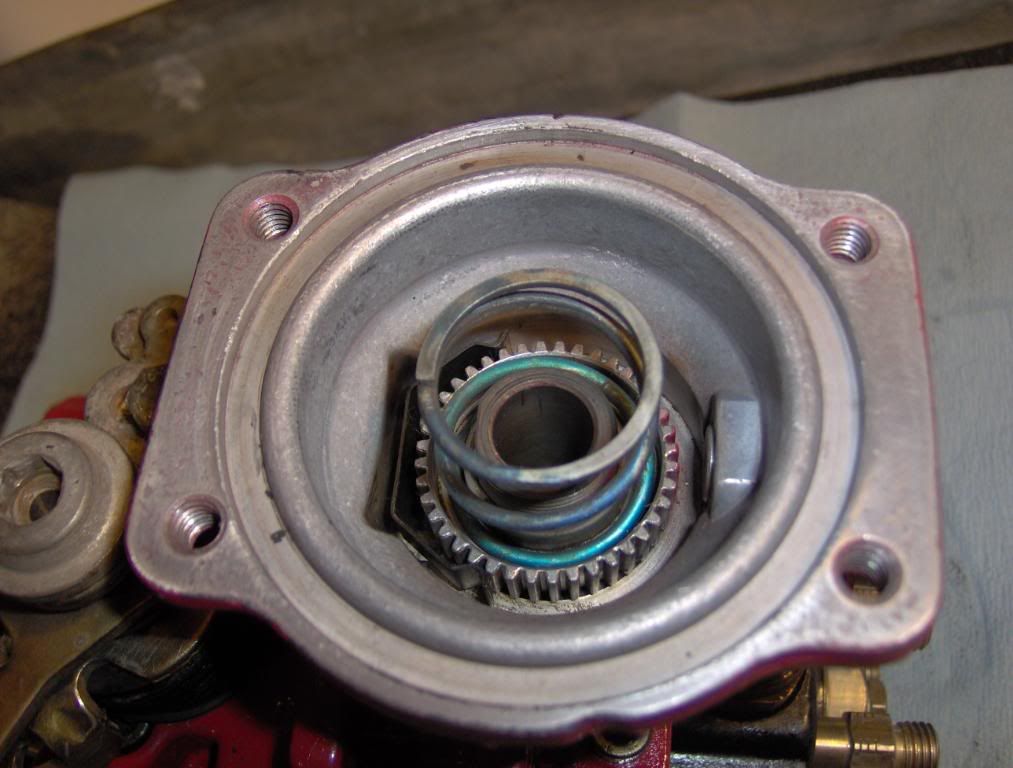
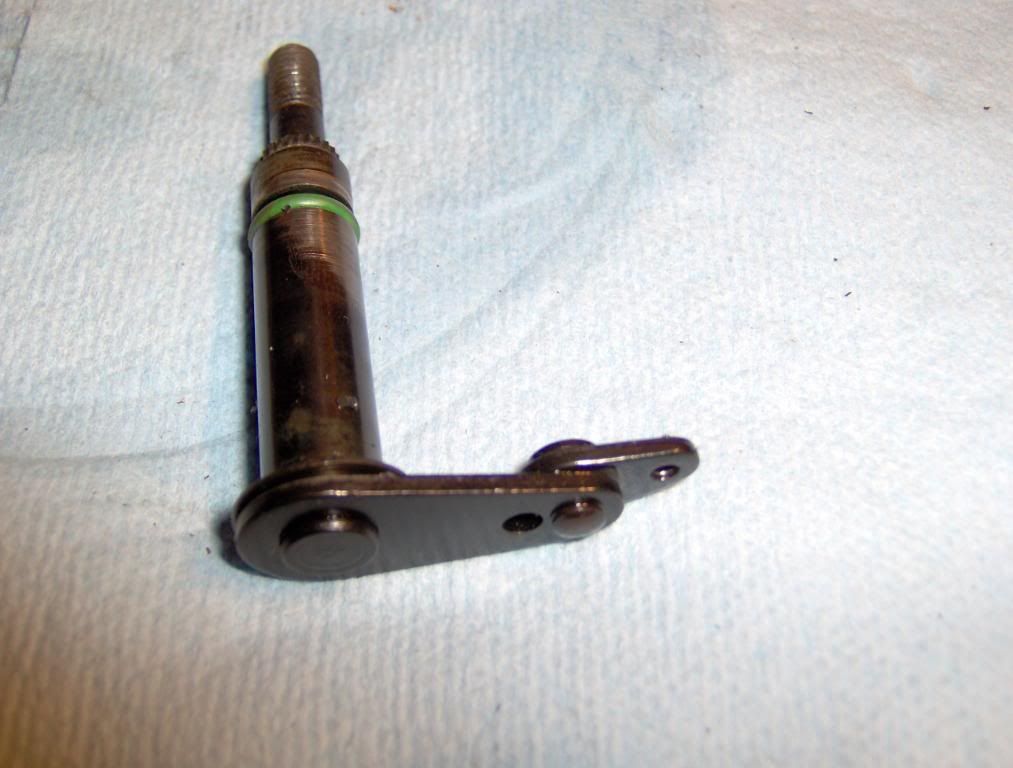
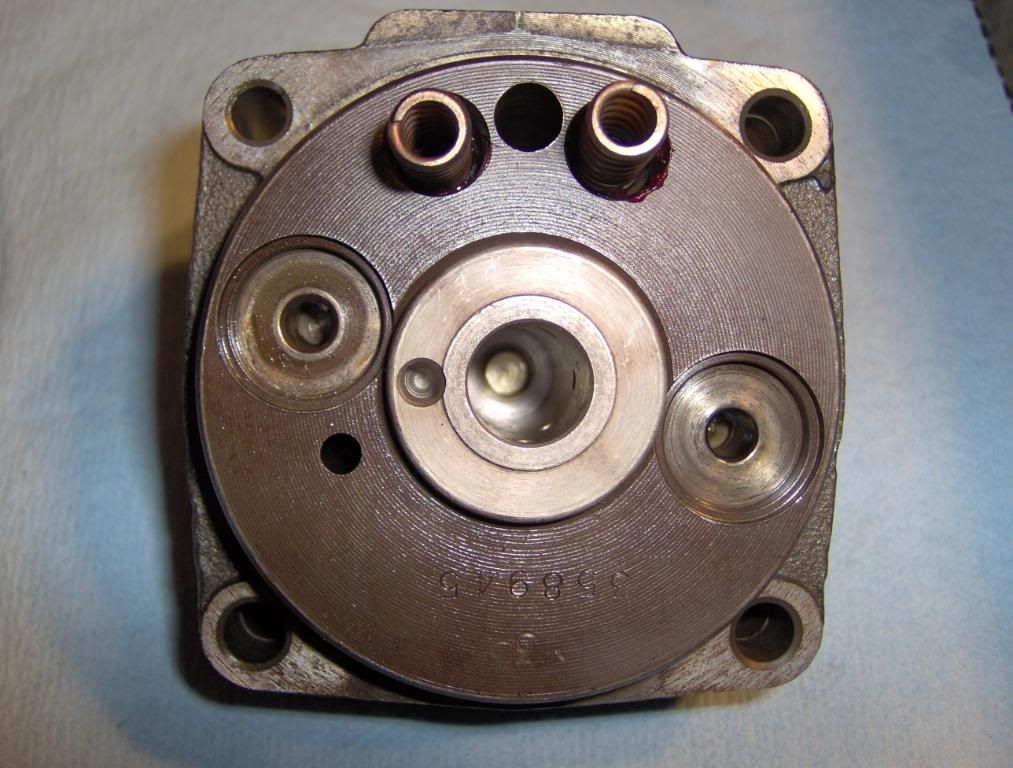
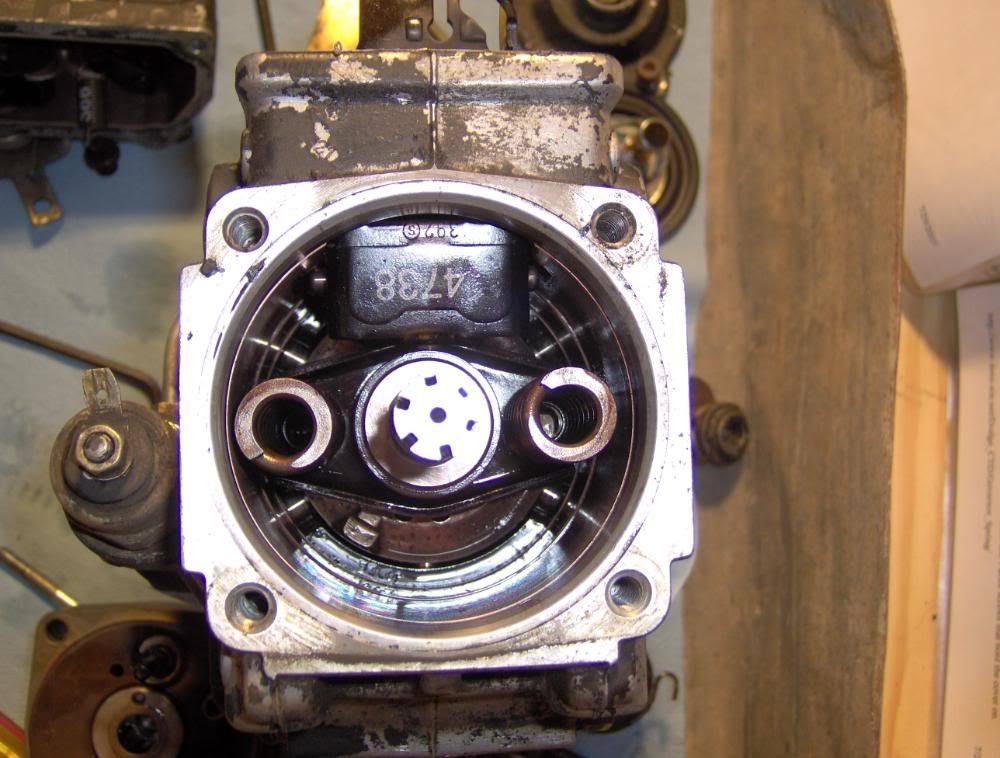
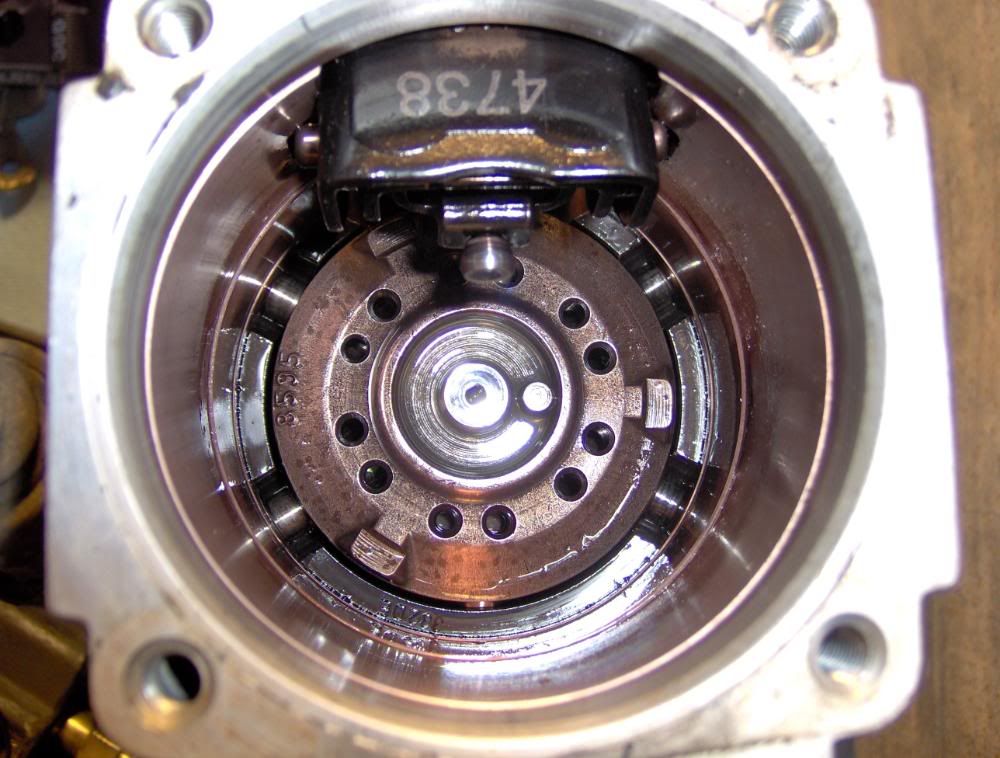
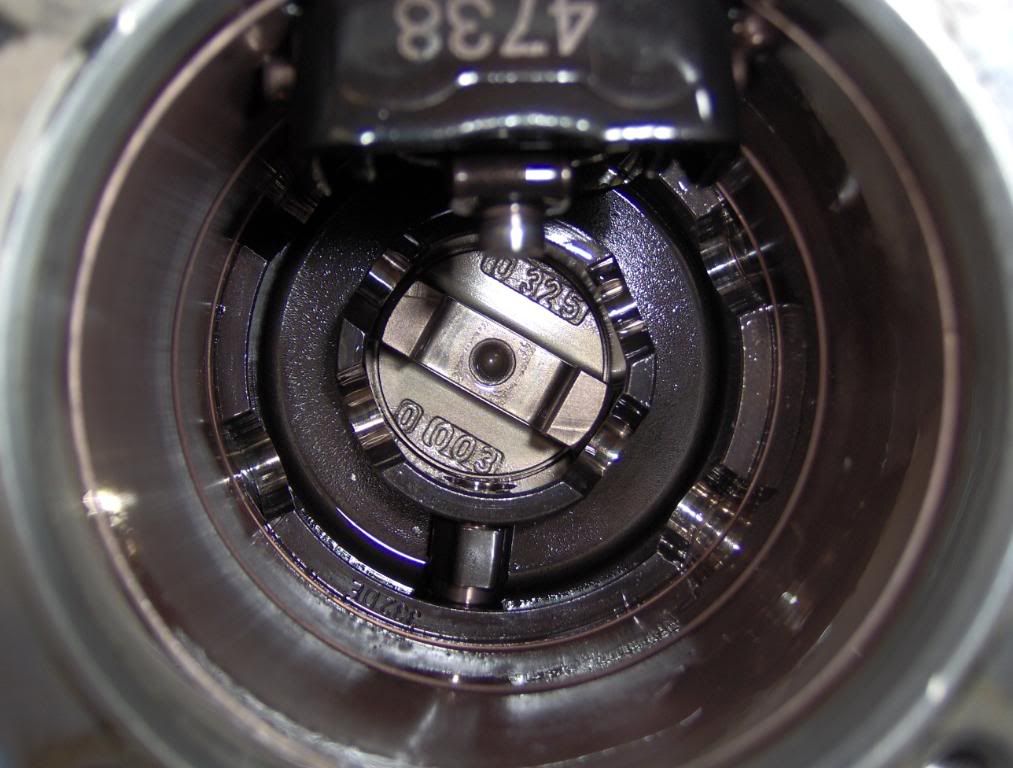
You HAVE to keep the rollers and pins and thrust washers together.
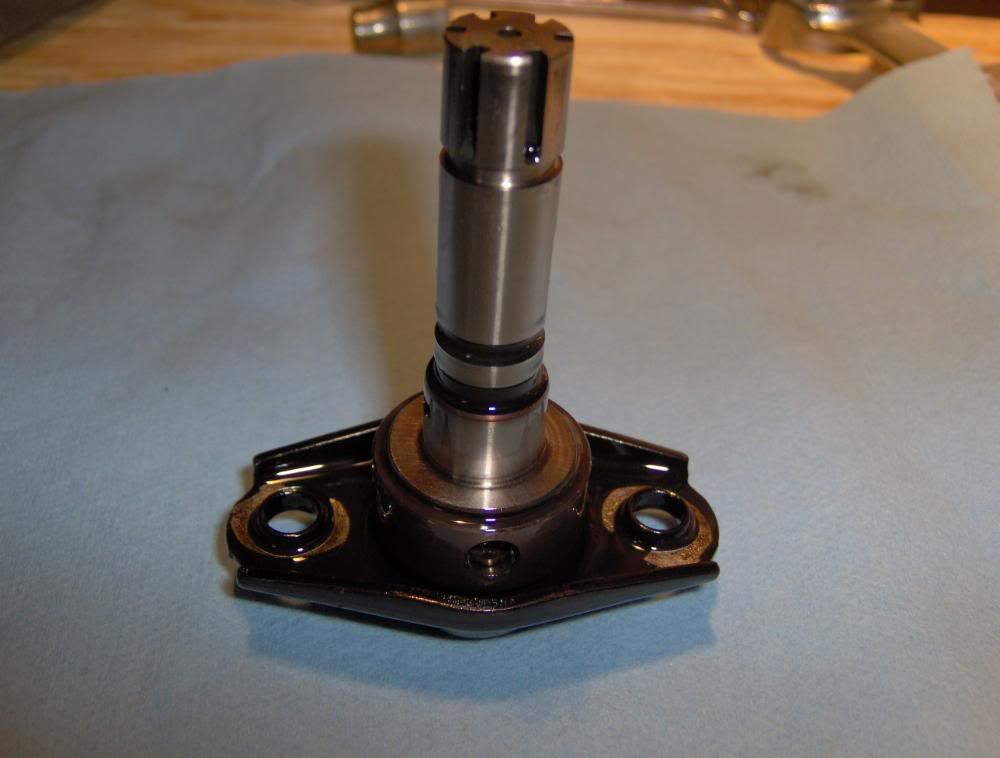
Here you can see were they ride. The KSB pushes the black ring and rotates the rollers and advances your Timing buy making the cam plate ride up on the rollers and stroke the piston sooner in the rotation that pops the injector a few * sooner before TDC.
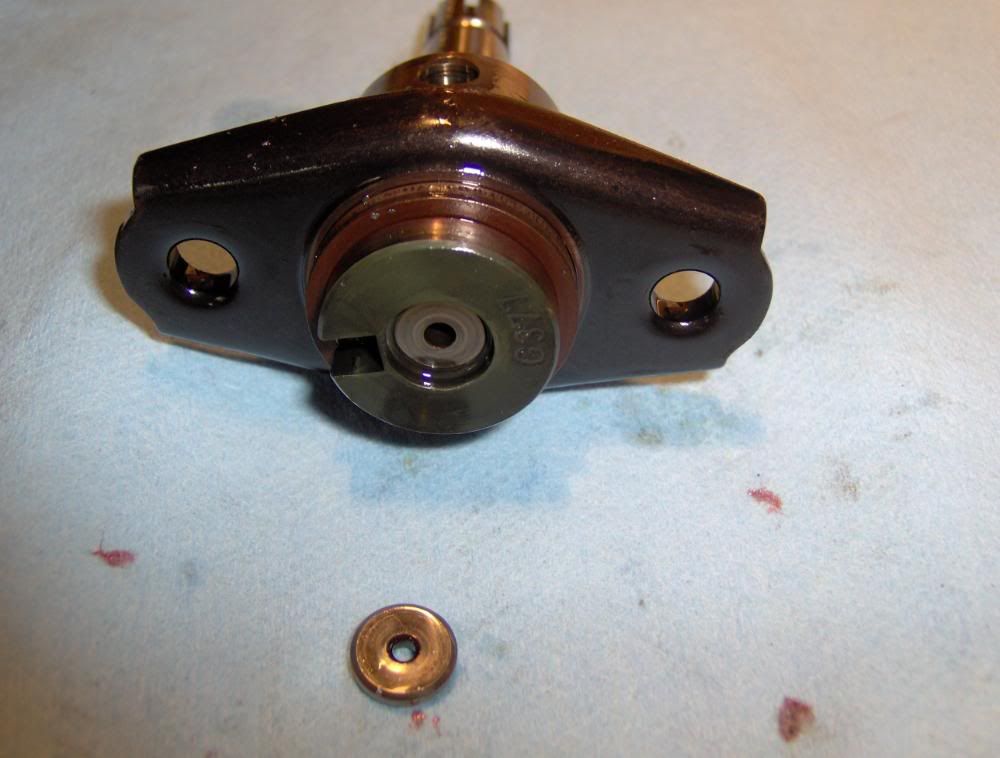
Now lets take the Head apart
This is how the piston fits in the head and builds the pressure. It also rotates like a distributor and delivers the fuel to the correct cylinder. It strokes every time the the cam plate rides up on the rollers.
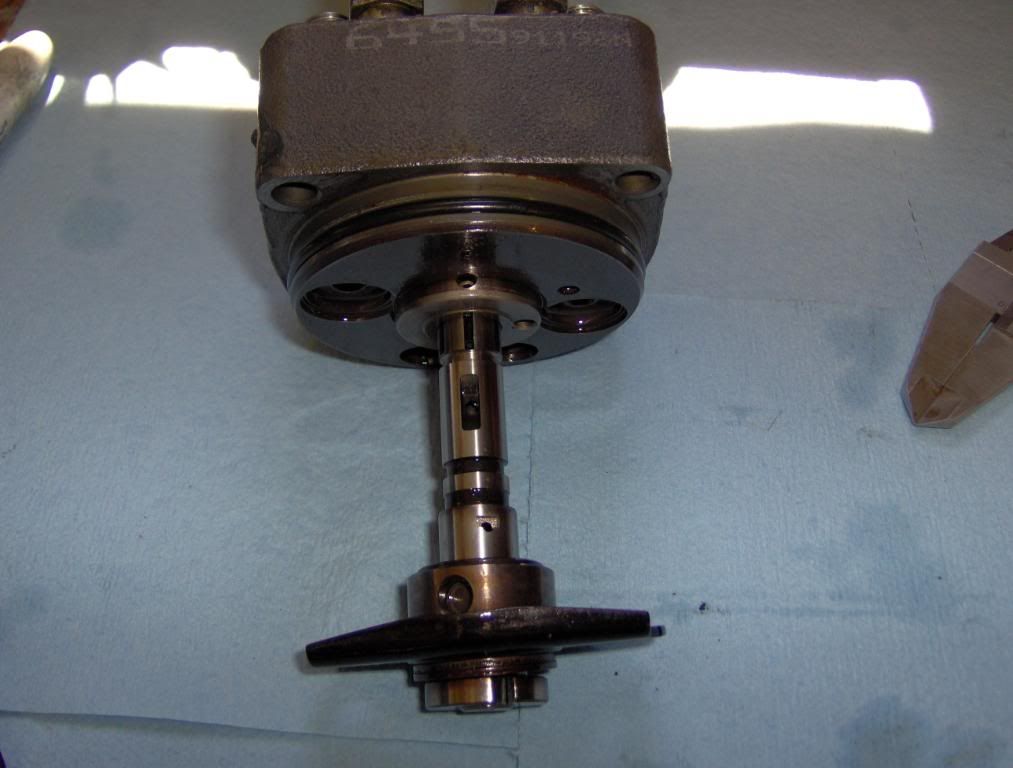
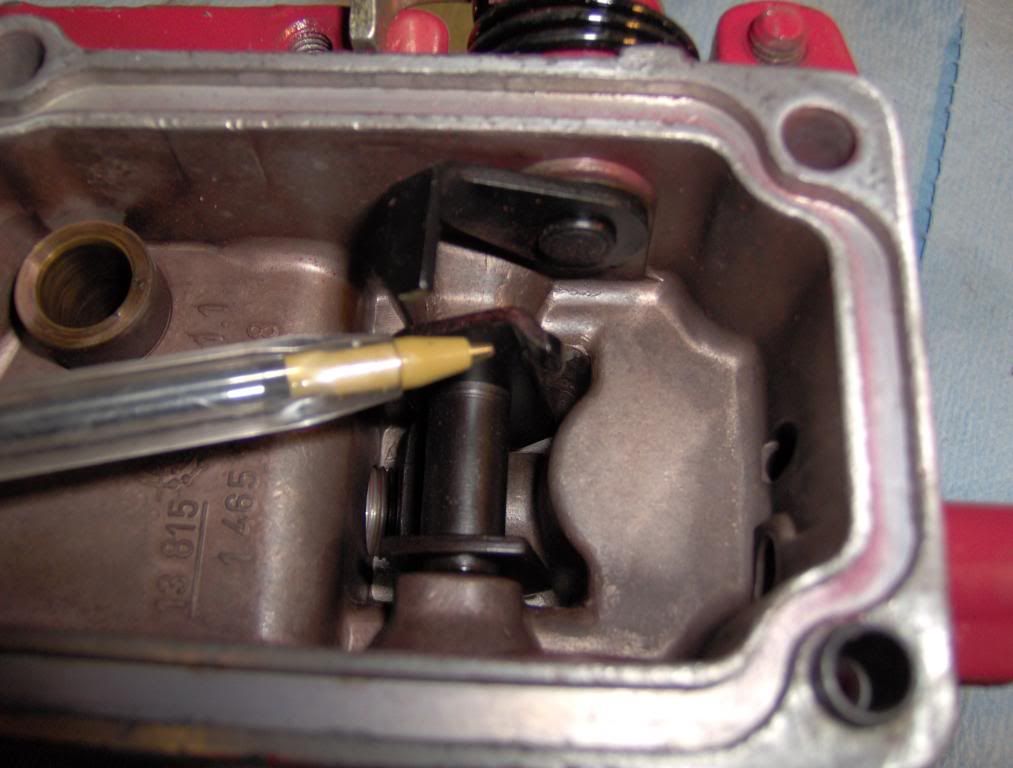
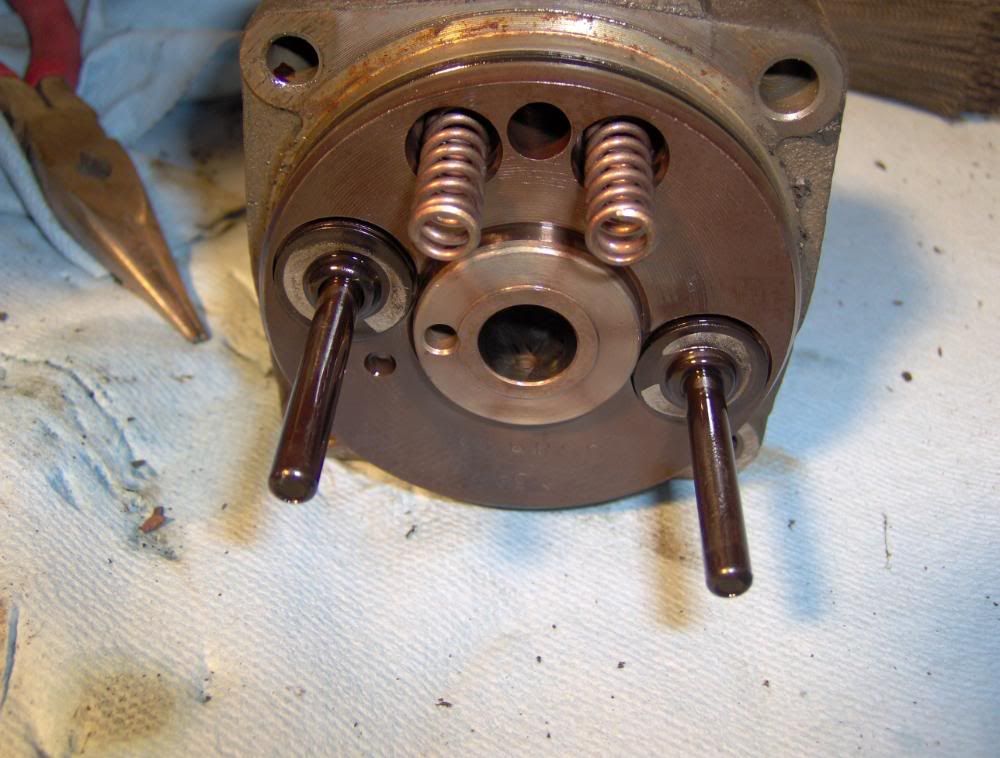
You can remove the Shut down solenoid and replace the o-ring on the tip.
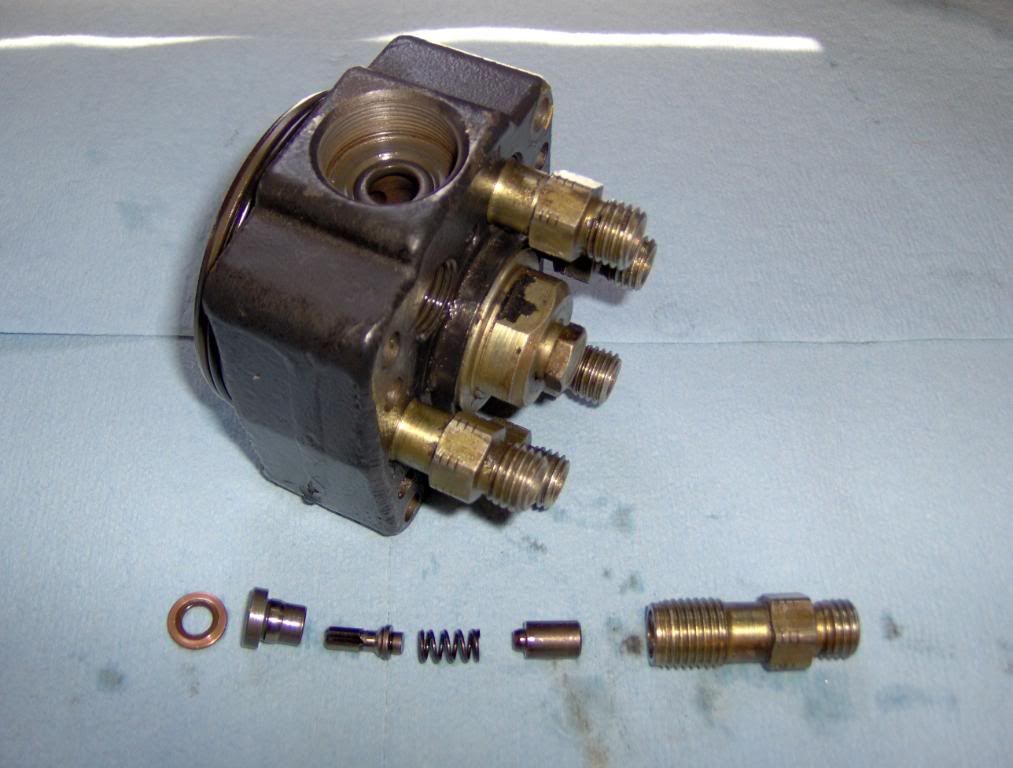
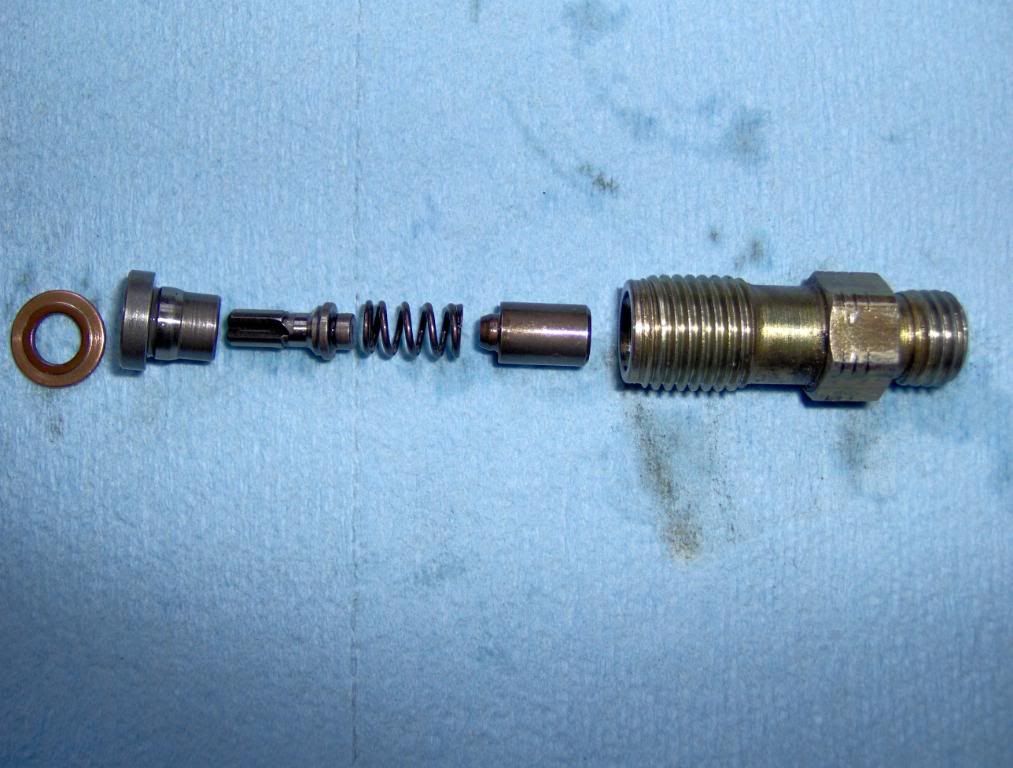
Then you can remove the DV's. YOU MUST KEEP ALL THE PARTS TOGETHER
Here you can see were they ride. The KSB pushes the black ring and rotates the rollers and advances your Timing buy making the cam plate ride up on the rollers and stroke the piston sooner in the rotation that pops the injector a few * sooner before TDC.
Now lets take the Head apart
This is how the piston fits in the head and builds the pressure. It also rotates like a distributor and delivers the fuel to the correct cylinder. It strokes every time the the cam plate rides up on the rollers.
You can remove the Shut down solenoid and replace the o-ring on the tip.
Then you can remove the DV's. YOU MUST KEEP ALL THE PARTS TOGETHER

 04-28-2008, 05:10 PM
#24
Registered User
Thread Starter
Join Date: Dec 2006
Location: Jonesboro, TEXAS
Posts: 1,269
Likes: 0
Received 0 Likes
on
0 Posts
735 views and 1 reply? Starting to wander if I should even finish. I dont need any one to kiss my but but I would like to know if any one even wants to know about this stuff .
.
.
04-28-2008, 05:21 PM
#27
1st Generation Admin

It's my opinion that the lack of comment is from not many having any info to add, much less discuss. While I've crawled all under my heap, I've yet to have been any further into the IP other than to install the 3200 spring. And that was a while ago.

Recently I've had some concerns that my AFC may be stuck. I've not looked yet but have pretty much decided that if I can do an A518A, then I could definitely screw up an IP.

In my case ~ "It's best to remain quiet and thought a fool, than to open my yak, and remove all doubt".

Keep up the fine work. I'm watching and taking notes from the back row.
 04-28-2008, 05:28 PM
#28
Registered User

FINE JOB

I just didn't want to muddy up your "sticky" post until you got done.
I sure could have used it a few weeks ago and am still learning.
Thanks.
04-28-2008, 05:36 PM
#29
Registered User
Roger that, keep it coming. I've had a few down to the bare nubs, but it's nice to have a picture reference. Keep up the good work--it's not easy to document a project like yours and I think it's safe to say that we all appreciate your efforts!
greg
greg
04-28-2008, 11:12 PM
#30
Registered User
Thread Starter
Join Date: Dec 2006
Location: Jonesboro, TEXAS
Posts: 1,269
Likes: 0
Received 0 Likes
on
0 Posts
Well I guess I was wrong. Sorry guys I have just had a lot going on and have been bent out of shape with the world and I guess I let it carry over to here. I appreciate you all trying to be polite and I had to go and take it wrong.
In my case ~ "It's best to remain quiet and thought a fool, than to open my yak, and remove all doubt".
I have heard that all my life and I feel the same way
Sorry guys for taking things the wrong way. I will try to do more when I have time. Thanks for the replies.
In my case ~ "It's best to remain quiet and thought a fool, than to open my yak, and remove all doubt".
I have heard that all my life and I feel the same way
Sorry guys for taking things the wrong way. I will try to do more when I have time. Thanks for the replies.