Make your own LED taillights.. (enhanced Taillight version)
#1
Thread Starter
Registered User
Joined: Dec 2010
Posts: 6,790
Likes: 1,648
From: Land of the Toxic Avenger
Make your own LED taillights.. (enhanced Taillight version)
I wanted LED taillights, and for now I have some LED and Conventional bulb tail light lenses and side-markers... all in one.
Since I couldn't find them anywhere, I decided to make my own. Ordered new assemblies from Amazon, and the first arrived today. I already had a couple of 2" round LED marker lamps that I wanted to use, so I was set to go.
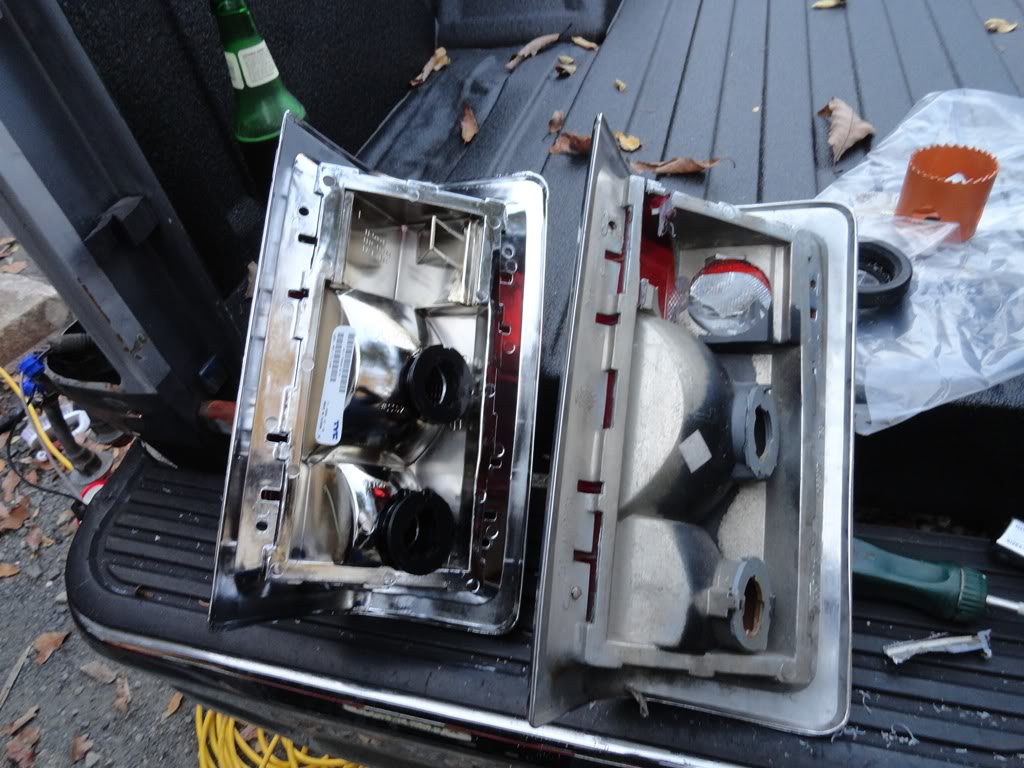
First off, take off your lenses, and put your old and new side by side. Take a practice shot and drill some 2" holes in the old ones. Make sure you remove the centering bit, otherwise, you'll blow right through the outer lense. Here's the good one, and a mistake in one... on the right. The one on the left is the newbie from Amazon.
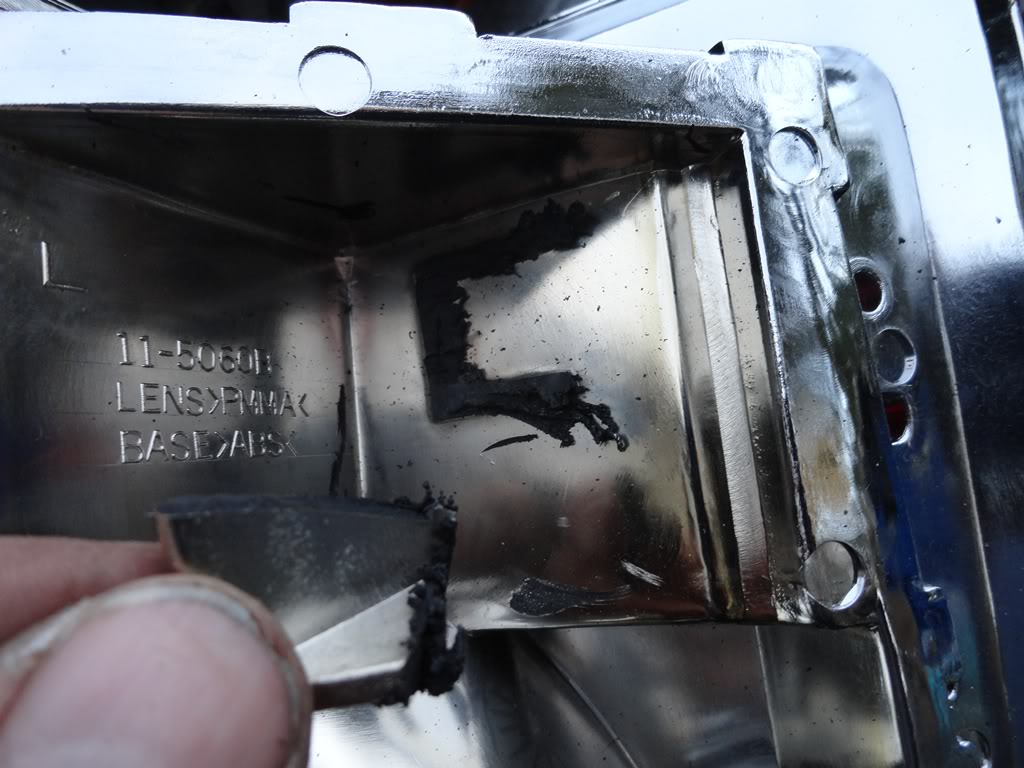
After practicing drilling (slow speeds and a sharp NEW bit are a must) you're ready to drill your new lenses. Simply drill two holes in the upper section of the rear assembly of the lens. You need to remove the right angle piece of plastic first to drill the outer side of the lense properly. I used a dremmel with a cutting disc on it. Again, you need to use a SLOW SPEED, otherwise you'll re-melt the plastic.
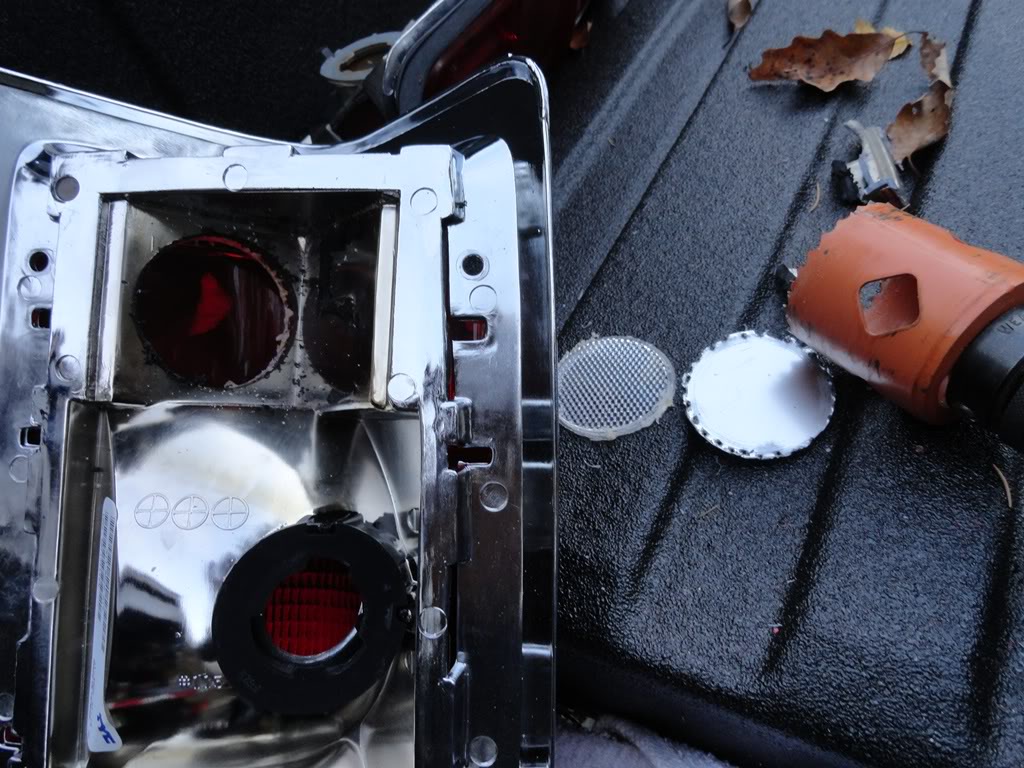
When drilling you have to be GENTILE when pushing into the lens. If you push too hard, or drill too fast, you're going to damage the lens assembly... so go SLOW ! You will be drilling through two layers of plastic. Stop after the first layer, remove the blank out of your hole saw, that you just drilled out and continue drilling. Be gentile pushing through the second layer, Go slow and don't push too hard. Let the saw do the work. Here is what you're going to end up with, if you do it right.
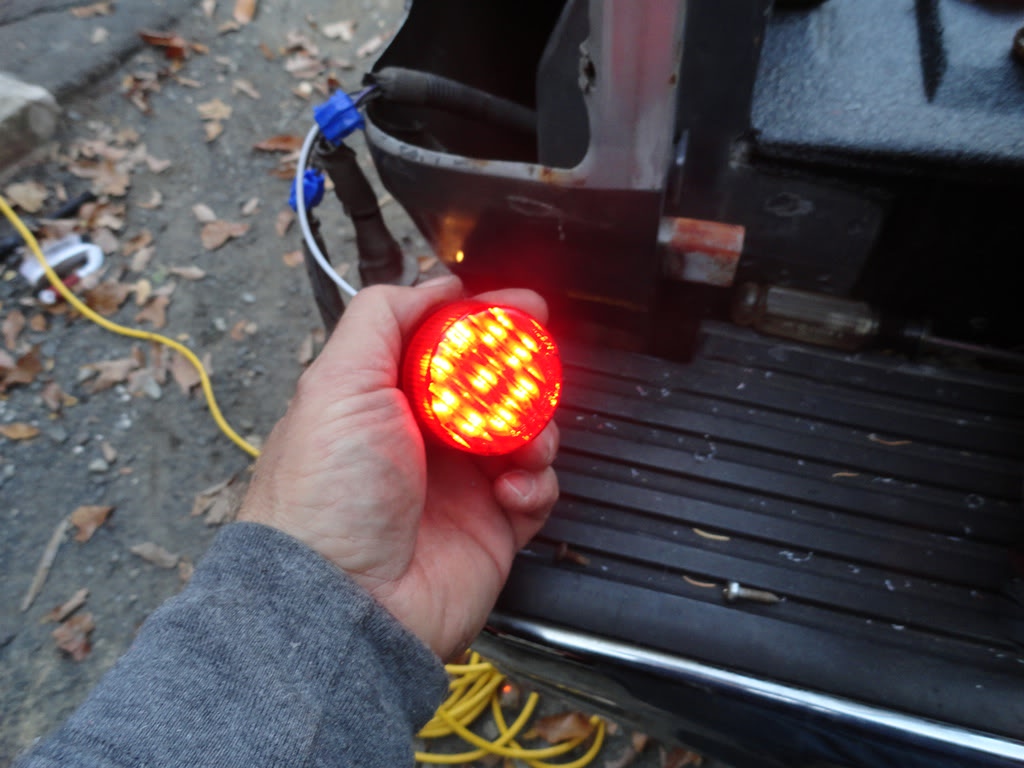
now the easy part. Take your 2" led assembly, and disconnect the wire. Put a bead of sealant around the back outer section of the lens. I used a liquid rubber compound that's available commercially, but I'm sure you can use common silicone adhesive to do the job. If you put sealant on the front of the LED lens, you're going to smear it all over the lens and you'll see it through the assembly after installation. Don't ask me how I know this. BTW, it's a real pain removing sealant from the inside of the housing through a 2" hole.
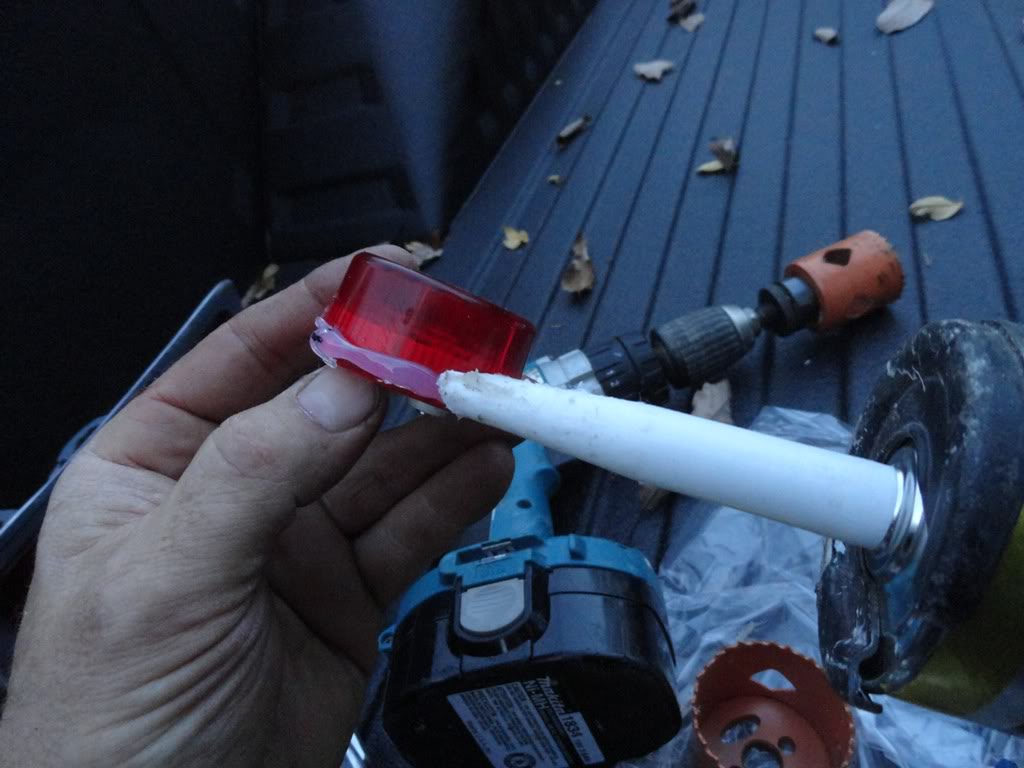
Install your led's. I ran the black wire to the parking light, and the white wire to a common ground wire. LED's light right up. I think you can figure out how to do this with a test light, but if not, just ask.
I put one on the rear, and one on the side, and this accomplishes my goal of being more "visible" from the side view of the truck while at night. You can see the two LED's in the housing all done and installed. Don't be afraid to use more sealant, as you don't want water entering your new lens assembly. Just don't get it in the connector ports of the LED.
IMPORTANT: Put the lens away until the sealant cures.
Don't rush this, as the sealant is critical for not allowing water to enter the unit. Put your tail lights back in TOMORROW ! Go have a beer and dream about your new lights. Movement will alter the seal and allow water to enter the housing.
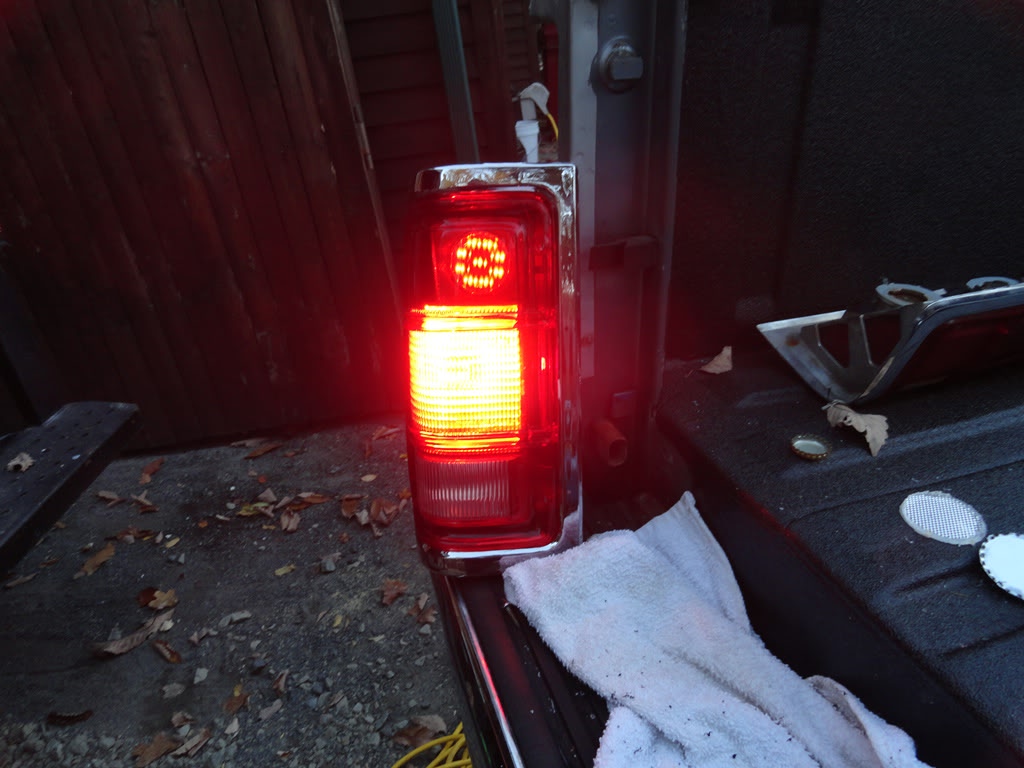
Here's the assembly with the "parking lights" on only
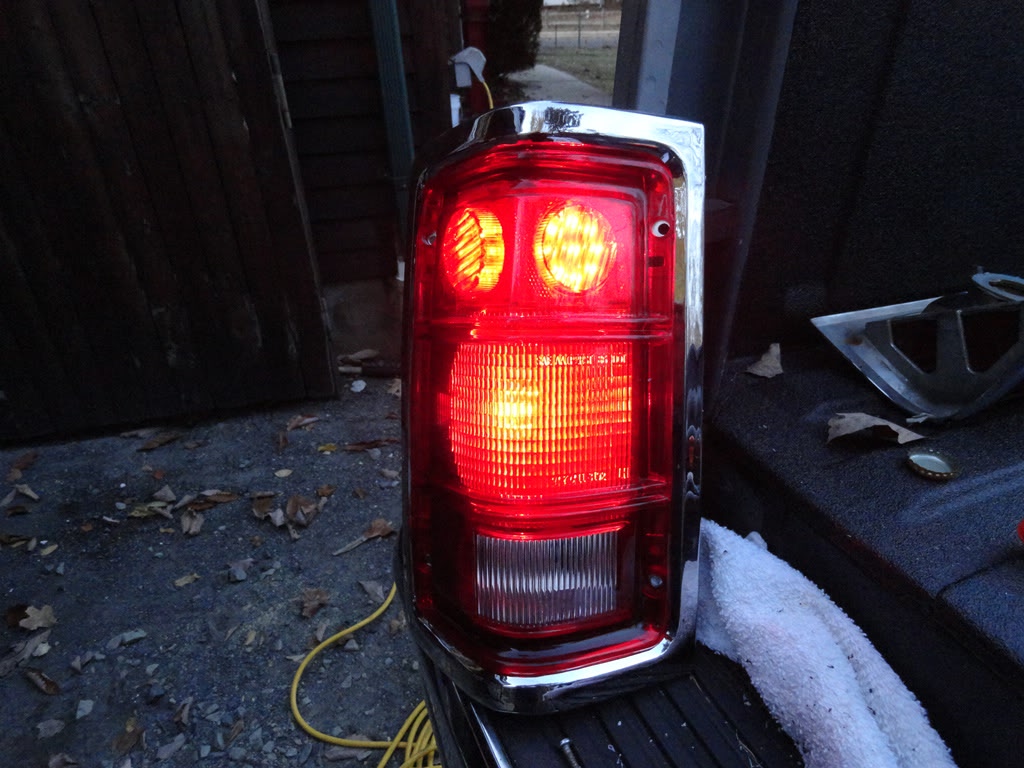
Here's the assembly with the brake light applied as well
Have fun making your truck enter the digital age.
Since I couldn't find them anywhere, I decided to make my own. Ordered new assemblies from Amazon, and the first arrived today. I already had a couple of 2" round LED marker lamps that I wanted to use, so I was set to go.

First off, take off your lenses, and put your old and new side by side. Take a practice shot and drill some 2" holes in the old ones. Make sure you remove the centering bit, otherwise, you'll blow right through the outer lense. Here's the good one, and a mistake in one... on the right. The one on the left is the newbie from Amazon.

After practicing drilling (slow speeds and a sharp NEW bit are a must) you're ready to drill your new lenses. Simply drill two holes in the upper section of the rear assembly of the lens. You need to remove the right angle piece of plastic first to drill the outer side of the lense properly. I used a dremmel with a cutting disc on it. Again, you need to use a SLOW SPEED, otherwise you'll re-melt the plastic.

When drilling you have to be GENTILE when pushing into the lens. If you push too hard, or drill too fast, you're going to damage the lens assembly... so go SLOW ! You will be drilling through two layers of plastic. Stop after the first layer, remove the blank out of your hole saw, that you just drilled out and continue drilling. Be gentile pushing through the second layer, Go slow and don't push too hard. Let the saw do the work. Here is what you're going to end up with, if you do it right.

now the easy part. Take your 2" led assembly, and disconnect the wire. Put a bead of sealant around the back outer section of the lens. I used a liquid rubber compound that's available commercially, but I'm sure you can use common silicone adhesive to do the job. If you put sealant on the front of the LED lens, you're going to smear it all over the lens and you'll see it through the assembly after installation. Don't ask me how I know this. BTW, it's a real pain removing sealant from the inside of the housing through a 2" hole.

Install your led's. I ran the black wire to the parking light, and the white wire to a common ground wire. LED's light right up. I think you can figure out how to do this with a test light, but if not, just ask.
I put one on the rear, and one on the side, and this accomplishes my goal of being more "visible" from the side view of the truck while at night. You can see the two LED's in the housing all done and installed. Don't be afraid to use more sealant, as you don't want water entering your new lens assembly. Just don't get it in the connector ports of the LED.
IMPORTANT: Put the lens away until the sealant cures.
Don't rush this, as the sealant is critical for not allowing water to enter the unit. Put your tail lights back in TOMORROW ! Go have a beer and dream about your new lights. Movement will alter the seal and allow water to enter the housing.
Here's the assembly with the "parking lights" on only

Here's the assembly with the brake light applied as well

Have fun making your truck enter the digital age.
#2
Great job, yet again, T!
I studied the set of taillights I have earlier trying to figure out how I could fit an additional light in there. Too bad the lenses aren't easier to remove from the housing. Then you wouldn't have to be so careful when drilling like you've done. How much did you pay for the assemblies on Amazon, if you don't mind me asking?
I studied the set of taillights I have earlier trying to figure out how I could fit an additional light in there. Too bad the lenses aren't easier to remove from the housing. Then you wouldn't have to be so careful when drilling like you've done. How much did you pay for the assemblies on Amazon, if you don't mind me asking?
#3
Thread Starter
Registered User
Joined: Dec 2010
Posts: 6,790
Likes: 1,648
From: Land of the Toxic Avenger
Fun to do. Hopefully someone else here comes up with a more innovative idea, based upon my work.
Here it is....although both of mine came from Amazon, and not this other vendor. I guess I got the last two....
Sorry.
http://www.amazon.com/TYC-11-5059-01...1327533&sr=1-1
http://www.amazon.com/gp/product/B00...sr=1-1&seller=
T.
#7
Thread Starter
Registered User
Joined: Dec 2010
Posts: 6,790
Likes: 1,648
From: Land of the Toxic Avenger
The new lenses themselves are so much brighter than the 20 year old plastic
Look at the difference, even without the LED light above the parking lamp, it's tremendously brighter. That's a regular 1157 in there, that is glowing, and the brakes are not on...

Look at the difference, even without the LED light above the parking lamp, it's tremendously brighter. That's a regular 1157 in there, that is glowing, and the brakes are not on...

Trending Topics
#8
To bad there isn't room beside the reverse light socket to hog out a slot and put a narrow accent one in for signal/brake. With the dremel it might be possible to put in 4 slots instead of two holes for that purpose.
Something like these

They are pretty bright but too long.
Might try something like these on the grill guard once I get it mounted. Put it vertical on the inside of the uprights.

I tried a set of the replacement 3157s once, worthless. Could barely see it through the lense. The standard bulb was a very big lot brighter.
Something like these

They are pretty bright but too long.
Might try something like these on the grill guard once I get it mounted. Put it vertical on the inside of the uprights.

I tried a set of the replacement 3157s once, worthless. Could barely see it through the lense. The standard bulb was a very big lot brighter.
#10
I once put red tail lights under the truck bed looked great when i braked especially when it had snowed really made people notice and stop further than ten inches behind the truck .
#11
Thread Starter
Registered User
Joined: Dec 2010
Posts: 6,790
Likes: 1,648
From: Land of the Toxic Avenger
You have to remember that with brand new lenses, they're perfectly clear, unlike my 20 year old plastic that I just replaced. I inserted the new LED's behind the red lenses. If you really want them to be brighter, remove the red outermost flat surface of the LED lens, and install.. that way, you have LED's directly behind the new tail light lenses. For me, that would have overpowered the brake lights.
Thread
Thread Starter
Forum
Replies
Last Post
Floridacracker
3rd Generation Ram - Non Drivetrain - All Years
2
01-25-2010 02:39 PM
reelfast
3rd Generation Ram - Non Drivetrain - All Years
2
12-20-2009 04:59 PM
rip 112
3rd Gen High Performance and Accessories (5.9L Only)
5
09-25-2007 11:43 AM
Pav1973
3rd Gen High Performance and Accessories (5.9L Only)
9
07-28-2007 08:04 PM


