
Let me see your drw mudflap mounting solutions
 11-08-2007, 09:47 PM
#1
Registered User
Thread Starter
Join Date: May 2007
Location: Indiana
Posts: 384
Likes: 0
Received 0 Likes
on
0 Posts
Let me see your drw mudflap mounting solutions
I was wondering what you dually guys do to mount mudflaps behind the duals. IIRC my old 91 dually had nothing to mount the flaps to, and the tailllights and rear of the bed always had road goo on it. Who's got a solution?
 11-08-2007, 10:07 PM
#2
Registered User
Join Date: Sep 2007
Location: Lancaster, PA
Posts: 530
Likes: 0
Received 0 Likes
on
0 Posts
don't have a dually, and I haven't mounted my flaps yet, but I have a set with a big ol' C on them. I was planning on welding up a T with angle iron using the top of the T to bolt/weld onto the frame, then hang the flaps from the stem of the T if ya know what i mean.
11-08-2007, 10:56 PM
#3
Registered User
Join Date: Apr 2007
Location: Geary Co. Kansas
Posts: 354
Likes: 0
Received 0 Likes
on
0 Posts
I have always had good luck with rebar when making mudflap brackets. A piece of angle iron at the top for mounting to the truck. And 2 pieces of rebar coming down about half way then rebar going the width of the mud flap with about an inch heated and bent around the edge to hold the flap. I will try to get a pic or a drawing. \hope this helps.
ez
ez
11-09-2007, 12:03 AM
#5
Registered User

The ones on my Ford hang from an eight-foot-long piece of 2x3 tube that lays on top of the truck-rails, well actually the top rail of the double-frame.
The wife's is not a dually, but it does have nice flaps.
I will have to poke my head under there and see what holds them.
While changing a flat, just laying in the grass alongside the road, I picked up a real fancy flap, sprung flex-hanger and all, with double chrome stiffeners, a chrome bottom weight, a bunch of fancy red reflectors, and some fancy truck-stop's logo emblazoned on it; I wish I had of found it's mate also.
11-11-2007, 01:56 AM
#6
Administrator

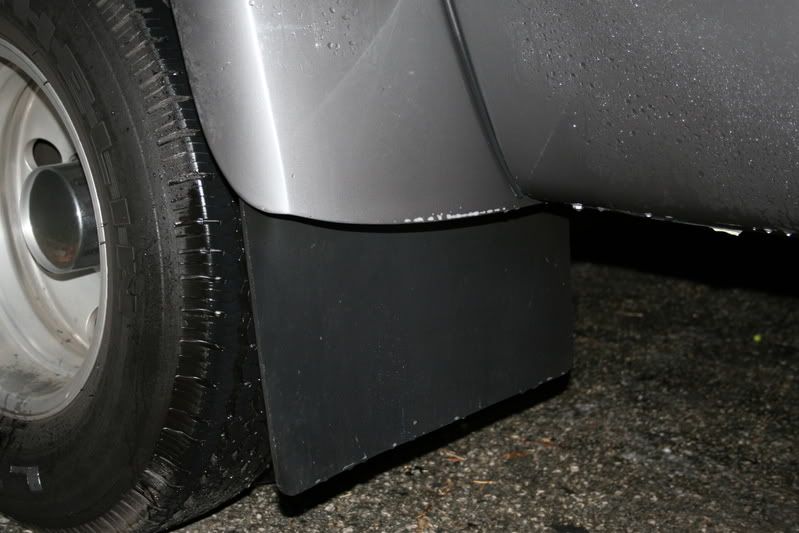
Here is what my mud flaps look like.
Here is my simple way that I mounted my mud flaps.
I took a length of 1� square tubing and cut it to length between the frame rail and within about 1/2� from the edge of the outer fender.
To the inside I welded a 1�X 2� tab of 3/16� steel and drilled a hole for a 3/8� bolt.
This 3�8� bolt will go through a hole that is already there on the frame rail.
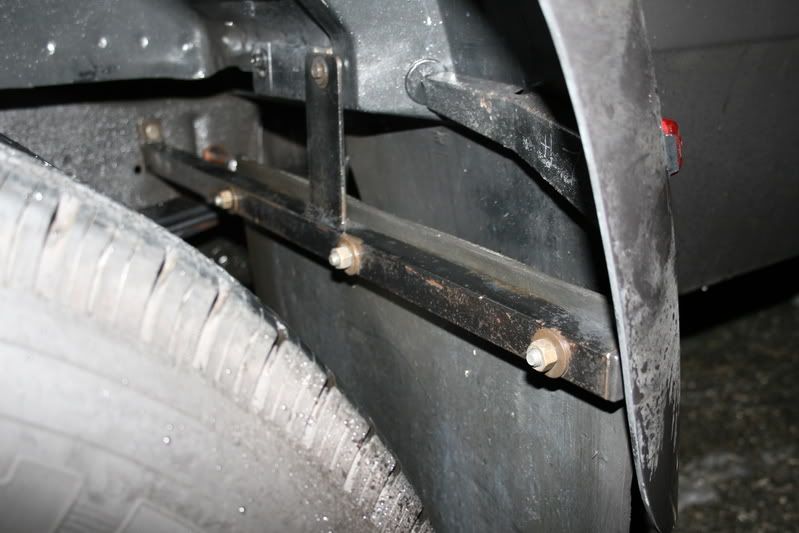
About midway using the existing bolt for the fender bracket I welded a piece of 1 �� X 3/16� steel long enough to reach the bolt and hold the square tubing parallel to the ground.
I then drilled 3) 3/8� holes evenly spaced using the standard mud flap hole spacing.
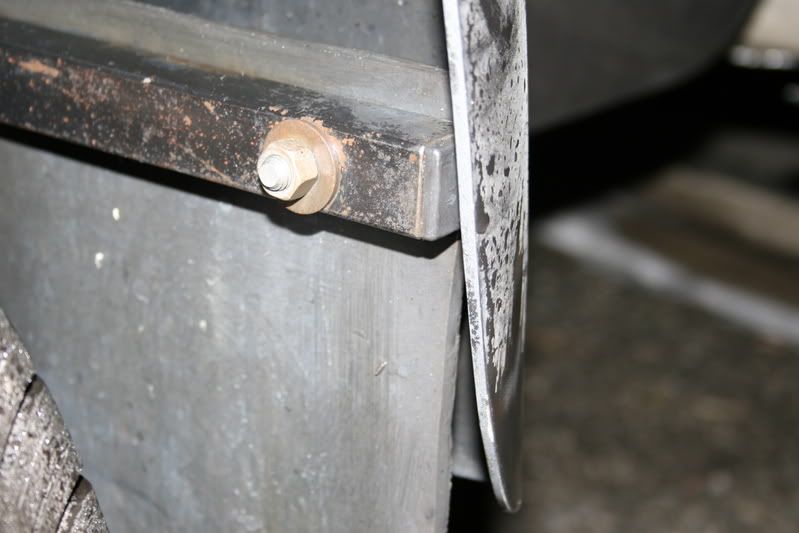
On the back of the mud flap you cannot see a 1� X 3/16� piece of steel with the same hole spacing (as the width of the mud flap) to go on the backside of the rubber flap.
This is better than using washers as it clamps the entire width of the flap. It is secured using 3/8� hex bolts, washers and nuts.

I took care of every little detail like a cap in the end of the tube so it looks nice and keeps out the water and mud.
These are standard rubber mud flaps that are used on semi tractors and trailers.
The only modification I made to the mud flaps was to trim down the length of them to what I thought looked good. I then radiused the corners for a finished look.
Before they were installed I primed and painted them using satin black paint.
It looks like I need to paint them again.
If you would like to duplicate them I could get the exact measurements.
Hope this gives you some ideas.
Jim
Sorry the truck is so dirty, I will get right on that tomorrow.


Trending Topics
11-11-2007, 09:08 AM
#8
Registered User
Yes, JIM, that is a straight-forward, no-nonsense, perfect solution for dually flap mounting.
You should alter the design as needed to fit the various makes/models and market them.
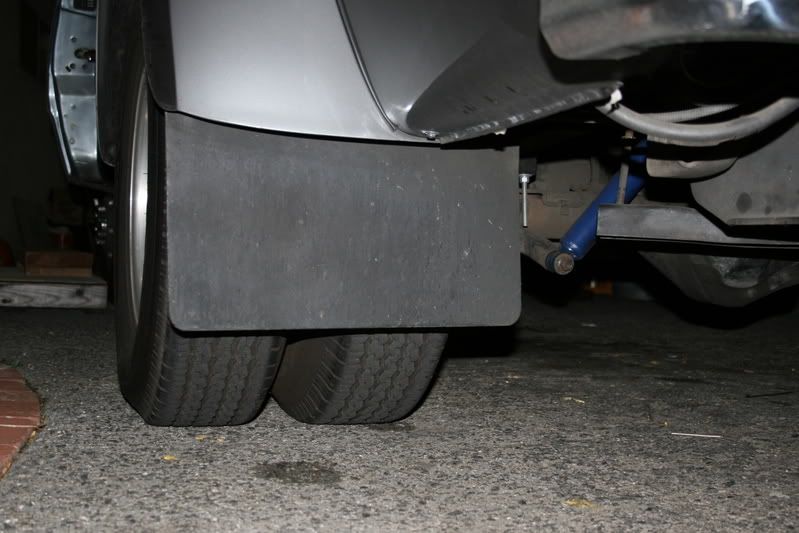
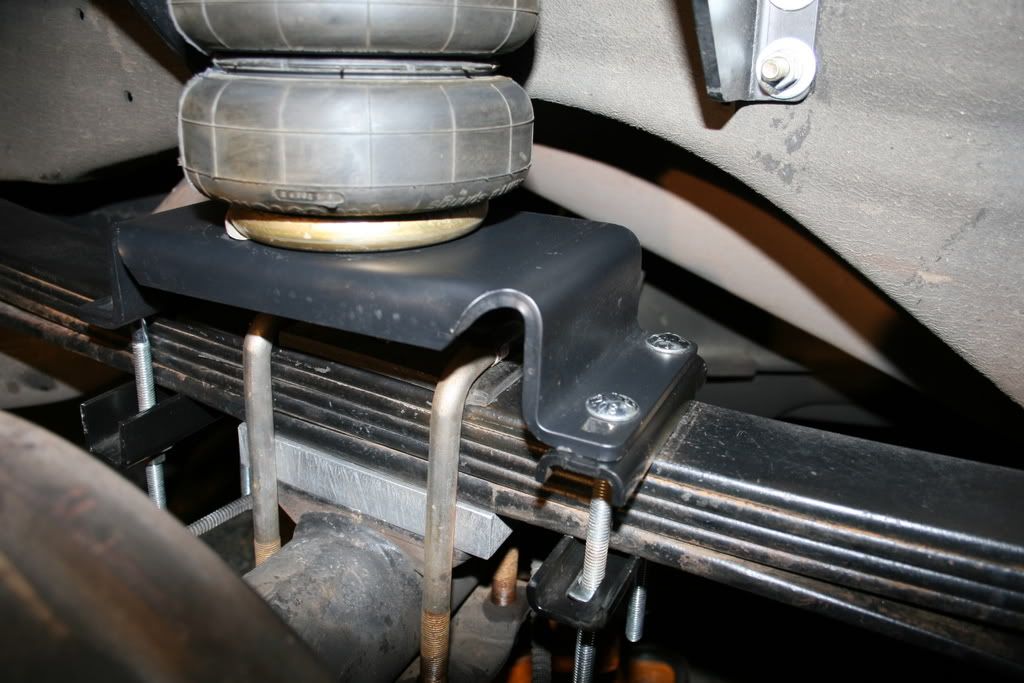
Just curious/nosey, what is the threaded rod I see, next to the blue shock-absorber ??
 11-11-2007, 03:38 PM
#9
Administrator
For 1st. Gen the only modifications you would need to make would be the length of the mud flap according to how tall your tires were.
And if you had installed a body lift you would need to adjust the length of the support bracket to the inner fender bolt.
The threaded rod you are seeing is a bolt that holds the lower air bag mounting plate to the top of the spring pack.
I just happen to have a picture of that also.
I also did a story on this project.
Although it did not make the Sticky Hall of Fame.
https://www.dieseltruckresource.com/...ofter+ride+gen
Jim
11-12-2007, 04:12 AM
#10
Registered User
I want one! For the back AND front axle  .
.
Wish they made a set up for the front still, or that I had time, tools and expertise to fabricate my own...
Yet another nice job Jim. Whoever inherits that truck will really have a nice one.
Were those bolts ungraded carriage bolts???
.Wish they made a set up for the front still, or that I had time, tools and expertise to fabricate my own...
Yet another nice job Jim. Whoever inherits that truck will really have a nice one.
Were those bolts ungraded carriage bolts???


 11-22-2008, 09:09 AM
#14
Registered User
Take a pair of plain old black flaps and a pair of the Yosemite Sam ones, neatly cut a centered oblong hole in each of the plain flaps,center old Sam in these holes, neatly mark and trim off most of the excess on the Sam flaps, leaving plenty of border, drill and rivet the Sam pictures such that they show through the oblong holes.
Done right, these will look like custom inset designs and all the rest of the rednecks will be wanting to know where you got them.
11-28-2009, 08:18 AM
#15
Registered User

Join Date: Jun 2005
Location: Brockport,NY
Posts: 4
Likes: 0
Received 0 Likes
on
0 Posts
Thanks Jim for the pics. I made the same basic bracket but used 3/4" square stock that I already had. I took a 7/16" bolt and ground off two of the points and inserted it into the tubing and welded. I then openned the existing hole in the frame rail just a hair to allow the 7/16" bolt to go into. I then made the same mid support as you did and also put on a end cap. I put on the cummins logo 24x30 flaps. I found it to be an simple easy job. Thanks abunch

Thread
Thread Starter
Forum
Replies
Last Post
Red3quarter
Other
541
12-12-2009 11:12 PM
Pride & Joy
2nd Gen. Dodge Ram - No Drivetrain
1
01-20-2007 09:10 AM
LanceK
3rd Gen High Performance and Accessories (5.9L Only)
2
06-07-2006 05:41 PM