
Crewcab update...


 10-25-2013, 09:10 AM
#197
Registered User

 Nice work Looks great!
Were there bolts in the bottom 4 holes on the motor mount cross member on yours? Mine has 8 rivets and 4 bolts through the bottom. and the left hand motor mount "pad" is bolted on but the right is welded
 .
10-25-2013, 10:43 AM
.
10-25-2013, 10:43 AM
#198
Registered User
Thread Starter
Just regular Tremclad type paint. I don't believe in those POR15 type products...snake oil so far as I'm concerned.
My cross member had 6 rivets on each side, plus two nut and bolt combos.
10-25-2013, 10:46 AM
#199
Registered User
Thread Starter
WOW !
Never realized how much work it takes to convert the truck to 4x4. Looks amazing, though ! Love the date code on the side of the framerail. Hopefully, you're going to repaint those letters there....
Looks as though the weather there has been cooperating with your build. What's your average temperature during the day ?
I've lucked out with the weather...usually its cold and raining. But it's been cool and foggy/misty over night and into the morning. Then by noon or so the sun is out in a clear sky and warming up to 15*C or more.
10-25-2013, 03:53 PM
#200
Registered User
No surprise though. California is full of stupid laws! like AB 1266!That allows male and female school kids to share bathrooms, locker rooms and showers.
But we can't have products that work! Because a study says if you drink 100 gallons of it at one sitting and inhale a match there is a .00001% chance that you might explode.
10-25-2013, 05:07 PM
#202
Registered User
Join Date: Dec 2010
Location: Land of the Toxic Avenger
Posts: 6,789
Received 1,647 Likes
on
1,120 Posts
I'm sure with every re-branding comes an increased price.
Seems like everything in Canada is more expensive than here because we screw you when we send it up there...
Sorry !
BTW... Sherwin Williams has a product called "controls rust", and so far it seems a little more protective than crustoleum. I've been using it for a few years now, and seems as though it's a good product
10-25-2013, 05:51 PM
#203
Registered User
 10-25-2013, 05:53 PM
#204
Registered User
I'm sure with every re-branding comes an increased price.
Seems like everything in Canada is more expensive than here because we screw you when we send it up there...
Sorry !
BTW... Sherwin Williams has a product called "controls rust", and so far it seems a little more protective than crustoleum. I've been using it for a few years now, and seems as though it's a good product
Seems like everything in Canada is more expensive than here because we screw you when we send it up there...
Sorry !
BTW... Sherwin Williams has a product called "controls rust", and so far it seems a little more protective than crustoleum. I've been using it for a few years now, and seems as though it's a good product
10-25-2013, 06:29 PM
#205
Registered User
And dual language labels and special msds and freight and brokerage well you get the idea. It's relative though, wages are much higher here but the cost of living is proportionate
10-26-2013, 02:34 AM
#208
Registered User
Thread Starter
OK today...or I guess tomorrow now...
I worked on getting the frame brackets and cross member in. Started by pulling out eh old frame rails from the donor 93. Started trying to figure out how I was going to transfer the location of the holes from the donor frame over to the crewcab frame. I started checking the location of the reference holes in the in the frames. The holes were close....but varied by up to 3/8". SO this was not going to work. I finally decided I had to bolt back together the donor frame with the cross members and take some hard measurements.

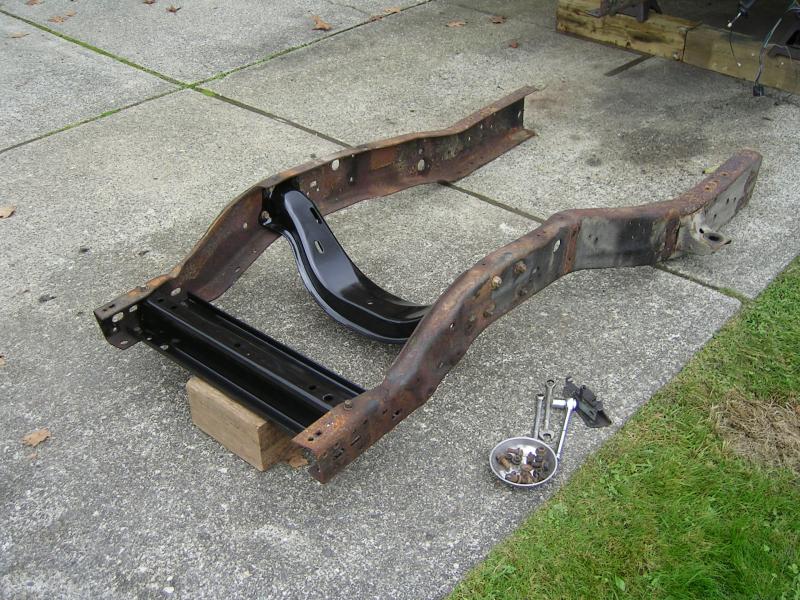
I worked on getting the frame brackets and cross member in. Started by pulling out eh old frame rails from the donor 93. Started trying to figure out how I was going to transfer the location of the holes from the donor frame over to the crewcab frame. I started checking the location of the reference holes in the in the frames. The holes were close....but varied by up to 3/8". SO this was not going to work. I finally decided I had to bolt back together the donor frame with the cross members and take some hard measurements.


 10-26-2013, 02:41 AM
#209
Registered User
Thread Starter
OK today...or I guess tomorrow now...
I worked on getting the frame brackets and cross member in. Started by pulling out eh old frame rails from the donor 93. Started trying to figure out how I was going to transfer the location of the holes from the donor frame over to the crewcab frame. I started checking the location of the reference holes in the in the frames. The holes were close....but varied by up to 3/8". SO this was not going to work. I finally decided I had to bolt back together the donor frame with the cross members and take some hard measurements.


I worked on getting the frame brackets and cross member in. Started by pulling out eh old frame rails from the donor 93. Started trying to figure out how I was going to transfer the location of the holes from the donor frame over to the crewcab frame. I started checking the location of the reference holes in the in the frames. The holes were close....but varied by up to 3/8". SO this was not going to work. I finally decided I had to bolt back together the donor frame with the cross members and take some hard measurements.
10-26-2013, 02:45 AM
#210
Registered User
Thread Starter
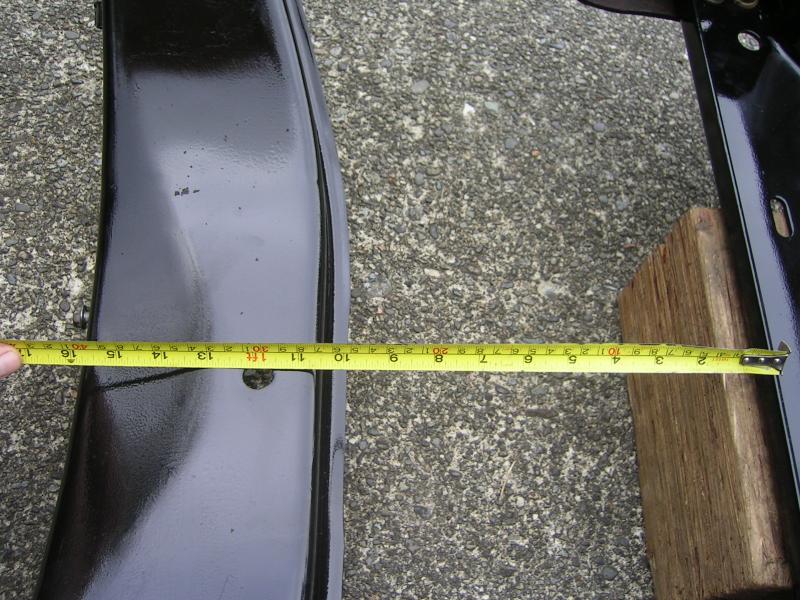
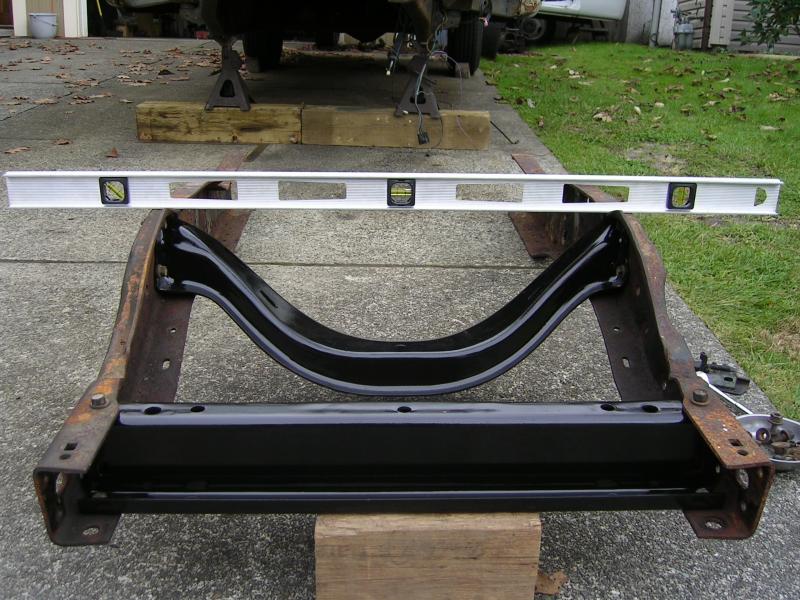
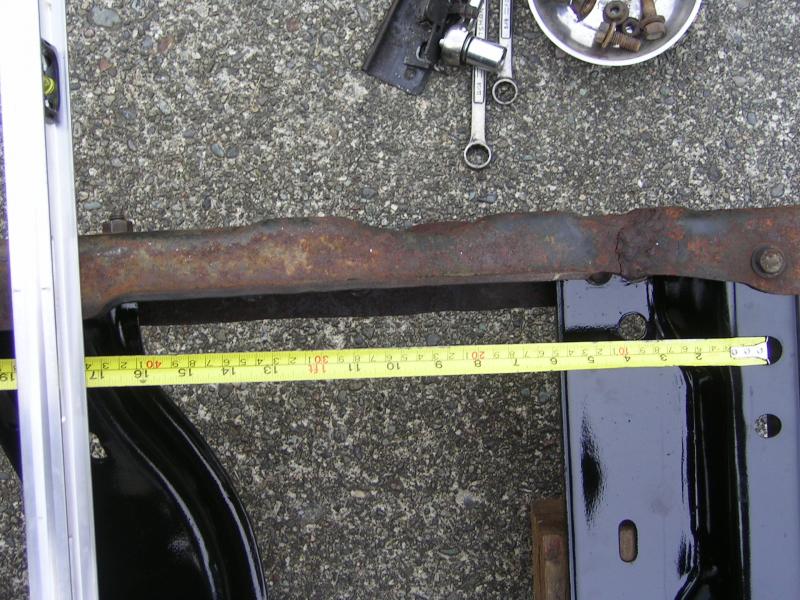
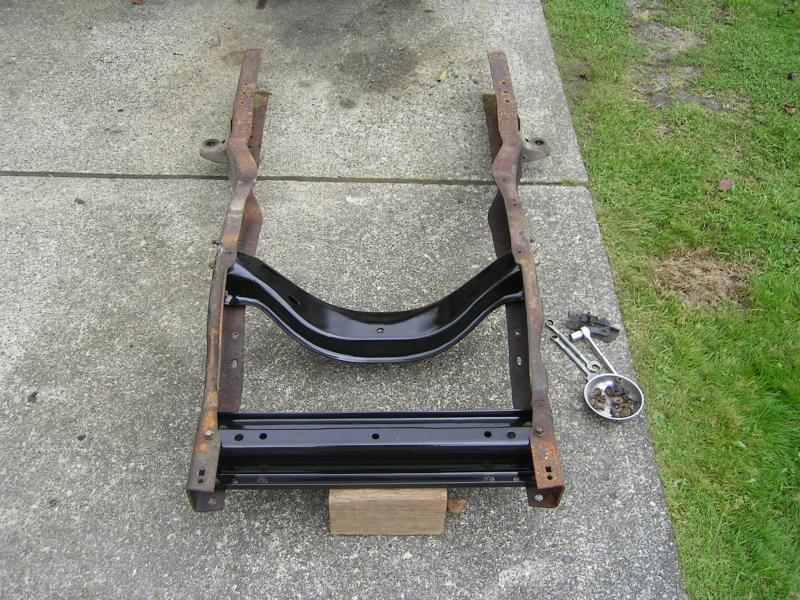
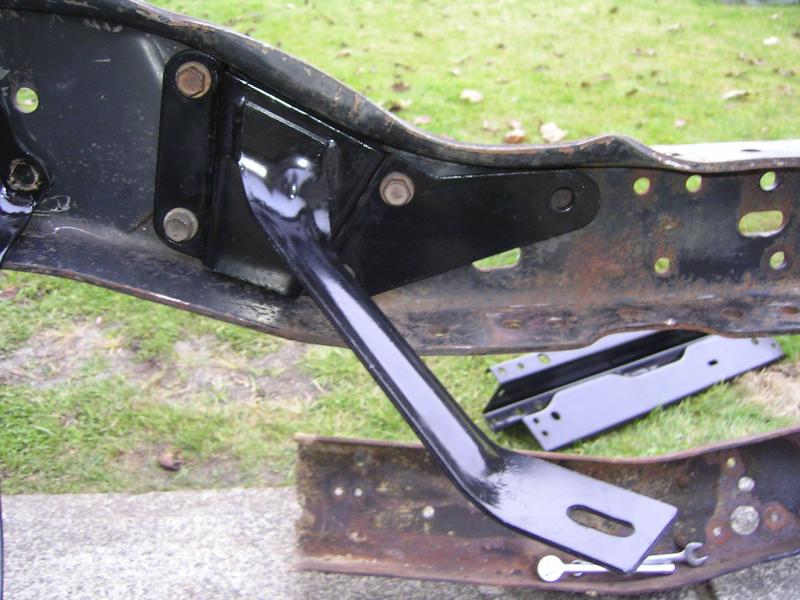
Once I took a few dozen measurements I disassembled everything and re-installed the forward cross member in the 84 frame. But before I got too far into that I decided to mount, and drill the needed hole for the steering box brace.
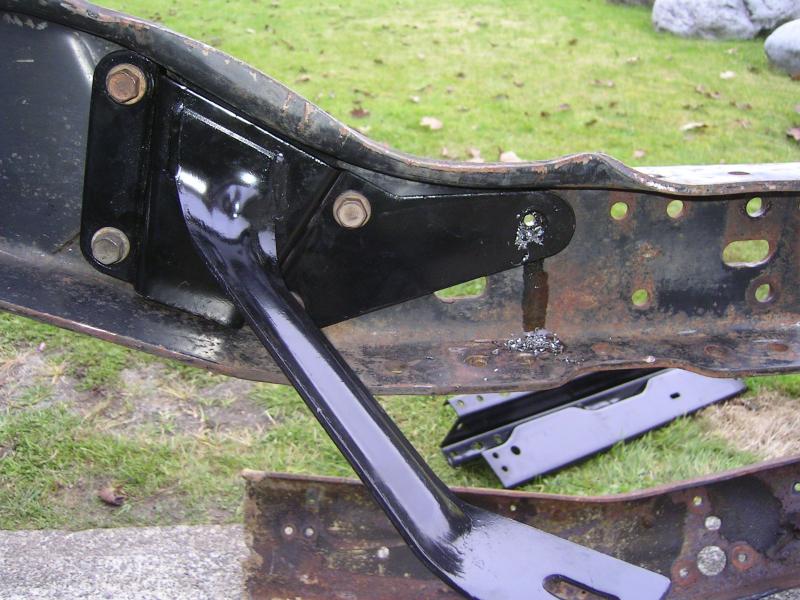
Installed....and punched
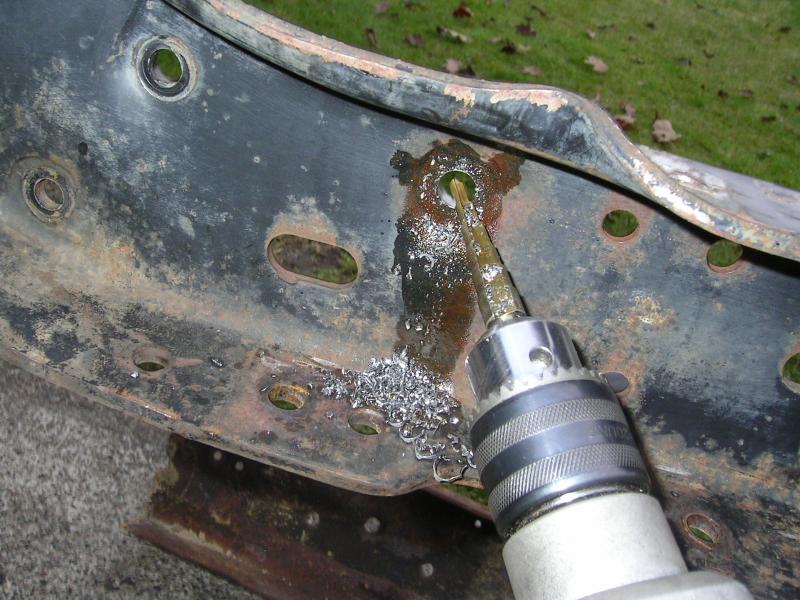
Drilled out to about 3/8"....
And then the final drilling was done with a step drill...worked like a charm!
Installed....and punched

Drilled out to about 3/8"....

And then the final drilling was done with a step drill...worked like a charm!
