
Cleaned out the HVAC today...think I found my problem.

 07-25-2010, 08:34 PM
#17
Registered User
07-25-2010, 08:39 PM
#18
Registered User
We have to worry about jaunta virus around here because deer mice keep getting in to our HVAC ducts and getting shreadded by the blower motor. Last winter I found a whole rat in my wife's Grand Cherokee'd blower.
07-25-2010, 10:49 PM
#19
Registered User

Join Date: Dec 2007
Posts: 58
Likes: 0
Received 0 Likes
on
0 Posts
ADMOPARMAN, what size of Dzus fastners did you use? What did you use to cut the door with?
I have several of them or something like them, I won't know for sure until I look, thrown in a jar where I thought that someday they would come in handy. This may be the time.
The more I read on this thread I think that I really need to do this.
I have several of them or something like them, I won't know for sure until I look, thrown in a jar where I thought that someday they would come in handy. This may be the time.
The more I read on this thread I think that I really need to do this.
07-26-2010, 07:42 AM
#20
Registered User
Thread Starter
Join Date: Nov 2006
Location: Southern Maryland
Posts: 795
Likes: 0
Received 0 Likes
on
0 Posts
ADMOPARMAN, what size of Dzus fastners did you use? What did you use to cut the door with?
I have several of them or something like them, I won't know for sure until I look, thrown in a jar where I thought that someday they would come in handy. This may be the time.
The more I read on this thread I think that I really need to do this.
I have several of them or something like them, I won't know for sure until I look, thrown in a jar where I thought that someday they would come in handy. This may be the time.
The more I read on this thread I think that I really need to do this.
07-26-2010, 08:59 AM
#21
Registered User
I used a sharp scribe and a straightedge to make the initial outline I wanted to cut. The plastic is quite soft and the scribe send up a nice curl of plastic ("chip"). Then I used a Stanley utility knife (which has a short blade) to finish the cut. It worked well. Potential damage is significantly limited when utitlizing hand tools only.
 08-07-2010, 09:22 PM
#24
Registered User
Thread Starter
Join Date: Nov 2006
Location: Southern Maryland
Posts: 795
Likes: 0
Received 0 Likes
on
0 Posts
To the far left of the evap you've probably got less then 1/4" - 1/2" of clearance, and on the far right you've got at least 2", but probably more along the lines of 3" or 4". If you take a look at my 2nd picture it'll show you just enough of the box cleaned out to get an idea for the amount of clearance.
08-08-2010, 01:24 PM
#25
Registered User

To the far left of the evap you've probably got less then 1/4" - 1/2" of clearance, and on the far right you've got at least 2", but probably more along the lines of 3" or 4". If you take a look at my 2nd picture it'll show you just enough of the box cleaned out to get an idea for the amount of clearance.
Like he said, the larboard/near side has hardly any clearance at all.
The starboard/off side has inches of clearance.
The evaporator sits in there at an angle.
Best is to set some type of depth limiter on your cutting device, such that it only can penetrate about 5/16".
A very good tool for the job is one of those abrasive cutting discs in a dremel-type tool.
Use an almost-worn-out disc that can only cut so deep; thus, there is no danger of hitting the evaporator.
Anyone that has not yet cut this hole and cleaned the box should do so at the soonest convenience.
 08-08-2010, 04:16 PM
#26
DTR's "Cooler than ice cubes 14 miles North of North Pole" member
Join Date: Oct 2006
Location: 14mi North of North Pole
Posts: 1,797
Likes: 0
Received 9 Likes
on
8 Posts
I used a 2 5/8" hole saw and then plugged it with a fire wall grommet off a 2nd gen......
https://www.dieseltruckresource.com/...ighlight=CLEAN
You can see the grommet in the pic below...
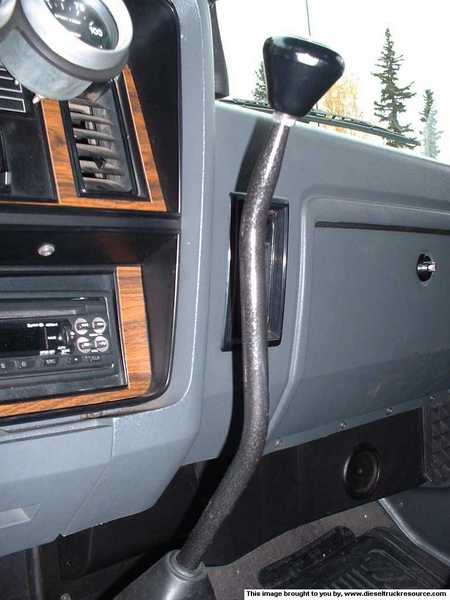
Took me a whole 10 minutes to do it. I pull the plug once a year and clean out anything that might find it's way in there.
https://www.dieseltruckresource.com/...ighlight=CLEAN
You can see the grommet in the pic below...
Took me a whole 10 minutes to do it. I pull the plug once a year and clean out anything that might find it's way in there.
06-02-2011, 12:12 AM
#27
Registered User
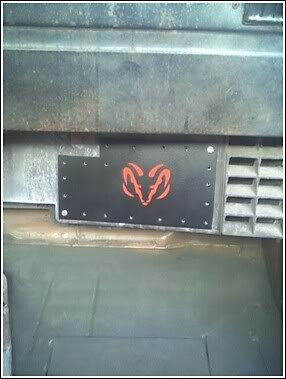
I have seen several "covers" over these home-made clean-out holes that are simply a license-plate screwed over the hole.
Most I have seen are usually of the fake tread-plate back-ground, with either CUMMINS, CUMMINS POWER, DODGE RAM, or the RAM emblem.
They make a real neat cover that looks appropriate.
Most I have seen are usually of the fake tread-plate back-ground, with either CUMMINS, CUMMINS POWER, DODGE RAM, or the RAM emblem.
They make a real neat cover that looks appropriate.
06-02-2011, 08:04 AM
#29
Registered User
Most, but not all, can be stopped by the simple process of adding window-screen either under or over the little slots in the cowl.
To be neatest and inconspicuous, remove the cowl-cover and zip-tie the screen over the slots from the bottom side.
A dab of hot-melt glue, here and there, through the screen and onto the cowl metal will hold the screen where there is nothing to zip-tie to.
Some just lay a bead of silicone adhesive around the perimeter and press the screen into that.
I did my 1985 Ford thus and stopped probably 95% of trash invasion.
A few year models later, Ford replaced the cowl with the big open slots with ones that have tiny holes in place of the slots, thereby eliminating the need for screening; I think later Dodges accomplished the same by using plastic inserts.
I need to take the time to do likewise to our Dodge fleet.
06-02-2011, 09:14 AM
#30
Instead of silicone use GOOP. You can get it at Home Depot and hardware places where the adhesives are. That stuff is the cats as. It will stick really good... better than silicone. It's clear. I used it to glue an entire headlight assy into my daughter's wrecked Honda. It's still holding it in. It's also great for wires where you need strain relief.