Around
87,850 miles, my tachometer started working intermittently, and my
check engine light was coming on. I was hauling cattle and could feel
the truck lose power every time the tach would die. The tach would
bounce back up to reading the RPM's and I would feel the power like it
was kicking back on. I
got on the DieselTruckResource.Com
website and found out that other truck owners had the same problem and
the fix was found by replacing their CKP, aka, Crankshaft Position
Sensor. I
went to a Dodge Dealer and talked to them. They agreed that is was the
CKP so I picked one up which set me back $63.00, came home and
replaced it. Below is the step-by-step instructions on how I replaced
my CKP. It did correct the problem with the tachometer and has
worked ever since with no check engine light on or loss of power. (1)
you need to disconnect both negative battery cables at both
batteries. I used a 1/2 inch deep socket to remove the cables
from the battery terminals. (2)
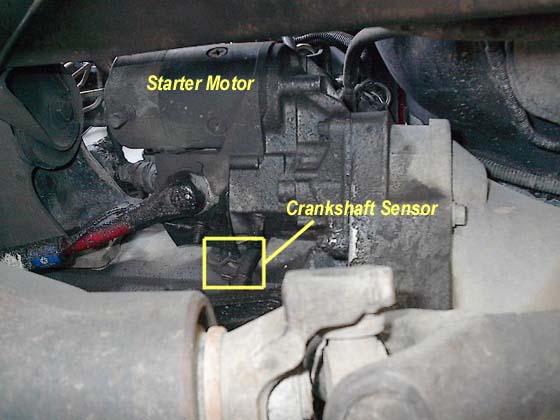
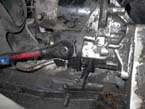
Remove starter motor to get to CKP. The sensor is located on the driver's side of the
engine with the starter motor placed in front of it. If you lay on your back under the drivers side,
with your head next to the right front tire, you will see the starter motor.
(Click on pictures to enlarge)
|
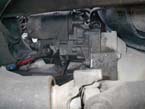
The Starter Underneath
|
Disconnect the wires from the terminals on the starter motor. I used a 5/16" socket to
remove the small ground wire and a 15mm socket to remove positive wire. I Then used a
10mm 12 point socket to remove the three mounting bolts holding starter motor and then detached starter and laid
it on ground. |
|
|
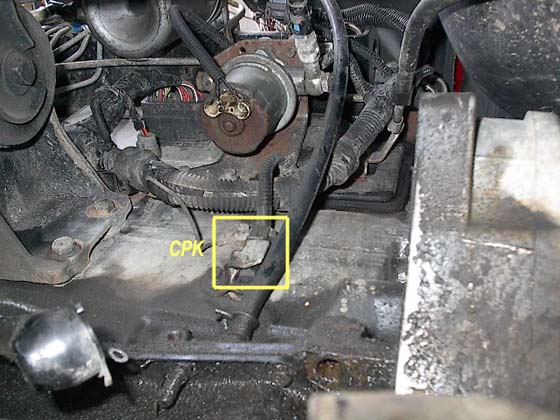
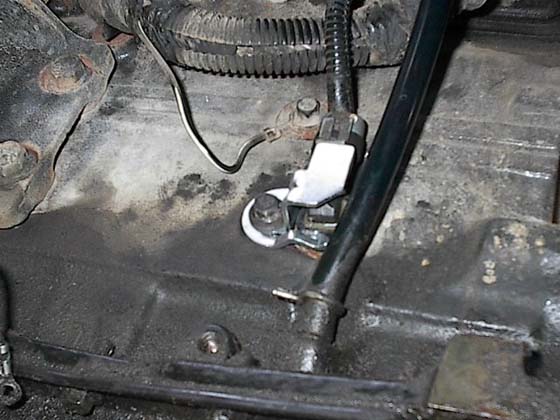
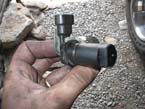
(3) Once Starter motor has been removed,
the CKP will be in front of the oil dipstick tube that is going into
the oil pan. Disconnect the electrical connector and remove mounting bolt, and hold down
bracket.
|
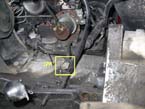
CKP without
starter
|
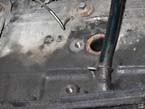
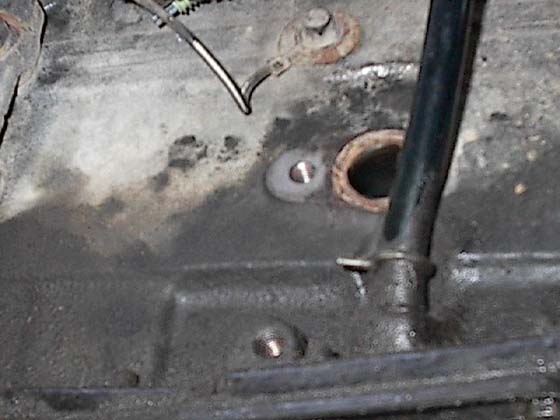
Block with no
CKP installed
|
|
|
Once the electrical connector
was removed, I used a 10mm socket to remove the mounting bolt and used an end of a
flathead screwdriver to pry the bracket off of the sensor. I then pulled the
CKP from the engine block by rotating the sensor back and fourth and pulling outwards. It took
a little while to get the sensor worked all the way out of the engine block.
Be careful.
|
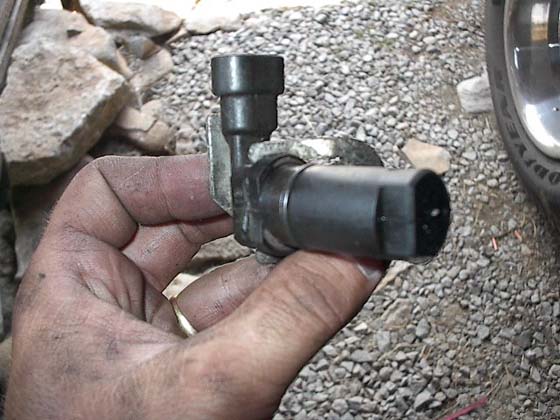
(4) Apply clean engine oil to
the o-ring on the new CKP senor and clean around CKP mounting hole on
the block. To pervent tearing of the o-ring, install new CKP into engine block using a twisting action. Once in
place, position hold down bracket and install mounting bolt. Tighten bolt to 24 N*m (18ft. lbs.)
torque.
|
View of new CKP
|

New Sensor,
installed
|
|
|
5) CKP is now installed and the starter motor is ready to be mounted back on
the engine.
The hardest part was to hold the starter while putting the bolts back in.
Use a 10mm 12 point socket head to tighten. Connect the positive and ground wires back up to starter motor.
Connect both negative battery cables at both batteries and you have completed the
installation of a new Crankshaft Position Sensor (CKP). Good
luck!
Cattle
Hauler -
 All Done!
|